Introduction
Keeping our homes clean and tidy is a never-ending task that requires consistent effort. One important aspect of cleaning that should not be overlooked is dusting. Dust accumulation not only looks unsightly but it can also aggravate allergies and respiratory problems. Incorporating dusters into your daily cleaning routine can help keep your home clean and reduce the negative impact of dust. In this article, we will explore the different types of dusters, various dusting techniques, using dusters for different surfaces, how often to dust, and tips for keeping your dusters clean. So, grab your duster and let’s get started!
The importance of dusting regularly
Dusting regularly is a crucial part of maintaining a clean and healthy home. Dust, made up of a combination of dirt, dead skin cells, pet dander, and other particles, can accumulate quickly and cause a range of problems if left unchecked. In this section, we will discuss the importance of dusting regularly and its benefits.
| Benefits of Dusting Regularly |
|---|
| 1. Improved Indoor Air Quality: Dust and other particles can trigger allergies and respiratory problems. Regular dusting reduces the amount of dust and pollutants in the air, making it easier to breathe. |
| 2. Reduced Risk of Illness: Dust can harbor bacteria, germs, and other harmful microorganisms. By dusting frequently, you can reduce the risk of illness and keep your home free of germs. |
| 3. Longer Lasting Furniture: Dust can scratch and damage furniture surfaces, causing them to wear out faster. Regular dusting helps keep your furniture looking new and lasting longer. |
| 4. Improved Aesthetics: A dust-free home just looks and feels cleaner. Regular dusting makes your home look and feel more welcoming and cozy. |
Dusting is also an essential task for maintaining the functionality of your electronics. Accumulated dust can cause overheating and permanent damage to your devices. Regular dusting can help prevent this.
Dusting regularly has numerous benefits and should not be neglected. It is an easy and inexpensive way to maintain the health, appearance, and longevity of your home and belongings. If you want to learn more about different types of dusters and how they can help with cleaning tasks, check out our article on dusters for cleaning tasks. Additionally, if you want to learn how to properly maintain and clean your dusters for optimal performance, check out our article on cleaning and maintaining dusters.
Types of Dusters
When it comes to dusting, choosing the right duster can make all the difference. There are several types of dusters on the market, each with its own set of advantages and disadvantages. Feather dusters are a classic choice that adds elegance to the cleaning process, while microfiber dusters are a more modern option that boasts superior dust-trapping abilities. Disposable dusters are also available for those who want a hassle-free cleaning experience. The decision between these options can be difficult, but by understanding the unique qualities of each, you can make an informed choice. To learn more about the comparison of these dusters, check out our article on microfiber dusters vs traditional. If you’re feeling crafty or want tips on upcycling old items into dusters, we also have an article on DIY dusters and upcycling tips. And if you’re interested in the evolution of dusting tools, we have an entire article on the topic, which can be found at dusting tools evolution.
Feather Dusters
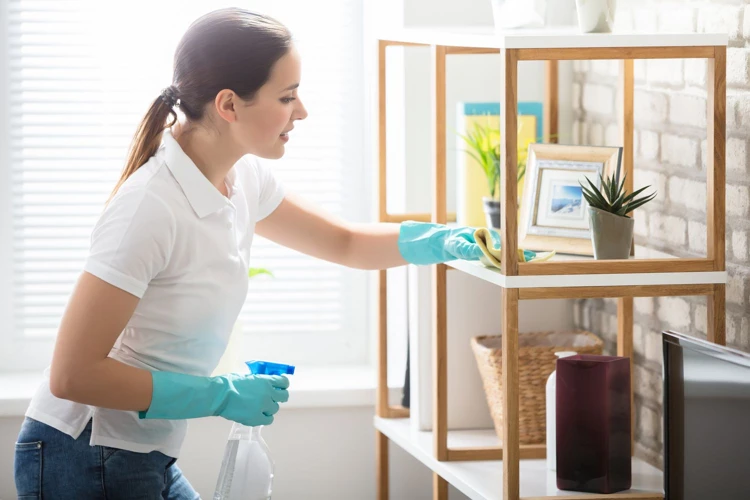
Feather dusters are a popular choice for cleaning due to their ability to effectively remove dust without scratching surfaces. They are particularly useful for delicate items such as figurines, picture frames, and plants.
However, it is important to note that feather dusters do not actually “clean” surfaces – they simply move the dust around. This means that it is important to follow up with a damp cloth or other cleaning method to truly eliminate dust and dirt.
Below is a table comparing the different features of feather dusters:
| Feature | Advantages | Disadvantages |
|---|---|---|
| Material | -Made from natural feathers -Soft and gentle on surfaces |
-May shed feathers -Difficult to clean |
| Shape | -Long, slender shape allows for reaching tight spaces -Easy to maneuver |
-May bend or break with excessive force -Not suitable for large surfaces |
| Maintenance | -No need to wash, simply shake out outside -Can last for years with proper care |
-May require occasional replacement |
For a more detailed comparison of feather dusters with other types of dusters and cleaning cloths, see our article on Comparing Dusters: Feather Dusters, Dust Cloths, and More.
Microfiber Dusters
Microfiber dusters are another popular type of duster that can effectively trap and hold dust and dirt. These dusters are made of tiny fibers that are woven tightly together to create a soft, fluffy texture. They come in various shapes and sizes, making them versatile and suitable for different surfaces and areas. Here are some key features and benefits of microfiber dusters:
- Reusable: Microfiber dusters can be easily washed and reused multiple times, making them a cost-effective and eco-friendly option.
- Electrostatic: The tiny fibers in microfiber dusters create a static charge that attracts and holds onto dust and dirt particles. This makes them an effective tool for cleaning hard-to-reach areas and intricate surfaces.
- Gentle: Microfiber dusters are gentle on delicate surfaces and won’t scratch or damage them. They are especially suitable for cleaning electronic devices, as they won’t leave scratches or static marks.
- No chemicals needed: Microfiber dusters can clean surfaces without using any cleaning chemicals, making them safe and healthy for you and your family.
- Multi-functional: Microfiber dusters can be used for various cleaning tasks, including dusting shelves, wiping down electronics, and cleaning mirrors and windows.
Microfiber dusters are a practical and efficient tool for your daily cleaning routine. They are easy to use, gentle on surfaces, and can effectively pick up and trap dust and dirt. Remember to wash them regularly to maintain their effectiveness and longevity.
Disposable Dusters
When it comes to cleaning with convenience, disposable dusters can be a great option. These dusters are made with materials such as paper, and come pre-treated with dust-catching solutions to make cleaning easier. Here’s a breakdown of the pros and cons of using disposable dusters:
| Pros | Cons |
|---|---|
| Convenient and time-saving, easy to use and toss away afterwards | Not environmentally friendly, as they contribute to waste and pollution |
| Effective at attracting and trapping dust due to their built-in electrostatic charge | Can sometimes leave behind lint or residue, especially if the duster is overly saturated with solution |
| Good for quick clean-ups, travel or use in small spaces | Frequently needing to buy new dusters adds up and can be expensive over time |
While disposable dusters can be a useful tool to have in your cleaning routine, it’s important to consider their environmental impact and the long-term cost. If you do choose to use disposable dusters, make sure to dispose of them properly and consider using them sparingly.
Dusting Techniques
When it comes to dusting, many people underestimate the importance of using the proper technique. Not all surfaces are the same, and not all dusters are created equal. By learning different dusting techniques and using the right type of duster for the job, you can ensure that your cleaning routine is as efficient and effective as possible. In this section, we will explore some of the most popular and effective dusting techniques, which include the Top to Bottom Method, the Circular Motion Method, and the Left to Right Method. So, let’s dive in and learn how to dust like a pro!
Top to Bottom Method
One effective way to dust your home is by using the top to bottom method. This method ensures that any dust or debris that falls from higher surfaces is caught and cleaned up as you move down to lower surfaces. Here are the steps to follow:
- Start with the ceiling: use a duster with a long handle to wipe away cobwebs, dust, and any other debris that may have collected on your ceiling or ceiling fans. Be sure to dust any light fixtures as well.
- Move on to walls and high surfaces: use a duster or a vacuum to clean dust from high surfaces like bookshelves, cabinets, and other furniture. Take your time and make sure to get into all the corners and crevices.
- Focus on mid-level surfaces: including your counter tops, tabletops, and other flat surfaces. Wipe down these surfaces with a damp cloth or use a duster to remove any remaining dust.
- Finish with the floors: vacuum or sweep the floors and then mop or clean them with a suitable solution to ensure they are spotless and dust-free.
Remember that dust can quickly accumulate in your home, especially during the dry seasons. By using the top to bottom method, you can easily and efficiently dust your entire home while ensuring that any debris is caught and cleaned up along the way.
Circular Motion Method
One effective dusting technique is the circular motion method. This method involves moving your duster in circular motions to pick up any dust and dirt on the surface. Here’s how to do it:
- Hold your duster with a firm grip and start at the top of the surface you’re cleaning.
- Press the duster onto the surface and move it in a circular motion, working your way down towards the bottom.
- As you move down the surface, make sure to overlap your circles to ensure you don’t miss any spots.
- Once you reach the bottom, gently shake your duster to release any collected dust into a trash can or outside.
- If there are any remaining spots, go back over them with the circular motion method until the surface is free of dust and dirt.
It’s important to note that when using this method, you should be using a clean and dry duster. If your duster becomes too dirty or wet, it will be less effective in picking up dust and may even spread it around.
Now that you know how to use the circular motion method, let’s talk about the different surfaces you can use it on. This method is great for surfaces such as countertops, tables, and shelves. It can also be used on walls and ceilings, but it’s important to be cautious and use a stable step stool or ladder to avoid accidents.
Left to Right Method
When dusting with the left to right method, start at the left side of the surface and work your way to the right. This method is popular with people who prefer structure and organization in their cleaning routine. Here are the steps to follow:
- Step 1: Start at the top left corner of the surface you are cleaning.
- Step 2: Use your duster to make short, back and forth strokes from left to right.
- Step 3: Work your way down the surface, overlapping your strokes slightly to ensure complete coverage.
- Step 4: When you reach the bottom right corner of the surface, use a clean cloth to wipe away any remaining dust.
- Step 5: Move on to the next surface and repeat the process.
Remember to use gentle pressure and avoid pressing too hard when using this method. It’s also important to use a duster appropriate for the surface you are cleaning to avoid damaging it. For delicate surfaces such as electronics, a microfiber duster is recommended. For wooden surfaces, a soft-bristled feather duster or a microfiber duster is best.
Using the left to right method is an effective way to ensure that you cover the entire surface and don’t miss any areas. It’s a helpful technique to use for those who like to clean in an organized and systematic way.
Using Dusters for Different Surfaces
When it comes to dusting, not all surfaces are created equal. Using the wrong type of duster or technique can leave behind streaks, scratches, or even damage. That’s why it’s important to know how to use dusters for different surfaces. Whether you’re dusting wooden furniture or electronic devices, we’ve got you covered with these tips and tricks. So, let’s dive in and explore the best practices for dusting different surfaces.
Wooden Surfaces
When dusting wooden surfaces, it is important to use a duster that will not scratch or damage the finish. The best type of duster to use is a microfiber or feather duster, as they are gentle on the surface. Use the following techniques to effectively remove dust from wooden surfaces:
| Step | Description |
|---|---|
| Step 1: | Start at the top of the surface and work your way down. This will prevent dust from falling onto areas that have already been cleaned. |
| Step 2: | Use gentle, sweeping motions to remove the dust. Avoid applying too much pressure to prevent scratching the surface or leaving streaks. |
| Step 3: | If the surface has intricate carvings or designs, use a small, soft-bristled brush to remove dust from these areas. |
| Step 4: | If there is stubborn dust or grime, use a damp cloth or specialized wood cleaner to gently remove it. Avoid using too much water, as this can damage the wood. |
| Step 5: | Once finished, ensure that the surface is completely dry before placing any items back on it to prevent damage. |
By following these steps, you can maintain the beauty and integrity of your wooden surfaces without causing any damage. Remember to dust regularly to prevent a build-up of dust and grime, which can make it harder to clean over time.
Glass Surfaces
When it comes to dusting glass surfaces, it is important to use a duster that won’t scratch or leave streaks. There are different types of dusters that work well on glass surfaces, such as microfiber dusters and feather dusters. Here are some techniques for dusting various glass surfaces:
| Surface | Duster | Technique |
|---|---|---|
| Windows | Microfiber duster or feather duster | Gently sweep from top to bottom, then use a clean, dry microfiber cloth to wipe away any remaining dust or streaks. |
| Mirrors | Microfiber duster or feather duster | Use circular motions to lift and remove dust from the surface. Then, wipe with a clean, dry microfiber cloth or a glass cleaner to remove any streaks. |
| Glass display cases | Microfiber duster | Gently sweep the duster over the surface to remove dust. If there are any tough spots, a glass cleaner and a microfiber cloth can be used to remove them. |
It is important to note that when cleaning glass surfaces, it is best to use a clean duster or microfiber cloth. A dirty one may leave streaks or scratches on the surface. Additionally, avoid using any harsh chemicals or abrasive materials that could damage the glass. By using the right techniques and tools, you can keep your glass surfaces looking clean and clear.
Electronics
When dusting electronics, it’s important to be gentle and cautious. Harsh chemicals or abrasive materials can damage delicate electronic components, so it’s best to use a soft, non-abrasive duster. Here are some tips for safely dusting your electronic devices:
| Device | Duster | Cautions |
|---|---|---|
| Computers and Laptops | Microfiber Duster | Avoid spraying water or cleaning solutions directly onto the computer or laptop. Instead, lightly dampen the microfiber cloth with water or rubbing alcohol and gently wipe down the screen and keyboard. |
| Telivision and Home Theater | Microfiber Duster | Gently dust the screen, making sure to avoid pressing too hard or using abrasive materials, which can scratch the screen. For the speakers, use a soft brush or cloth to gently remove dust. |
| Smartphones and Tablets | Disposable Duster or Microfiber Cloth | Turn off the device before cleaning. Use a disposable duster or a lightly dampened microfiber cloth to gently remove dust and fingerprints from the screen and body of the device. |
Remember to take your time and be gentle when dusting your electronics. If you’re unsure about the best way to clean a particular device, consult the manufacturer’s instructions or seek professional advice. By taking care of your electronics, you can help ensure they work properly and last for years to come.
How often to Dust
Maintaining a clean home involves many tasks, including dusting. Dust is an unavoidable part of daily life and can accumulate quickly, making it important to dust regularly. However, with our busy schedules, it can be challenging to determine the frequency and schedule for dusting. The question arises: how often should one dust? In this section, we’ll cover the recommended dusting schedule and frequency guide to help you maintain a dust-free living space.
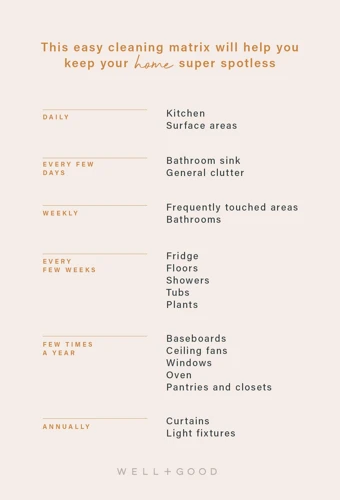
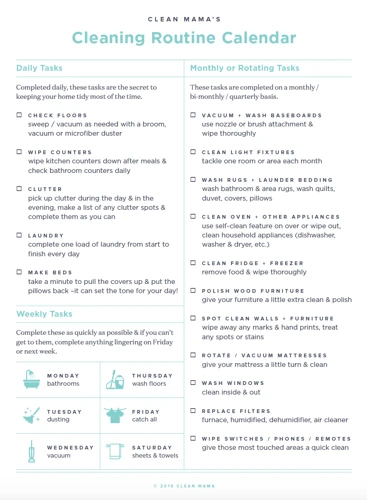
Dusting Schedule
Keeping on top of your dusting chores can be daunting, but creating a dusting schedule can make it more manageable. Here are some tips for creating your own dusting routine:
- Assess your home: Take note of the areas in your home that gather dust more easily – this could include high-traffic areas, rooms with more electronics, or homes with pets.
- Set a schedule: Choose a regular day and time each week to dedicate to dusting. Write it down on your calendar or set a reminder on your phone to ensure you don’t forget.
- Divide and conquer: Break down your cleaning tasks by room or by surface to make it more manageable. For example, one week you could focus on dusting all the wooden surfaces in your home, and the next week you could focus on electronics.
- Delegate tasks: If you have members of your household who are able to help with cleaning, make a list of specific tasks for them to complete. This will help ensure that everyone is contributing and taking responsibility for keeping the home clean.
- Stay consistent: Make an effort to stick to your dusting schedule each week to prevent dust build-up and to maintain a clean living space.
By following these tips, you will be able to create a dusting schedule that works for you and your home, and make the daunting task of dusting more manageable.
Dusting Frequency Guide
Keeping up with regular dusting is key in maintaining the cleanliness and hygiene of your home. However, it’s important to know how often to dust different surfaces, as dust can accumulate at different rates depending on the surface and environment. To help you out, here is a handy dusting frequency guide:
| Surface | Frequency of Dusting |
|---|---|
| Wooden Surfaces | At least once a week |
| Electronics | Once a month |
| Glass Surfaces | Once a week or as needed |
| Furniture | Once a week |
| Floors (hardwood, tile, laminate) | Once a week or as needed |
| Carpeted floors | Twice a week |
| Bedding | Once a week |
| Decorative items (e.g. picture frames, figurines) | Once a week or as needed |
Remember, this is just a general guide and frequency may vary based on the specific environment and usage. If you or anyone in your household has allergies or respiratory issues, it’s best to dust more frequently. By following this guide and incorporating dusting into your daily cleaning routine, you’ll be on your way to a cleaner and healthier home.
Keeping Dusters Clean
As you use your dusters to sweep away dust, dirt, and grime from various surfaces in your home, it’s essential to keep them clean. Over time, dusters may accumulate dust and other contaminants, defeating the purpose of cleaning. Properly cleaning your dusters will not only extend their lifespan but also ensure their efficiency in picking up unwanted particles. In this section, we will discuss some ways to keep your dusters clean and effective in their cleaning tasks.
Washing Microfiber Dusters
When it comes to washing microfiber dusters, it’s important to follow the proper steps to ensure they remain effective and long-lasting. Here are the steps you should take:
| Step | Action |
|---|---|
| Step 1 | Shake off the duster to remove any loose dust particles |
| Step 2 | Rinse the duster thoroughly under hot water |
| Step 3 | Add a small amount of mild detergent to a sink or bucket filled with hot water |
| Step 4 | Submerge the duster in the soapy water and gently agitate it to release any remaining dirt or debris |
| Step 5 | Rinse the duster thoroughly under hot water to remove any residual soap |
| Step 6 | Squeeze out any excess water and hang the duster to dry completely before using it again |
If you don’t have access to hot water, use warm water instead. It’s also important to avoid using fabric softeners or bleach, which can damage the microfiber. Avoid drying the duster with heat, as this can cause the fibers to melt and lose their effectiveness. Instead, hang the duster to air dry in a well-ventilated area.
By following these steps, you can ensure that your microfiber dusters are clean and effective every time you use them. Regular washing will also help prolong their lifespan, so you can use them for years to come.
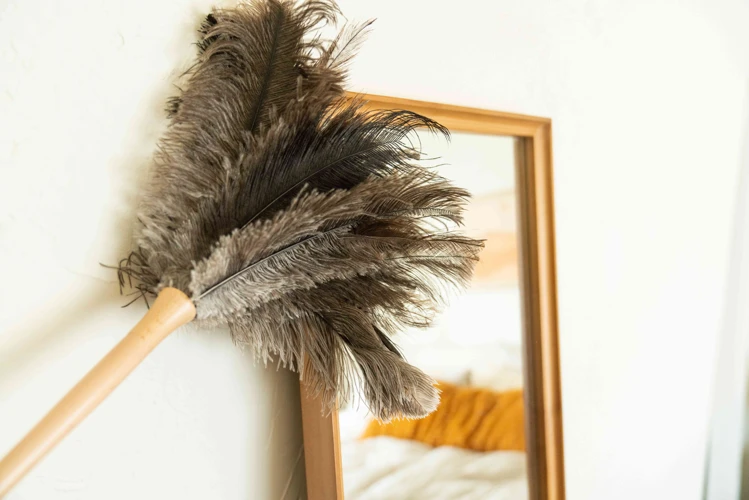
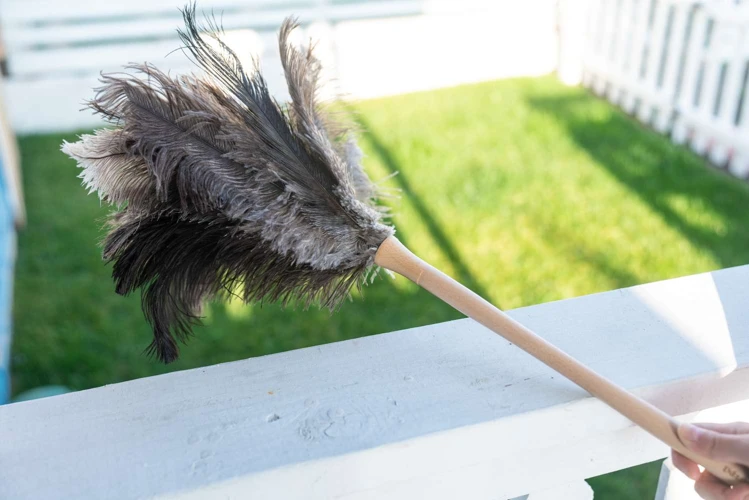
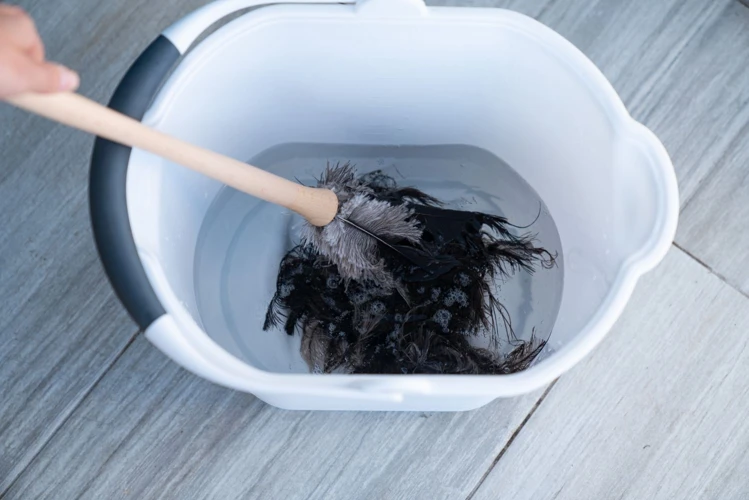
Cleaning Feather Dusters
To clean feather dusters, first tap the duster outside to remove any loose dust and debris. Then, gently wash the feathers in warm water with a mild soap. Be sure to rinse thoroughly and squeeze out any excess water. Hang the duster upside down to dry completely before using again.
Alternatively, you can also use a can of compressed air to blow out any trapped dust and debris from the feathers. This method is quick and efficient for regular maintenance.
It’s important to note that feather dusters should not be washed too often as it can damage the feathers and cause them to clump together. Only clean the duster when it becomes noticeably dirty or loses its effectiveness.
Remember to store feather dusters in a clean, dry location away from sources of moisture and dust. With proper care, they can last for several years.
Disinfecting Disposable Dusters
Disposable dusters are very convenient, especially for those who prefer not to wash their dusters frequently. However, it is important to disinfect them regularly to prevent the spread of bacteria and germs. Here are the steps for disinfecting your disposable dusters:
| Step 1: | Prepare a disinfectant solution by mixing water and a disinfectant spray, following the manufacturer’s instructions. |
| Step 2: | Spray the disposable duster with the disinfectant solution, making sure to saturate the entire surface. |
| Step 3: | Allow the disinfectant to sit on the duster for a few minutes to ensure that all bacteria and germs are killed. |
| Step 4: | Rinse the disposable duster thoroughly with water to remove any remaining disinfectant spray. |
| Step 5: | Squeeze the excess water out of the disposable duster and hang it to dry completely before using it again. |
Following these steps will ensure that your disposable dusters are disinfected and safe to use for your next cleaning session. Remember to use proper hand hygiene before and after cleaning to help prevent the spread of germs.
Other Tips and Tricks
As you become more familiar with dusting, you may find that there are certain areas or surfaces that require a bit of finesse in order to get fully clean. This is where some additional tips and tricks can come in handy. From reaching those tricky corners to preventing dust build-up altogether, the following pointers and advice will help you take your dusting game to the next level.
Using Dusters for Hard-to-Reach Areas
When it comes to cleaning, there are often places that are hard to reach, but can still gather a lot of dust over time. Here are some tips for using dusters to reach these areas:
- Use an extendable duster: An extendable duster can be adjusted to different lengths and can help you reach high or awkward spots, such as ceiling fan blades or the top of bookshelves.
- Wrap a duster around a tool: If you have a tool with a long, thin handle, such as a screwdriver, you can wrap a microfiber duster around the end to create a makeshift extended duster.
- Use compressed air: For areas that are too delicate to touch with a duster, such as intricate lampshades or computer keyboard keys, you can use a can of compressed air to blow away the dust.
- Don’t forget about the floor: Dust collect in hidden areas on the floor, such as underneath furniture or in the corners of the room. Use a duster with a long handle or a handheld duster to reach these spots.
Remember to always prioritize safety when accessing hard-to-reach areas. Use a sturdy stepladder or ask for assistance if necessary. Additionally, be careful not to overreach or twist your body in awkward positions.
Preventing Dust Build-up
Preventing dust build-up is an important aspect of keeping your home clean and healthy. Here are some tips on how to prevent dust from accumulating:
- Regular Cleaning: The most important step in preventing dust build-up is regular cleaning. Dust and dirt accumulate over time, so cleaning your home on a regular basis can help prevent the accumulation of dust. This includes dusting, vacuuming, mopping floors, and wiping down surfaces.
- Control Humidity Levels: High humidity levels can contribute to the growth of mold, which can lead to the accumulation of dust. Use a dehumidifier to control the humidity level in your home and prevent mold growth. Keep the air conditioning on during the hot months to control humidity.
- Eliminate Clutter: Cluttered spaces tend to accumulate dust, so keep your home organized and clutter-free. Regularly sort through items and donate or dispose of things you no longer need. This will create more space and make it easier to keep your home clean.
- Use Doormats: Place doormats at every entrance to your home to prevent dirt and dust from being tracked inside. Encourage family members and guests to wipe their feet before entering your home.
- Change Bedding and Linens: Bedding and linens tend to accumulate dust and debris, so it is important to wash them regularly. Use hypoallergenic bedding and vacuum mattresses and pillows to prevent dust mites from accumulating.
- Avoid Smoking Indoors: Smoking indoors can contribute to the accumulation of dust and debris, as well as increase the risk of respiratory problems. Encourage smokers to smoke outdoors or in a designated smoking area to prevent dust build-up.
By following these tips, you can prevent dust from accumulating in your home and maintain a clean and healthy living space.
Using Dusters for Quick Clean-ups
Quick clean-ups can be done with dusters in a matter of minutes. Whether it’s before guests arrive or just to freshen up a room, using a duster can quickly remove surface dust and debris. Here are some quick clean-up techniques using different types of dusters:
| Type of Duster | How to Use for Quick Clean-ups |
|---|---|
| Feather Duster | Hold the feather duster at one end and use quick flicks to dust surfaces. Focus on areas that are most visible, such as table tops and shelves. For hard-to-reach areas, use the duster along with a step ladder or stool. |
| Microfiber Duster | Fold the microfiber duster in half and use it to wipe surfaces in a back-and-forth motion. Wash the microfiber duster frequently to prevent spreading dust and dirt. |
| Disposable Duster | Unfold the disposable duster and use it in a back-and-forth motion on surfaces to remove dust and debris. Dispose of the duster when finished. |
Remember that quick clean-ups should only be done on surfaces that are lightly dusty or dirty. For heavily soiled areas, a more thorough cleaning is necessary. By using the right type of duster and technique, quick clean-ups can be a breeze.
Conclusion
In conclusion, incorporating dusters into your daily cleaning routine can help maintain a clean and healthy living environment. Dusting regularly is important to prevent allergies, promote better air quality, and extend the life of household items. There are different types of dusters available such as feather, microfiber and disposable dusters, each suitable for different cleaning needs.
When it comes to dusting techniques, it is recommended to use the top to bottom method, circular motion method or left to right method depending on the surface being cleaned. For wooden surfaces, it is important to use a soft duster to prevent scratches. For glass surfaces, a microfiber duster is the perfect choice to avoid leaving streaks. And for electronics, it’s best to use a dry microfiber duster to avoid any moisture damage.
Establishing a dusting schedule and following a frequency guide is also critical to ensure that dust does not accumulate and become overwhelming. Keeping dusters clean is essential to ensure they function properly and avoid any transfer of bacteria or other harmful organisms.
Finally, using dusters for hard-to-reach areas, preventing dust build-up and utilizing dusters for quick clean-ups are other handy tips that can make your daily cleaning routine more effective.
In summary, incorporating dusters into your daily cleaning routine can give you a cleaner and more enjoyable living space. By following the tips and techniques discussed in this article, you can make dusting a simple and effective part of your home maintenance routine.
Frequently Asked Questions
Can dusting regularly improve air quality in my home?
Yes, dusting helps to remove allergens and pollutants that can contribute to poor indoor air quality.
What is the best type of duster for cleaning wooden surfaces?
A microfiber or feather duster is best for cleaning wooden surfaces as they are gentle and won’t scratch the surface.
Can I use the same duster for all surfaces?
No, it is best to use different dusters for different surfaces to avoid cross-contamination.
How often should I dust electronics?
Electronics should be dusted once a week to prevent dust build-up that can damage the device.
How do I clean a dirty feather duster?
To clean a dirty feather duster, gently shake it outdoors to remove loose dust and then hand wash it in cold water with mild soap. Rinse thoroughly and hang to dry.
What is the best way to prevent dust build-up on surfaces?
Regularly dusting and wiping down surfaces with a microfiber cloth can help prevent dust build-up. It’s also important to vacuum regularly and use air purifiers.
Can disposable dusters be reuse?
No, disposable dusters are designed for one-time use only and should be thrown away after each use.
What is the importance of using a top-to-bottom dusting method?
Using a top-to-bottom dusting method ensures that dust and debris fall downward, preventing them from settling on lower surfaces that have already been cleaned.
How often should I wash my microfiber duster?
Microfiber dusters should be washed after every use or once a week if used daily. Use cold water and mild detergent to prevent damage to the fibers.
Can I use a feather duster on my TV screen?
No, feather dusters are not recommended for use on TV screens as they can scratch the delicate surface. Instead, use a microfiber cloth to gently wipe the screen.