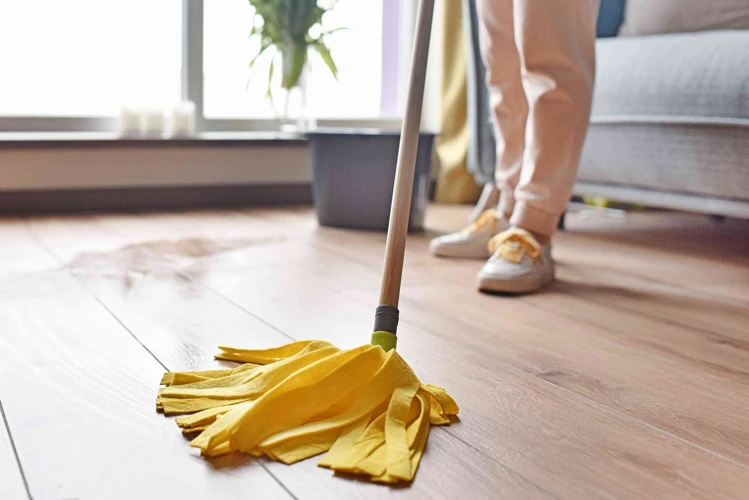
When it comes to cleaning, many people tend to overlook the cleanliness of their mops. However, keeping your mop clean is just as important as any other cleaning task. A dirty mop not only spreads bacteria and germs, but it also makes cleaning less effective, and reduces the lifespan of the mop. Proper cleaning and storage of your mop can help maintain its effectiveness and keep it in good condition for longer. In this article, we will cover step by step how to properly clean and store your mop for maximum effectiveness.
Why Proper Cleaning and Storage is Necessary
When it comes to keeping your home or workplace clean, mopping is definitely an essential chore to tackle. However, simply swishing a mop around on the floor is not enough. Proper cleaning and storage practices are necessary to maintain the effectiveness of your mop and prevent the spread of germs and bacteria. In this article, we will discuss the importance of cleaning and storing your mop properly, and provide step-by-step instructions on how to do so. We will also include some helpful tips for maximum mop effectiveness. But before we dive into the cleaning process, let’s explore the reasons why it’s so critical to maintain a clean mop. So, follow with us as we explore the reasons.
Prevents the Spread of Germs and Bacteria
Proper cleaning and storage of your mop is crucial for preventing the spread of germs and bacteria in your home or workplace. Dirty mops can harbor harmful bacteria and viruses that spread easily from surface to surface as you clean. This is especially concerning in areas like the kitchen or bathroom where there may be harmful pathogens present. By cleaning and disinfecting your mop after each use, you can keep these germs at bay and prevent the spread of illness in your home or office.
To ensure proper cleaning, it’s important to remove any excess debris from the mop head before washing. This can be accomplished by shaking out loose dirt and debris into a trash bin or by rinsing the mop head under running water. Once the excess debris is removed, the mop can be hand washed or machine washed with a mild detergent. After washing, the mop must be dried properly to avoid the growth of mold and mildew.
But cleaning alone is not enough to prevent the spread of germs and bacteria. It is also important to regularly disinfect your mop using a solution of bleach and water or another disinfectant. Make sure to follow the directions on the product carefully and allow the mop to soak in the solution for the recommended time to ensure all the germs are killed.
By properly cleaning and disinfecting your mop after each use, you can help prevent the spread of harmful bacteria and viruses in your home or workplace. This will help keep you and your family or coworkers healthy and safe.
Removes Dirt and Grime
Cleaning your mop removes dirt and grime that has been picked up during the cleaning process. This is essential because dirty mops can spread germs and bacteria, reducing their cleaning effectiveness. When a mop is used repeatedly without proper cleaning, the tool will accumulate dirt and grime from previous cleaning sessions. This buildup reduces the mop’s ability to absorb solution and properly clean surfaces, resulting in an inefficient cleaning process.
To ensure that your cleaning is effective, it is important to properly clean your mop after each use. This step removes any visible debris and dirt particles that have been picked up by the mop head. The cleaning procedure should start by removing larger debris like hair or pet fur by hand. Do this before rinsing the mop with water or putting it in the washing machine.
One common mistake made when cleaning a mop is using hot or warm water. Hot water causes the dirt particles to stick to the mop, keeping them attached to the mop fibers. As a result, cleaning with hot water is counterproductive because the dirt is not completely removed. Instead, use cold water to rinse the mop head thoroughly.
Another way to remove dirt and grime from mop fibers is to use a proper cleaning solution. Prepare a cleaning solution using water and a cleaning agent suitable for the surface being cleaned. Not all types of cleaning solutions are suitable for all surfaces. For example, some surfaces may be damaged by acidic solutions, while others may require an abrasive cleaner. Choose the appropriate cleaning agent for your cleaning needs.
After cleaning your floor surfaces, it is crucial to clean and disinfect your mop to prevent the spread of bacteria and germs. Explore different methods on how to make a DIY cleaning solution and disinfectant that can be used to sanitize your dirty mop.
By following these steps for cleaning your mop, you can rest assured that your cleaning will be effective and efficient, minimizing the risk of spreading germs and dirt.
Preserves the Mop’s Lifespan
Proper cleaning and storage of your mop not only prevents the spread of germs and removes dirt and grime, but it also helps preserve the mop’s lifespan. By taking care of your mop, you will save money in the long run by not needing to frequently replace it. Here are some tips on how to preserve the lifespan of your mop:
- Select the right type of mop for cleaning specific surfaces. For example, a microfiber mop pad is ideal for eco-friendly cleaning while steam mops are great for hard floors.
- Replace the mop head regularly to ensure effective cleaning and prevent buildup of dirt and bacteria. Depending on the frequency of use, it is recommended to replace the mop head every one to three months.
- Keep multiple mops on hand so you can rotate them and have a clean one ready to use. This also reduces wear and tear on a single mop.
- Clean and disinfect the mop after each use to prevent bacteria and germs buildup. Regular cleaning also prevents the mop fibers from becoming smelly or discolored.
By following these tips and properly maintaining your mop, you can not only ensure maximum cleaning effectiveness but also prolong its lifespan. For more information on selecting the right mop for your needs, check out our article on selecting the right mop.
How to Clean Your Mop
Cleaning your mop is just as important as using it to clean your floors. A dirty mop can harbor germs and bacteria, and spread them around your home. Proper cleaning and maintenance of your mop will help keep your floors clean and extend the life of the mop. In this section, we will discuss how to clean your mop step-by-step. Before we begin, make sure you have all the necessary materials, including water, mild detergent, and a bucket. Additionally, it’s important to use the right type of mop for your specific flooring. You can read more about types of mops for cleaning on our website.
Gather Your Materials
When it comes to cleaning your mop, it is important to make sure you have all the necessary materials at hand. Gathering the right materials makes the cleaning process smooth and efficient. Here is a list of materials you will need:
| Material | Description |
|---|---|
| Bucket | A bucket will be needed to fill with water and cleaning solution to wash the mop in. |
| Mop cleaning solution | The cleaning solution will depend on the type of mop you have. If you have a microfiber mop, you can use an eco-friendly cleaning solution. |
| Gloves | Wearing gloves during the cleaning process will protect your hands from any chemicals or bacteria on the mop. |
| Cleaning brush | A cleaning brush will be used to scrub any tough stains or dirt particles off the mop. |
| Drying rack | After washing the mop, you will need a drying rack to hang it on for proper drying. |
| Disinfectant | Using a disinfectant after cleaning the mop will kill any remaining bacteria or germs. |
It’s important to note that some mops require specific cleaning materials. For example, if you have a steam mop, you won’t need a cleaning solution, but rather just water. Make sure to consult the manufacturer’s instructions for the best cleaning practices for your specific mop. If you want to learn more about the different types of mops and their cleaning requirements, you can check out our article on types of mops for cleaning. Additionally, if you are interested in using eco-friendly cleaning materials, you can learn more about microfiber mop pads in our article on eco-friendly cleaning supplies, or discover the benefits of steam mops for hard floors in our article on steam mops.
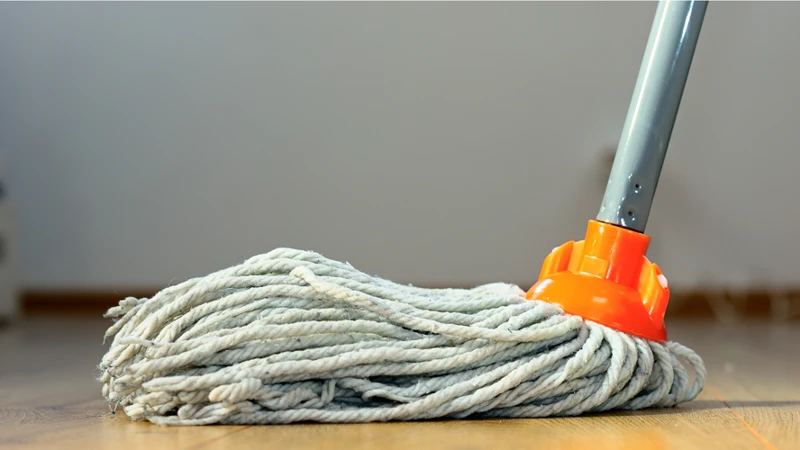
Remove Excess Debris
Before starting the cleaning process, it is important to remove any excess debris from the mop. This will prevent the debris from spreading and contaminating other surfaces during use. To do this, follow these steps:
- Step 1: Shake the mop vigorously to remove any loose dirt or debris. This will help to loosen any dirt or debris that may have accumulated on top of the mop head.
- Step 2: Use a soft-bristled brush to gently scrub the mop head. This will help to loosen any dirt or debris that may be trapped in the fibers of the mop head.
- Step 3: Place the mop under running water and use your hands to massage the fibers. This will help to dislodge any remaining dirt or debris and wash it away.
- Step 4: Repeat steps 2 and 3 until the water runs clear and the mop head is clean.
- Step 5: Squeeze out any excess water from the mop head. Avoid twisting or wringing the mop head, as this can damage the fibers.
By removing excess debris from your mop before cleaning, you can ensure that your mop will be more effective at cleaning your floors and preventing the spread of germs and bacteria.
Hand Wash or Machine Wash
When it comes to cleaning your mop, you have two options: hand wash or machine wash. Both methods are effective, but it’s important to consider the type of mop you have before choosing which method to use. Here’s a breakdown of each method:
| Hand Wash | Machine Wash |
| :———— | :———— |
| Hand washing your mop is a more gentle option that is ideal for delicate mop heads, such as microfiber or natural fibers. | Machine washing your mop is a convenient option that is ideal for tough and durable mop heads, such as cotton or synthetic fibers. |
| To hand wash your mop, start by filling a bucket with warm water and adding a small amount of detergent. Dip the mop head into the water and agitate it to loosen any dirt or debris. Rinse the mop thoroughly with clean water and squeeze out excess water. Hang the mop to dry. | To machine wash your mop, place it in the washing machine alone or with other cleaning cloths that are similar in texture and color. Use a small amount of detergent and set the machine to a gentle cycle with warm water. Avoid using fabric softener or bleach, as they can damage the fibers of the mop. Once the cycle is complete, hang the mop to dry. |
| It’s important to note that hand washing your mop may not kill as many germs and bacteria as machine washing, as the water may not get hot enough to sanitize the mop. | Machine washing your mop is an easy and effective way to kill germs and bacteria that may be lurking in the fibers. However, it’s important to regularly clean and disinfect your washing machine to prevent the buildup of mildew and bacteria. |
Now that you know the differences between hand washing and machine washing your mop, you can choose the method that is best for your specific cleaning needs. No matter which method you choose, be sure to clean and disinfect your mop after each use to ensure maximum effectiveness.
Dry the Mop Properly
After washing your mop, it is important to dry it properly to prevent the growth of bacteria and prolong its lifespan. Here are some recommended ways to dry your mop:
| Method | Description |
|---|---|
| Hang the mop | Hang the mop by its handle in a well-ventilated area until it is completely dry. Make sure the mop head is not touching the ground or any other surface. This method is best for cotton or synthetic string mops. |
| Lay the mop flat | Spread out the mop on a clean surface to air dry. This method is best for flat mops or microfiber mops. |
| Use a dryer | If the care instructions specify that the mop can be put in the dryer, use a low heat setting to dry it. This method is best for synthetic fiber mops. |
It is important to note that you should never store a wet mop as this can promote the growth of bacteria and cause an unpleasant smell. Allow your mop to dry completely before storing it. Additionally, if you are using a mop with replaceable mop heads, it is recommended to have several mop heads on hand so that you can rotate them and always have a clean, dry one available when you need it.
Disinfect the Mop
After washing your mop, it’s important to disinfect it to kill any remaining germs or bacteria. Here are the steps to properly disinfect your mop:
| Step 1: | Prepare a disinfecting solution by mixing one gallon of hot water with 1/2 cup of bleach or another disinfectant solution. |
| Step 2: | Soak the mop head in the disinfecting solution for at least five minutes, making sure it’s completely submerged. |
| Step 3: | After five minutes, remove the mop head from the solution and wring out any excess liquid. |
| Step 4: | Hang the mop to air dry thoroughly before storing it. |
Disinfecting your mop is especially important if you use it in areas where there may be harmful bacteria, such as bathrooms or kitchens. By taking these extra steps to properly clean and disinfect your mop, you can reduce the risk of spreading germs and keeping your floors and surfaces clean.
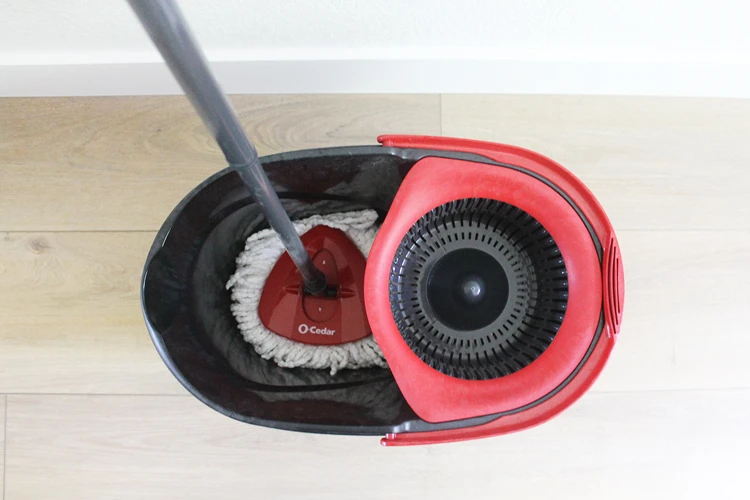
How to Store Your Mop
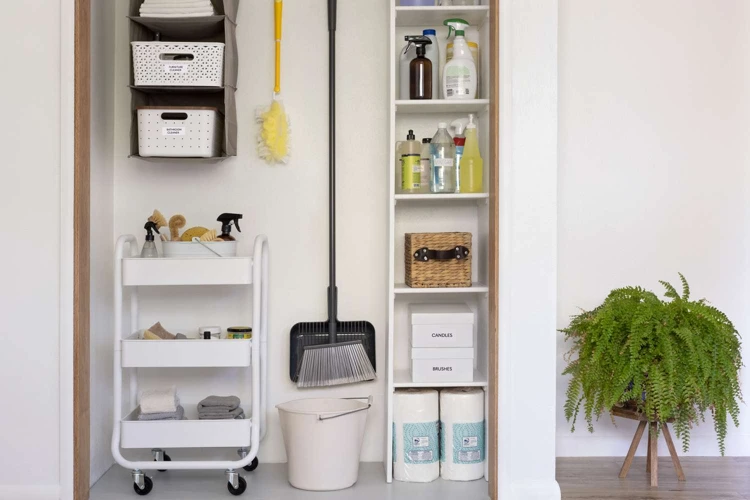
Keeping your mop properly stored is just as important as cleaning it regularly. Failure to store your mop correctly can lead to the growth of bacteria and mold which can cause unpleasant odors and create potential health hazards. In this section, we will discuss the best practices for storing your mop to maximize its effectiveness and lifespan. Follow these simple steps to ensure that your mop stays clean and ready for use whenever needed.
Store in a Dry Place
It is essential to store your mop in a dry place to prevent the growth and spread of bacteria and mold. A damp environment is a breeding ground for microbes that can contaminate your mop and potentially cause health hazards.
To ensure maximum effectiveness and longevity of your mop, it is important to store it in a safe, dry place. Below are some tips on how to properly store your mop:
| Tips for Storing Your Mop in a Dry Place |
|---|
| 1. Use a well-ventilated storage area |
| Avoid storing your mop in enclosed or humid areas such as basements, garages, or bathrooms. Instead, opt for a well-ventilated area with sufficient airflow to prevent moisture buildup and mold growth. |
| 2. Avoid storing the mop on the floor |
| Storing your mop on the floor is not recommended as it can collect dust and debris, decreasing its effectiveness. Consider using a mop rack or hooks to keep it off the ground. |
| 3. Keep away from other cleaning supplies |
| Store your mop away from other cleaning supplies to avoid cross-contamination and to keep it clean and ready to use. |
| 4. Store in a climate-controlled environment |
| Extremes in temperature and humidity can cause your mop to deteriorate quickly. It is essential to store your mop in a climate-controlled environment with stable temperature and humidity levels. |
By following these tips, you can ensure that your mop is well-preserved and ready to use when needed. Keeping your mop in a dry place not only guarantees its effectiveness but also helps you maintain a clean and healthy living environment.
Hang or Store the Mop Upright
When it comes to storing your mop, it’s important to hang or store it upright in order to prevent the growth of mold and bacteria. This also helps to maintain the shape of the mop head and allows it to dry properly. Here are some tips to follow:
| Tip 1: | Use a mop holder or rack to hang your mop upright. This keeps the mop head off the floor and allows air to circulate around it while it dries. |
| Tip 2: | If you don’t have a mop holder or rack, you can use a hook or nail to hang your mop. Make sure to hang it from the handle, not the mop head, to prevent any damage to the fibers. |
| Tip 3: | Avoid standing your mop on its head or laying it on its side. This can cause the fibers to become misshapen and makes it harder for the mop to dry. |
| Tip 4: | If you need to store your mop in a closet or utility room, make sure to stand it upright and lean it against a wall. This also helps to prevent any moisture from accumulating on the mop head. |
By following these tips and hanging or storing your mop upright, you can help to extend the lifespan of your mop and ensure that it is always ready for your next cleaning job.
Keep the Mop Head Covered
Keeping the mop head covered is an important step in properly storing your mop. Not only does it help to keep the mop head clean, but it also prevents dust and debris from accumulating on it. Here are some tips for keeping your mop head covered:
| Tip #1: | Use a plastic bag |
| Tip #2: | Use a mop head cover |
| Tip #3: | Make your own cover using a clean towel or cloth |
Using a plastic bag is a simple and effective way to cover the mop head. Simply place the mop head inside the bag and tie it closed. Make sure that the bag is not too tight, as this can cause the mop head to become misshapen.
Another option is to use a mop head cover. These covers are specifically designed to fit over the mop head and provide a snug, protective covering. You can find these covers at most stores that sell cleaning supplies.
If you don’t have a mop head cover, you can easily make your own using a clean towel or cloth. Simply wrap the towel or cloth around the mop head and secure it with a rubber band or string. This will help to keep the mop head clean and free from dust and debris.
No matter which method you choose, it’s important to remember to always cover the mop head when not in use. This will help to preserve its lifespan and ensure maximum effectiveness when using it for cleaning.
Do Not Store the Mop Wet
Storing a wet mop is a big no-no when it comes to maintaining its quality and effectiveness. Wet mops that are not dried before storage can lead to the growth of bacteria and mold, creating an unsanitary and unpleasant odor. Storing a wet mop can also damage its fibers, resulting in a shorter lifespan.
To avoid these problems, you should always take the necessary steps to properly dry your mop before storing it. One way to do this is to use a clean towel or rag to remove excess moisture from the mop head. Place the mop on a clean, dry surface and leave it in a well-ventilated area to air dry completely.
Alternatively, you can hang the mop upright, with the mop head facing down, in a designated mop storage area. This not only helps the mop to dry faster but also prevents any remaining moisture from dripping onto the floor, avoiding potential slip and fall hazards.
Remember, a damp mop can also lead to the growth of bacteria and unpleasant odors, so it’s important to ensure that the mop is completely dry before storage. In addition to prolonging the lifespan of your mop and preventing the spread of germs, properly drying your mop before storage can also help it to maintain its effectiveness.
Properly drying your mop before storage is a crucial step in maintaining its quality and effectiveness. By following these simple steps, you can ensure that your mop is always ready to use when you need it, without the risk of spreading germs or damaging its fibers.
Tips for Maximum Effectiveness
Now that you know how to properly clean and store your mop, it’s important to take a few additional measures to ensure maximum effectiveness in your cleaning routine. By following these tips, you can avoid cross-contamination, save time and effort, and get the most out of your mop. Let’s take a closer look at what you can do to enhance your cleaning experience.
Use the Right Type of Mop for the Surface
When it comes to mopping, one of the most important things to consider is using the right type of mop for the surface you will be cleaning. There are several types of mops available and each one is designed for specific cleaning tasks. Using the wrong type of mop can not only make cleaning less efficient, but can also cause damage to the surface being cleaned. It’s important to choose the right mop for the job to ensure maximum effectiveness and avoid any unnecessary damage.
Here’s a quick reference table to help you choose the right type of mop based on the surface you are cleaning:
| Surface Type | Mop Type |
|---|---|
| Hardwood Floors | Microfiber Mop or Sponge Mop |
| Tiled Floors | String Mop or Sponge Mop |
| Laminate Floors | Microfiber Mop or Sponge Mop |
| Linoleum Floors | String Mop or Sponge Mop |
| Concrete Floors | String Mop or Sponge Mop |
For hardwood or laminate floors, it’s important to use a microfiber mop or sponge mop. These types of mops are gentle on the surface and won’t scratch or damage the floors. For tiled or linoleum floors, a string mop or a sponge mop is recommended. The strings or sponge are able to get into the grout lines and clean more effectively. For concrete floors, a string mop or sponge mop is also recommended, as these types of mops are able to handle the rough surface of concrete.
By choosing the right type of mop for the surface you are cleaning, you can ensure that the cleaning process is efficient and effective, while also avoiding any damage to the surface being cleaned.
Replace the Mop Head Regularly
Over time, the mop head can become worn and less effective at cleaning your floors. To ensure maximum effectiveness, it is important to replace the mop head regularly. Here are some tips to help you determine when it’s time to replace your mop head:
- Check the appearance: If the mop head appears frayed or worn, it is likely time for a replacement.
- Smell the mop: If the mop head has a persistent odor, despite being cleaned regularly, it may be time to replace it.
- Assess cleanliness: If you notice that your floors are not getting as clean as they used to, this could be a sign that the mop head is no longer effective.
- Frequency of use: If you use your mop frequently, you may need to replace the mop head more often.
Remember, a clean and effective mop is essential for maintaining a clean and healthy home. By regularly replacing your mop head, you can ensure that your floors are getting the best cleaning possible.
Keep Multiple Mops on Hand
It is recommended to keep multiple mops on hand to ensure that you always have a clean one available. This is particularly important if you have a large space to clean or if you frequently use your mop. Additionally, having multiple mops allows you to designate certain mops for specific areas, such as using one mop for the kitchen and another for the bathroom.
When selecting multiple mops, choose ones that are appropriate for the surfaces you will be cleaning. For example, if you have hardwood floors, consider purchasing a mop specifically designed for those floors.
Label your mops so that you can easily identify which one is which. This can be especially helpful if you have designated mops for specific rooms or purposes. A simple way to label your mops is to use a permanent marker to write the room or purpose on the mop handle.
Ensure that your mops are always clean and ready for use by laundering and storing them properly. After cleaning and allowing them to dry completely, fold them neatly and place them in a designated area. Consider using a mop rack or hooks to keep them organized and off the ground.
Having multiple mops on hand also allows you to easily replace old or worn out mops. When a mop head becomes excessively dirty, torn or worn out, dispose of it and replace it with a clean one. By having multiple mops available, you can substitute one out without interrupting the cleaning process.
Having multiple mops on hand is an effective way to ensure that your floors are always clean and properly maintained. By keeping them clean, storing them properly, and using the right mop for the task at hand, you can maximize their effectiveness and maintain a clean living environment.
Clean and Disinfect the Mop After Each Use
After each use, it is crucial to clean and disinfect your mop to prevent the spread of bacteria and increase its lifespan. The following are steps to clean and disinfect your mop:
- Remove excess debris: Before cleaning, shake or rinse out any excess debris from the mop.
- Hand wash or machine wash: Depending on the mop’s material, you can either hand wash it with soap and warm water or machine wash it on a gentle cycle with detergent.
- Dry the mop properly: After washing, hang or lay the mop flat to dry. Ensure it is fully dry before storage to prevent mildew or bacteria growth.
- Disinfect the mop:Using bleach or a disinfectant, soak the mop in a solution for at least 5 minutes. Rinse thoroughly and allow to dry completely.
It is important to note that different types of mops may require specific care. Be sure to check the manufacturer’s instructions before cleaning and disinfecting your mop.
Conclusion
In conclusion, it is essential to properly clean and store your mop to ensure maximum effectiveness. Failure to follow these steps can lead to the spread of germs and bacteria, as well as a shortened lifespan for your mop.
To prevent the spread of germs and bacteria, it is important to remove any excess debris from the mop before cleaning it. A hand wash or machine wash using the proper cleaning solution is necessary to remove all the dirt and grime from the mop. Additionally, proper drying and disinfecting help to kill any remaining bacteria.
Proper storage of your mop is also critical to its effectiveness. Keep it in a dry place and store it upright or hung up to prevent any standing water from collecting in the mop head. Always keep the mop head covered and avoid storing the mop wet.
To get the most out of your mop, it is important to use the right type of mop for the surface and to regularly replace the mop head. It is also helpful to keep multiple mops on hand and to clean and disinfect the mop after each use.
By following these steps, you can maximize the effectiveness of your mop and ensure that your surfaces remain clean and germ-free. So, go ahead and give your mop the care it deserves for a more effective and long-lasting cleaning experience.
Frequently Asked Questions
How often should I clean my mop?
You should clean your mop after every use.
Can I machine wash my mop?
It depends on the type of mop. Check the manufacturer’s instructions before machine washing.
Should I use hot or cold water to clean my mop?
Hot water is more effective for cleaning and disinfecting a mop.
How should I dry my mop?
You should hang your mop to air dry, or place it in a ventilated area to dry.
Can I store my mop wet?
No, you should always make sure your mop is completely dry before storing to prevent bacteria and mold growth.
How do I know when it’s time to replace my mop head?
You should replace your mop head every few months, or when it becomes visibly worn or damaged.
Should I use the same mop for different types of surfaces?
No, you should use different mops for different surfaces to prevent cross-contamination and maintain cleanliness.
Can I use bleach to disinfect my mop?
Yes, you can use a bleach solution to disinfect your mop. Follow the manufacturer’s instructions for dilution ratios.
How should I store my mop if I don’t have a designated space?
You can store your mop in a labeled plastic bag or container to protect it from dust and other debris.
What is the best type of mop for hardwood floors?
A microfiber mop is a good choice for cleaning hardwood floors because it is gentle and won’t scratch the surface.