You take pride in keeping your home clean, and mopping is one of the essential tasks in your cleaning routine. However, have you ever noticed that even after mopping, your floors look dull and streaky? You may be making some mistakes that are sabotaging your efforts to achieve sparkling clean floors. In this article, we’ll discuss the common mistakes people make while mopping their floors and how to avoid them. By the end, you’ll be equipped with the knowledge and tips to mop your floors like a pro. So, let’s dive into it!
Mistake 1: Using Too Much Water
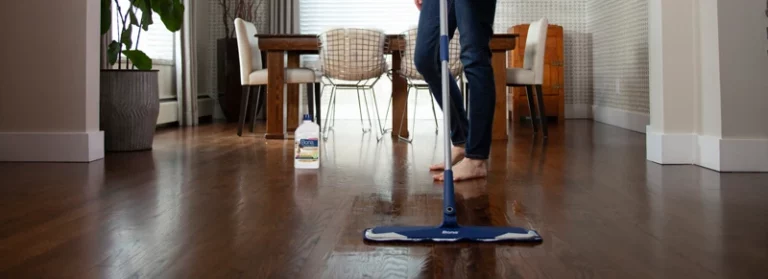
When it comes to mopping the floors, using the right amount of water is crucial in ensuring a clean and streak-free finish. However, many people make the mistake of using too much water, which can lead to a variety of problems. From not wringing out the mop or cloth to using a soaking wet mop, there are several ways in which this mistake can manifest. In this section, we’ll explore some of the most common issues associated with using too much water and offer tips for avoiding them. To learn more about different types of mops and how to select the right one for your floors, check out our guide on selecting the right mop.
1.1 Not wringing out the mop or cloth
One of the most common mistakes people make while mopping their floors is not wringing out the mop or cloth properly. When you have too much water on your mop, you risk leaving behind puddles of water on the floor, which can damage the flooring material over time. Using a soaking wet mop can make the mopping process more tedious and time-consuming.
To avoid this mistake, it’s important to first select the right mop for the job. Certain types of mops, such as sponge mops, can hold a lot of water, making it harder to control the amount of water you’re putting on the floor. On the other hand, microfiber mops can be a great choice because they are absorbent and can be wrung out easily.
When you’re ready to start mopping, it’s important to wring out the mop or cloth properly before you begin. This can be done by placing the mop head in a wringer or using your hands to squeeze out the excess water. If you’re using a cloth, you can twist it tightly to remove the excess moisture.
By properly wringing out your mop or cloth, you can control the amount of water you’re putting on your floors, resulting in a cleaner and healthier living space. To learn more about the different types of mops available or how to properly clean and store your mop, check out our informative articles on types of mops for cleaning and how to clean and store your mop.
1.2 Not using a damp mop, rather than a soaking wet mop
Using a damp mop instead of a soaking wet mop can make a huge difference when it comes to cleaning your floors. When you use too much water, your floors can become over-saturated and may take much longer to dry, which can lead to water damage or warping of your floors.
To avoid using a soaking wet mop, make sure to wring it out thoroughly after soaking it in water and cleaning solution. You can do this using a wringer bucket or simply by pressing down on the mop head with your hands until excess water is removed.
It’s also important to note that using too much cleaning solution can have a similar effect to using too much water. Make sure to read the instructions on the cleaner and dilute it properly before using it on your floors.
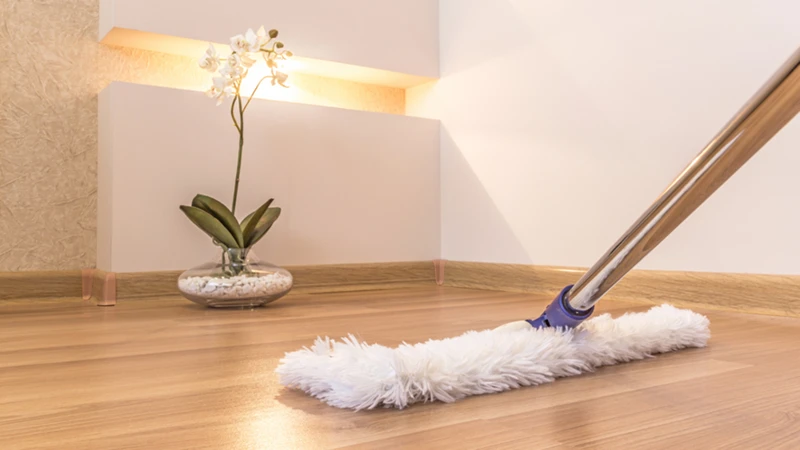
Using a microfiber mop pad can be particularly helpful when using a damp mop. The microfiber material has an absorbent quality that allows it to pick up more dirt and grime while using less water than traditional mop materials. Additionally, it generally leaves fewer streaks and can be washed and reused multiple times, making it more environmentally friendly. If you prefer to use a steam mop, check out our article on the benefits of steam mops for hard floors.
Using a damp mop instead of a soaking wet mop can help you achieve cleaner floors while also preserving their longevity. If you notice that your mop head has become particularly dirty or grimy, check out our article on how to refresh your mop head for some DIY cleaning tips.
Mistake 2: Skipping the Sweeping or Vacuuming Step
Have you ever mopped your floors, only to notice bits of debris and dirt still lingering around? It could be because you skipped an important step before mopping. Skipping the sweeping or vacuuming step is a common mistake that many people make when cleaning their floors. It may seem faster and more efficient to skip this step, but in reality, it can lead to a buildup of grime on your floors. Let’s explore some reasons why skipping the sweeping or vacuuming step is a mistake and why it’s important to take the time to properly prep your floors.
2.1 Sweeping and vacuuming picks up loose debris
Before beginning to mop your floors, it’s important to make sure that loose debris has been cleared away. This is where sweeping or vacuuming comes in. Sweeping and vacuuming picks up loose debris, such as:
| Dirt | Dust | Hair |
| Sand | Food particles | Pet hair |
| Small objects | Gravel | Other debris |
Without sweeping or vacuuming, these particles can become stuck to the mop or cloth, or simply get pushed around the floor, leaving dirt and grime behind. By taking the extra step to remove loose debris, you’ll be ensuring that your mop or cloth can effectively clean the surface of your floors, leaving them looking clean and polished.
2.2 Mopping with debris can leave dirt and grime on floors
When you skip the sweeping or vacuuming step before mopping, you run the risk of leaving dirt and grime on your floors. The mop will simply move the debris around, resulting in a less-than-desirable outcome. It is important to thoroughly remove all loose debris before wet mopping.
One way to ensure that you have removed all debris is to use a sweeping or vacuuming tool that is suited for your flooring type. For example, a broom or dust mop can be used for a quick cleanup before mopping a hardwood or tiled surface. A vacuum cleaner with a hard floor setting can be used for carpeted or tiled flooring.
If you are not sure about which tool to use for your flooring type, you can refer to the manufacturer’s instructions or consult with a flooring professional. However, it is generally safe to use a broom or dust mop for hardwood or tiled surfaces and a vacuum cleaner with a hard floor setting for carpeted or tiled flooring.
Remember, taking the time to thoroughly clean your floors before mopping will ultimately result in a cleaner and shinier outcome.
Mistake 3: Using the Wrong Cleaner
One of the most perplexing aspects of mopping floors is choosing the right cleaner. Choosing the wrong one can lead to damage and unsightly residue on your floors. It’s important to know the do’s and don’ts when it comes to selecting and using the right cleaner for your flooring. Let’s explore some of the most common mistakes people make when it comes to floor cleaner selection.
3.1 Not reading the label of the cleaner used
When it comes to cleaning our floors, we often think that any cleaner will do the job. However, this is a common mistake that many people make. Not reading the label of the cleaning product could result in irreparable damage to your floors or even harm to your health. Here are some important things to keep in mind:
- Read the label: Always read the label and instructions of the cleaner you are planning to use. Different types of flooring may require specific types of cleaners.
- Chemicals: Look for the type of chemicals used in the cleaner. Some chemicals may be harmful if inhaled or come in contact with skin, while others may cause discoloration or other types of damage to certain flooring materials.
- Dilution: Check if the cleaner needs to be diluted before use. If you use the product at its maximum strength, it may be too potent and cause damage to your floors.
- Testing: Test the cleaner on a small, inconspicuous area of the flooring first to check for any discoloration or damage.
It’s important to always read the label of any cleaning product before using it on your floors. This will ensure that you don’t cause any damage to your floors or put your health at risk.
3.2 Using too strong or too harsh cleaner can damage floors
When it comes to selecting a cleaner for your floors, it is important to choose wisely. Using too strong or too harsh cleaning solutions can have a damaging effect on your floors. Cleaning products that contain harsh chemicals can wear away the finish of your floors and cause permanent damage.
To avoid causing any harm to your floors, always take the time to read the label of the cleaning product being used. Make sure to only use cleaners that are specifically designed for the type of flooring you have. For example, a hardwood floor cleaner may not be suitable for use on a tile floor.
It is important to always use the recommended amount of cleaner. Using more than the suggested amount of cleaner will not provide any extra cleaning benefits and could actually cause more harm than good.
When in doubt, test a small, inconspicuous area before using any cleaning solution on your entire floor. This will help ensure that the cleaner is safe to use and does not cause any unwanted damage. Always keep in mind that prevention is the key when it comes to maintaining the quality and longevity of your floors.
3.3 Using oil-based cleaners can leave a residue on floors
When cleaning your floors, it is essential to use the right type of cleaner. One common mistake people make is using oil-based cleaners on their floors, which can leave a sticky residue. This can be a particular problem for hardwood and laminate floors, which can become damaged over time if not cleaned properly. Here are some reasons why you should avoid using oil-based cleaners on floors:
- Leaves a sticky residue: Oil-based cleaners can leave a sticky film on your floors, which attracts dirt and grime. This residue can be difficult to remove, leaving your floors looking dull and dirty.
- Difficult to remove: If you continue to use oil-based cleaners on your floors, the residue can build up over time. This can make it more difficult to remove, requiring special cleaners or even professional help.
- Damages floors: Over time, the residue left behind by oil-based cleaners can damage your floors. The sticky film can become embedded in the surface of your floors, creating scratches and other damage over time.
- Not suitable for all floor types: Oil-based cleaners should not be used on all types of floors. For example, they can be especially damaging to hardwood and laminate floors, but can also be problematic for other types of surfaces.
To avoid these issues, it is important to read labels carefully and select the appropriate cleaner for your floors. In general, water-based cleaners are a safer and more effective choice for most floors. If you do choose to use an oil-based cleaner, be sure to follow the instructions carefully and rinse your floors thoroughly to remove any residue.
Mistake 4: Not Rinsing the Mop or Cloth Frequently Enough

Cleaning floors can be a tedious task, and it’s important to avoid making mistakes that can lead to unsatisfactory cleaning results. One mistake that many people make while mopping their floors is not rinsing their mop or cloth frequently enough. This mistake can lead to dirt and grime being spread around the floor, rather than being cleaned up.
Why is it important to rinse the mop or cloth frequently while mopping?
When mopping a floor, it’s essential to rinse the mop or cloth frequently to ensure that it’s cleaning the floor effectively. As the mop or cloth is used to clean the floor, it becomes saturated with dirt and grime. If this dirt and grime are not rinsed out, the mop or cloth will simply spread the dirt around the floor, leaving it looking dirty and dull.
How often should you rinse the mop or cloth while mopping?
The frequency with which you should rinse the mop or cloth while mopping depends on the size of the area being mopped and the amount of dirt and grime on the floor. However, as a general rule, it’s a good idea to rinse the mop or cloth every few passes to ensure that it’s picking up the dirt and grime effectively.
How can you tell if it’s time to rinse the mop or cloth?
One way to tell if it’s time to rinse the mop or cloth is to look at the water in the bucket. If the water is murky or dirty-looking, it’s time to rinse the mop or cloth. You can also feel the mop or cloth to see if it’s becoming saturated with dirt and grime. If it feels heavy or sticky, it’s time to rinse it out.
What is the best way to rinse the mop or cloth?
To rinse the mop or cloth, simply dip it into a bucket of clean water and wring it out thoroughly. You can also rinse it under running water if you prefer. Be sure to wring out the mop or cloth thoroughly to remove as much water as possible. A wet mop or cloth can leave streaks on the floor and make it more difficult to clean.
Conclusion
Rinsing the mop or cloth frequently while mopping is a crucial step in getting your floors clean. By following this simple tip, you can avoid spreading dirt and grime around your floors and ensure that they are left looking clean and shiny.
Mistake 5: Mopping in the Wrong Direction
Ensuring that your floors are mopped in the correct direction may seem like a small detail, but it can make a big difference in the final result. Many people don’t realize that mopping in the wrong direction can leave unsightly streaks and marks on their floors, even if they are using the right tools and cleaners. In this section, we’ll discuss the common mistakes people make when mopping in the wrong direction and offer tips on how to avoid them. Let’s explore some essential tips for mopping your floors in the right direction.
5.1 Not following the grain of the wood or direction of the tiles
When mopping floors, it is important to pay attention to the direction in which the mop is being moved. Not following the grain of the wood or direction of the tiles can lead to streaks, marks, and an unclean finish.
Mistake: Not following the grain of the wood or direction of the tiles
Why it’s a problem: Can lead to streaks, marks, and an unclean finish
When mopping hardwood floors, it is essential to mop with the grain of the wood. Mopping against the grain can cause the mop to catch on the gaps between floorboards, leaving behind streaks and marks. Always mop with the grain of the wood to achieve a clean, polished look.
Similarly, mopping tiles in the wrong direction can lead to uneven cleaning and visible marks. It is best to mop tiles in the same direction as the grout lines or the natural direction of the tile pattern for a flawless finish.
| Wrong Way: | Right Way: |
| Mopping across the grain of the wood | Mopping with the grain of the wood |
| Mopping tiles in a circular motion | Mopping tiles in the direction of the grout lines or natural tile pattern |
By following the natural patterns and directions of the surfaces being mopped, it is possible to achieve a spotless, professional-looking finish on floors. So, take the extra time to pay attention to the direction of your mop, and enjoy gleaming floors that will impress anyone who walks in the door.
5.2 Can leave streaks or marks on floors
Mopping in the wrong direction can have an adverse effect on the appearance of your floors. When you mop perpendicular to the grain of the wood or tiles, it can leave unsightly streaks or marks. These marks can be difficult to remove and can make your floors look dirty even after cleaning. It is essential to mop in the proper direction, following the grain of the wood or direction of the tiles.
To avoid making this mistake, it is essential to know the layout and direction of your floors. Once you have determined the direction, you can begin mopping from one end of the room to another, following the same direction. This way, there will be no risk of making any stray marks on the floor. If you have a large surface to clean, you can also divide it into smaller sections, so you can ensure that each section is cleaned thoroughly and in the correct direction.
Mopping in the right direction can also give your floors a smooth and polished appearance. It can help the floor shine and look cleaner, even after use. Always take the time to determine the direction of the floor and follow it while mopping.
Here is a summary of the mistakes you should avoid while mopping your floors:
| Mistake | Effect |
|---|---|
| Using Too Much Water | Can leave your floors wet and take longer to dry |
| Skipping the Sweeping or Vacuuming Step | Can leave dirt and debris on floors |
| Using the Wrong Cleaner | Can damage floors, leave a residue or not clean properly |
| Not Rinsing the Mop or Cloth Frequently Enough | Can spread dirt or cleaning solution instead of removing it |
| Mopping in the Wrong Direction | Can leave streaks or marks on floors |
Conclusion
In summary, it is important to avoid making certain mistakes while mopping your floors in order to achieve the best results. By not using too much water and ensuring that you wring out the mop or cloth and use a damp rather than a soaking wet mop, you can avoid leaving excess water on the floors, which can cause damage over time. Skipping the sweeping or vacuuming step can also lead to problems, such as leaving debris on the floors, which can result in dirt and grime buildup. Additionally, using the wrong cleaner, such as one that is too strong or harsh or oil-based, can damage the floors or leave a residue.
It is also important to rinse the mop or cloth frequently enough to ensure that you are effectively cleaning the floors and not spreading dirt and grime around. Finally, mopping in the wrong direction, such as not following the grain of the wood or direction of the tiles, can result in unsightly streaks or marks on the floors. By avoiding these mistakes, you can ensure that your floors are consistently clean and well-maintained for years to come.
Frequently Asked Questions
Q1. Can I use any type of mop for cleaning my floors?
A1. No, it is recommended to use a mop that is suitable for the type of flooring you have. For instance, microfiber mops are good for hardwood floors, while string mops are better suited for tile floors.
Q2. How often should I mop my floors?
A2. It depends on the traffic in your home, but generally mopping once a week is recommended. If you have children or pets, you may need to mop more frequently.
Q3. Can I use bleach to clean my floors?
A3. It is not recommended to use bleach on floors as it can damage the finish or discolor the surface. Instead, use a cleaner that is specifically designed for your type of flooring.
Q4. Why is it important to rinse the mop frequently?
A4. Rinsing the mop frequently helps to prevent dirt and grime from being spread around the floor. This ensures that the floor is thoroughly cleaned without leaving any streaks or marks.
Q5. Is it necessary to sweep or vacuum before mopping?
A5. Yes, it is important to sweep or vacuum before mopping as it removes loose debris that could scratch or damage the floor during mopping.
Q6. Can I add vinegar to my mop water?
A6. Yes, adding a small amount of white vinegar to your mop water can help to disinfect and remove odors. However, it is important to dilute the vinegar with water and not to use too much as it can damage some types of flooring.
Q7. What is the best way to clean grout lines?
A7. Use a scrub brush or an old toothbrush with a mixture of water and baking soda or vinegar to clean grout lines. Avoid using bleach as it can damage the grout over time.
Q8. Are steam mops a good option for cleaning floors?
A8. Yes, steam mops are a great option for cleaning floors as they use heat and moisture to disinfect and remove dirt and grime. However, it is important to follow the manufacturer’s instructions and use the appropriate temperature and setting for your type of flooring.
Q9. How long should I wait for the floor to dry after mopping?
A9. It depends on the humidity and temperature of your home, but generally floors should be left to dry for at least 30 minutes to an hour after mopping. Avoid walking on the wet floor during this time.
Q10. Can I use a commercial floor wax to restore shine to my floors?
A10. It is not recommended to use commercial floor wax on all types of flooring as it can build up and be difficult to remove. Instead, use a product that is specifically designed for your type of flooring and follow the instructions carefully.