For many DIY enthusiasts, polishing metal can seem like an intimidating task. It’s easy to feel overwhelmed by the vast array of tools and materials available, as well as the various techniques used in metal polishing. However, with the right knowledge and a little bit of practice, metal polishing can be an incredibly rewarding experience. In this article, we’ll provide beginners with a comprehensive guide on how to polish metal, from selecting the right tools and materials, to preparing the metal surface, polishing techniques, and maintaining the polished metal. So, let’s get started and turn those dull metal surfaces into dazzling masterpieces!
Tools and Materials

When it comes to DIY metal polishing, having the right tools and materials is essential for achieving a professional-looking, high-quality finish. Using the wrong tools or materials can cause damage to the metal surface and lead to disappointing results. In this section, we will discuss what tools and materials you will need for metal polishing, including how to select the right tools for the job and what type of polish is appropriate for the metal you are working on. We will also provide tips on how to prepare the metal surface before polishing it and how to maintain the shine of your polished metal. To learn more about selecting the appropriate metal polish, you can check out our guide on different types of metal polish.
Selecting the Right Tools
When it comes to metal polishing, choosing the right tools is crucial to achieve a polished and shiny surface. Here are some factors to consider when selecting the right tools:
- Type of Metal: Different metals require different tools for polishing. For instance, aluminum is a soft metal that can be polished using a microfiber cloth and a metal polish, while stainless steel requires an abrasive metal polish and a polishing wheel.
- Extent of Damage: If the metal surface is severely scratched or has rust, you’ll need more abrasive tools like a sanding sponge or a wire brush. For minor scratches, a buffing wheel is enough.
- Size of the Surface: For larger surfaces, a power tool is recommended. A rotary tool with a polishing attachment can save time and effort.
- Budget: Decide how much you’re willing to spend on tools. Investing in a good quality tool once can save you money in the long run.
Once you have considered these factors, here are some tools that you may need for metal polishing:
- Microfiber cloth or polishing pad
- Polishing compound or metal polish
- Buffing wheel or polishing attachment
- Sanding sponge or wire brush
- Protective gloves and eyewear
- Rotary tool (for larger surfaces)
It’s important to remember that using the wrong tool can damage the metal surface. Make sure to do your research and use the right tool for the job. In case you are unsure of what tool to use, seek advice from professionals or refer to a trusted metal polishing guide.
Materials Needed
To begin polishing metal, there are several materials that you will need. These include:
| Material | Description |
|---|---|
| Abrasive pads or sandpaper | Used to smooth out rough surfaces and remove scratches. The grit level should be appropriate for the type of metal being polished. |
| Cleaning solution | Used to remove dirt, grime, and other impurities before polishing. Depending on the type of metal, you may need a specific cleaner such as brass cleaner or silver polish. Check the manufacturer’s instructions for proper use. |
| Polishing compound | Used to buff and shine the metal to a high gloss finish. There are different types of polishing compounds available depending on the metal being polished. Check the manufacturer’s instructions for proper use and application. |
| Polishing cloth or buffing wheel | Used to apply the polishing compound and buff the metal to a shine. Choose a cloth or wheel made specifically for metal polishing to ensure a high-quality finish. |
| Gloves and safety glasses | Wear gloves to protect your hands from the abrasive materials and safety glasses to protect your eyes from any debris. |
It’s important to note that not all materials are interchangeable. For example, using the wrong cleaning solution on certain metals can cause discoloration or damage. Using a polishing compound that’s too abrasive can also cause damage. Be sure to read the manufacturer’s instructions carefully before using any materials and use the proper ones for the type of metal you’re polishing.
If you’re unsure about which materials to use or how to use them properly, consider doing some research or consulting with a professional. By using the right materials and techniques, you can achieve a beautiful, high-quality finish on your metal surfaces.
Preparing the Metal Surface

Preparing the metal surface is a crucial step in achieving a high-quality polished finish. Before polishing the metal, it is important to ensure that the surface is clean and free from rust, stains, and other imperfections. Neglecting to prepare the metal surface properly can result in a less than stellar finish. In the following sections, we will discuss the steps involved in preparing the metal surface for polishing, including cleaning the metal and removing rust and stains. For tips on removing tarnish from household items, check out our guide on removing tarnish from metal with household items.
Cleaning the Metal
When it comes to metal polishing, the first step is always to clean the metal thoroughly. This step is crucial because polishing a dirty metal can lead to scratches and other damage. Here are some tips for cleaning different types of metal surfaces:
| Metal | Cleaning Method |
|---|---|
| Stainless Steel | Mix dish soap and warm water. Use a soft sponge or cloth to scrub the surface gently. Rinse with clean water and dry with a microfiber cloth. |
| Aluminum | Mix cream of tartar and water to create a paste. Apply the paste on the metal surface and scrub gently with a soft sponge or cloth. Rinse with clean water and dry with a microfiber cloth. |
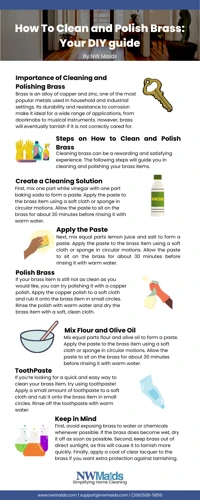
| Brass | Mix equal parts of vinegar and water. Dip a soft cloth in the mixture and use it to wipe the surface. Rinse with clean water and dry with a microfiber cloth. |
| Silver | Mix baking soda and water to create a paste. Apply the paste on the silver surface and scrub gently with a soft sponge or cloth. Rinse with clean water and dry with a microfiber cloth. |
It is essential to avoid using abrasives or harsh chemicals when cleaning metal surfaces. These can lead to scratches and other damage. Also, make sure to dry the surface of the metal thoroughly after cleaning it. Any moisture left on the surface can cause rust or corrosion over time.
If you have kitchen utensils made of metal, such as pots, pans, and cutlery, it is much easier to clean them before polishing. You can check out our article on how to clean and polish kitchen utensils made of metal for more tips.
Remember that cleaning and polishing are two different processes. While cleaning removes dirt and grime, polishing enhances the metal’s shine and smoothness. If you want to know more about the difference between metal cleaner and metal polish, check out our article on metal cleaner vs. metal polish: what’s the difference?
Once you have cleaned the metal surface, you can move on to the next step of removing rust and stains. But first, let’s take a quick look at how often you should polish your metal surfaces.
Removing Rust and Stains
One of the biggest issues with metal surfaces is the development of rust and stains over time. If not addressed properly, this can severely damage the metal and affect the polished finish. Removing rust and stains is a crucial step before proceeding to the polishing phase.
The following table outlines some techniques for removing rust and stains from different metal surfaces:
| Metal Type | Rust Removal Technique | Stain Removal Technique |
|---|---|---|
| Iron/Steel | Scrub the affected area with steel wool or wire brush. Apply a rust remover chemical and let sit for 15-20 minutes. Scrub again and rinse with water. | Make a paste of baking soda and water. Apply to the stain and let sit for several hours. Scrub with a soft bristle brush and rinse with water. |
| Brass | Make a paste of equal parts salt, vinegar, and flour. Apply to the affected area and let sit for an hour. Scrub with a soft brush and rinse with water. | Mix equal parts lemon juice and cream of tartar. Apply to the stain and let sit for 30 minutes. Brush with a soft bristle brush and rinse with water. |
| Silver | Make a solution of boiling water, baking soda, and aluminum foil. Place the silver item in the solution for a few minutes until the rust dissolves. | Create a paste of baking soda and water. Apply to the stain and let sit for several hours. Scrub with a soft bristle brush and rinse with water. |
It is important to note that removing rust and stains may not always be possible without causing damage to the metal surface. In such cases, it may be necessary to seek professional help or accept the imperfections. Additionally, preventing rust and stains is key to maintaining a polished metal surface over time.
For more information on preventing damage to specific types of metal, see our articles on how often to polish metal surfaces, cleaning and polishing brass at home, and dos and don’ts of polishing silverware.
Polishing the Metal
After preparing the metal surface, it’s time to move on to the polishing process. This is the step where the metal will finally start to shine and look like new again. However, it’s important to keep a few things in mind before getting started. There are different types of polish and techniques for each type of metal. The key to a successful polishing job is to have the right tools and materials and to approach the task with patience and care. In this section, we will cover everything you need to know about polishing metal so that you can achieve a beautiful, flawless finish.
Selecting the Right Polish
When it comes to selecting the right polish for your metal, there are a few factors to consider:
1. Type of Metal: Different metals require different types of polish. For example, brass and copper require a different type of polish than silver or stainless steel.
2. Abrasiveness: The level of abrasiveness needed in a polish will depend on the level of tarnish or oxidation on the metal. For light polishing, a less abrasive polish will suffice, whereas heavily tarnished metal may require a more abrasive polish.
3. Type of Polish: Polishes come in a variety of forms, including liquids, pastes, and creams. The type of polish you choose will depend on personal preference and the type of metal you are working with.
4. Chemical vs. Natural: Some polishes contain harsh chemicals, while others are made from natural ingredients. It’s important to consider not only the effectiveness of the polish, but also the impact it may have on the environment.
5. Brand Reputation: When choosing a polish, it’s important to consider the reputation of the brand. Look for products from reputable companies with a history of producing quality metal polishes.
Selecting the right polish is essential to achieving a successful metal polishing project. Take the time to research and consider your options before making a final decision.
Polishing Techniques
Polishing is a crucial step in the metal polishing process. It is a technique that involves removing scratches and blemishes on the surface of the metal to give it a smooth and shiny appearance. Here are some polishing techniques to follow:
| Technique | Description |
|---|---|
| Hand Polishing | Hand polishing is the simplest technique that requires only a cloth and some elbow grease. Apply a small amount of polish to the cloth and rub it onto the metal in circular motions. Use firm pressure but do not press too hard, as this can cause more scratches. |
| Machine Polishing | If you have a large area to cover or prefer a more efficient method, machine polishing is the way to go. Use an electric polisher with a foam pad attachment and apply the polish to the pad. Move the machine in circular motions, and maintain a steady speed and pressure. Be careful not to linger in one place for too long, as this can cause overheating and damage to the metal. |
| Airway Buffing | Airway buffing involves using a cloth wheel, called an airway, that is attached to a bench polisher. Apply the polish to the airway, and then move the metal across the spinning wheel in a back-and-forth motion. This technique is preferred for harder metals, as it can produce a mirror-like finish. |
| Hot Bluing | Hot bluing is a technique typically used on gun barrels where heat is used to create a blue-black oxide layer on the metal. This layer provides a protective coating that reduces rust and corrosion. This technique should only be done by a professional, as it involves heating the metal to high temperatures, which can be dangerous if done improperly. |
Remember to wear gloves and protective goggles when using these techniques, as metal polishing can be a messy and hazardous process. Also, always follow the instructions on the polish label, and test on a small area first to ensure the desired results.
Buffing and Finishing
Once you have polished the metal surface, the final step is to buff and finish it to achieve a smooth, glossy shine. Here are the steps for buffing and finishing your polished metal:
- Step 1: Clean the surface of the metal to remove any residue that may be left from the polishing process.
- Step 2: Select a buffing wheel that corresponds to the shape and size of the metal object you are polishing. For larger surfaces, use a larger buffing wheel, and for smaller surfaces, use a smaller wheel.
- Step 3: Apply a small amount of metal polish to the buffing wheel. Use caution not to apply too much polish, as this can cause the wheel to become clogged and less effective.
- Step 4: Begin buffing the metal using a light pressure, moving the wheel back and forth across the surface of the metal. Be sure to polish in the direction of the grain of the metal, as this will help to prevent scratches and other surface damage.
- Step 5: Continue buffing the metal until you are satisfied with the shine and finish. Be sure to check the surface carefully, as any scratches or blemishes will be accentuated by the shine of the polished metal.
- Step 6: Once you have finished buffing, use a clean, soft cloth to remove any excess polish from the surface of the metal. This will help to prevent buildup and keep the metal looking its best.
- Step 7: To achieve a mirror-like finish, you may want to use a microfiber cloth or chamois to buff the surface of the metal one final time. This will help to remove any remaining smudges or streaks and give the metal a brilliant shine.
Following these steps will help you achieve a beautiful, polished finish on your metal objects. Remember to take your time and be patient, as buffing and finishing can be a delicate process. With practice and care, you can create stunning, professional-quality finishes on all your metal surfaces.
Maintaining the Polished Metal
After putting in the effort to properly polish a piece of metal, it’s important to follow up with maintenance to keep the sleek and shiny appearance. Proper maintenance not only prevents future damage but it also prolongs the lifespan of the metal. In this section, we will discuss some tips to keep your polished metal looking great for years to come. From preventing damage to regular maintenance tricks, we have got you covered. So, let’s explore the best practices for maintaining polished metal surfaces.
Preventing Future Damage
Preventing future damage to your polished metal is key to maintaining its shine and luster. Here are some tips to help keep your metal looking its best:
- Protect from Moisture: Metal can easily rust or corrode if exposed to moisture for extended periods. Make sure to keep your polished metal dry and if possible, store it in a dry location.
- Avoid Abrasives: Abrasive cleaners, like steel wool or scouring pads, can leave scratch marks on your metal surface. Instead, use a soft cloth or non-abrasive sponge to wipe down your polished metal.
- Regular Dusting: Dust and dirt can settle on your metal surface and dull its shine over time. Regularly dust your polished metal with a dry, soft cloth to remove any debris.
- Avoid Exposure to Sunlight: Prolonged exposure to sunlight can cause your metal surface to discolor or fade. Avoid displaying your polished metal in direct sunlight, and store it in a shaded area.
- Use Protective Coatings: Applying a protective coating, like wax or clear coat, can help protect your polished metal from scratches and damage. Be sure to apply the coating in thin layers, using a soft cloth or applicator.
- Handle with Care: Finally, when handling your polished metal, be sure to do so with care. Avoid dropping or banging your metal surface, and be cautious when moving it to prevent scratches and dents.
By following these tips, you can help prevent future damage to your polished metal and keep it looking shiny and new for years to come.
Regular Maintenance Tips
Maintaining the polished metal is essential to keep it looking shiny and new for the long term. Here are some regular maintenance tips to follow:
- Keep the metal dry: Water and moisture can cause rusting and damage the polished surface. Dry the metal surface thoroughly after cleaning or exposure to water.
- Dust and dirt removal: Dust and dirt can accumulate on the polished surface and make it look dull. Use a clean dry, soft cloth to wipe the metal surface regularly to remove any dust and dirt.
- Avoid abrasive materials: Avoid using abrasive materials to clean the metal surface as it can scratch and damage the surface. Instead, use a soft cloth or a microfiber cloth.
- Avoid contact with chemicals: Chemicals such as bleach, ammonia, and acid can cause discoloration and damage to the polished metal surface. Avoid contact with such chemicals or clean them immediately if accidental contact occurs.
- Store carefully: If the metal object is not in regular use, store it carefully to prevent any scratches or damage. Wrap it in a soft cloth or store it in a clean, dry place away from any moisture or sunlight exposure.
By following these regular maintenance tips, you can keep your polished metal surface shining and looking new for an extended period. Additionally, it might save you time and money on future restoration work.
Conclusion
In conclusion, metal polishing can be a rewarding and satisfying DIY project for beginners. With the right tools and materials, it’s possible to transform dull and tarnished metal into gleaming and lustrous surfaces. However, it’s important to approach this task with caution and care, especially if dealing with fragile or valuable metal objects.
One of the most crucial aspects of metal polishing is preparing the surface properly. This involves cleaning the metal thoroughly and removing any rust or stains. Neglecting to do this step can result in a less than perfect finish or even cause damage to the metal.
Another key factor in metal polishing is selecting the appropriate tools and materials. Using the wrong tools or products can be ineffective or even harmful to the metal surface. It’s important to research and choose the best products for the specific type of metal being polished.
Polishing techniques also play a significant role in achieving a satisfactory outcome. Taking the time to learn and practice the different polishing methods, including buffing and finishing, can make all the difference in the final result.
To maintain the polished metal, it’s important to take preventative measures against future damage and establish a regular maintenance routine. This can include regular cleaning and applying protective coatings to the surface, depending on the type of metal.
Overall, metal polishing can be a fun and enjoyable DIY project for beginners, but it’s important to approach it with caution and attention to detail. With proper preparation, technique, and maintenance, it’s possible to achieve a stunning and long-lasting finish on various metal surfaces.
Frequently Asked Questions
What types of metal can be polished?
Most types of metal can be polished, including stainless steel, aluminum, brass, copper, and silver.
Can I use household cleaners to clean my metal before polishing?
No, it is important to use cleaners specifically designed for metal surfaces to avoid damaging the metal during the cleaning process.
How do I know which polish to use for my metal?
The type of polish you use will depend on the type of metal you are polishing. Be sure to read the label or do research to determine the appropriate polish for your specific metal type.
Can I polish metal with a regular cloth or paper towel?
No, it is recommended to use a microfiber or soft cloth when polishing metal to avoid scratching the surface.
Do I need to wear protective gear when polishing metal?
Yes, it is recommended to wear gloves and eye protection when polishing metal to avoid any potential injury or exposure to chemicals.
What techniques should I use when polishing intricate designs and crevices?
Using a small, soft-bristled brush can help get polish into hard-to-reach areas and crevices. You can also use a polishing cloth or cotton swab to apply and remove polish from these areas.
How often should I polish my metal surfaces?
The frequency of polishing will depend on the amount of use and exposure to elements. However, it is recommended to polish metal surfaces every few months to maintain their shine.
What should I do if my metal surface is severely damaged or scratched?
If your metal surface is severely damaged or scratched, you may need to seek professional help to repair it. Attempting DIY repairs on severely damaged surfaces can actually cause further damage.
How can I prevent future damage to my polished metal surfaces?
Preventative measures such as placing coasters or felt pads underneath objects can help prevent scratches and damage to your metal surfaces. Additionally, keeping your metal surfaces clean and dry can prevent rust and other issues.
Can I use a power tool to polish my metal surfaces?
Yes, you can use a power tool such as a rotary or orbital sander to polish metal surfaces. However, it is important to use the correct attachments and speed settings to avoid damaging the metal.