
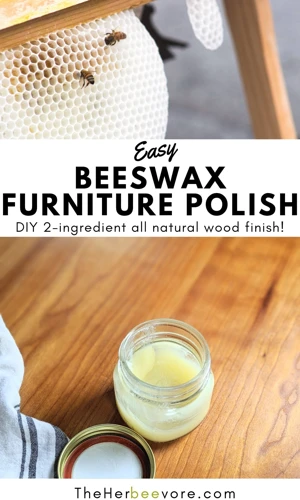
Have you ever wondered what ingredients are in your furniture polish? If you’re looking for a natural alternative, making your own beeswax polish is a great option. Not only is it environmentally friendly and better for your health, but it also leaves a beautiful shine on your furniture. And the good news is, it’s easier to make than you may think. In this article, we’ll take you through a step-by-step guide on how to make your own beeswax furniture polish, including a list of ingredients and tools needed. So let’s get started and bring a natural glow to your home!
What You’ll Need
To start making your own furniture polish with beeswax, you will need a few ingredients and tools. Creating your own polish is a great way to have quality control over the substances you use in your home. Thankfully, the supplies required for this project are readily available and easy to find. In this section of the article, we will list out the ingredients and tools you will need to make homemade cleaner. For more information on the benefits of using natural, homemade furniture polishes or avoiding common mistakes with them, check out these helpful links: home-furniture-polish-natural, diy-furniture-polish-recipes, homemade-furniture-polish-benefits, essential-oils-furniture-polish, and avoid-homemade-furniture-polish-mistakes.
Ingredients
For making the furniture polish with beeswax, you just need a few ingredients that are easily available. Here is a list of ingredients you will need for making furniture polish with beeswax:
| Ingredients | Amount |
| Beeswax | 1 cup |
| Coconut oil | 3 cups |
| Lemon essential oil | 30-40 drops |
| Orange essential oil | 10-20 drops |
Beeswax is the main ingredient of the furniture polish that provides a protective layer and helps in retaining the moisture of the wooden surface. Coconut oil used in this recipe is the carrier oil that helps the wax to spread evenly over the furniture surface. Lemon and orange essential oils are used to give a nice fragrance to the polish and also for the benefits they offer. While lemon essential oil is known for its antibacterial properties and can help remove sticky residue, orange essential oil has anti-inflammatory properties and can help calm the mind.
These ingredients are easily available online or at a local store. Now let’s move on to the tools you will need for this DIY project.
Tools
To make furniture polish with beeswax, you will need a few tools to help you through the process. Here’s what you will need:
- Double boiler: This will be used to heat and melt the beeswax without overheating it. If you don’t have a double boiler, you can create your own by placing a heat-resistant glass bowl over a pot of simmering water.
- Grater: You will need a grater to grate the beeswax. You can use a regular cheese grater or a microplane grater for this.
- Measuring cups and spoons: Accurate measurements are important when making furniture polish. You will need measuring cups and spoons to measure out the ingredients.
- Stirring utensil: You will need something to stir the mixture as it melts together. A wooden spoon or silicone spatula will work well.
- Container: You will need a container to store your finished furniture polish in. A glass jar with a lid or a metal tin will work well. If you want to be more eco-friendly, you can use a container that you already have at home.
Once you have gathered all the tools you need, you can start making your furniture polish with beeswax. For tips on how to use and store your homemade furniture polish, see the next section. And if you want to purchase a ready-made furniture polish, check out our online store.
Step-by-Step Instructions
Now it’s time to get started on making your very own furniture polish using beeswax! We’ll take you through each step of the process in detail so that you can create a high-quality and all-natural polish for your wooden furniture. By following these step-by-step instructions, you’ll end up with a beautiful and effective furniture polish that will help to nourish and protect your wooden pieces for years to come. So let’s dive in and get started on this fun and easy DIY project!
Step 1: Grate Beeswax and Measure Ingredients
The first step in making furniture polish with beeswax is to gather all the necessary ingredients and tools. It’s important to have everything prepared before starting the process.
Ingredients
One of the main ingredients is beeswax. You’ll need to grate the beeswax into small pieces so that it will melt easier. To make approximately 8 ounces of furniture polish, you will need the following ingredients:
| Ingredients | Amount Needed |
|---|---|
| Beeswax | 3 ounces |
| Olive oil | 3 ounces |
| Coconut oil | 1.5 ounces |
| Essential oil | 15-20 drops |
Tools
In addition to the ingredients, you’ll also need some tools. Here’s what you’ll need:
- A grater for the beeswax
- A double boiler or a heat-safe bowl and a saucepan
- A stirring utensil, such as a spoon or silicone spatula
- A glass container for the finished product
- A scale to measure the ingredients accurately
Once you have all of these ingredients and tools prepared, you can move on to the next step in making your own furniture polish with beeswax.
Step 2: Melt Beeswax and Oils Together
To continue with the recipe, the next step is to melt the grated beeswax and the oils together. Follow these steps:
- Create a double boiler: Fill a small saucepan with an inch or two of water. Place a glass or metal bowl on top of the saucepan, making sure it fits securely and does not touch the water.
- Add beeswax: Place the grated beeswax into the bowl and let it melt over medium heat in the double boiler.
- Add oils: Once the beeswax has melted, add the olive oil and coconut oil, stirring continuously with a wooden spoon until everything is completely melted and combined into a glossy mixture.
- Monitor the temperature: Keep an eye on the temperature of your mixture to make sure it doesn’t get too hot. Your wax and oil mixture should not exceed 140°F (60°C) to avoid burning or altering the oils’ properties.
Pro-tip: If you don’t have a double boiler, you can create one by placing a glass or metal bowl directly over a saucepan with water in it. Be careful, though, as the bowl may become very hot to the touch.
Step 3: Add Essential Oils
Now that the beeswax and oils have melted together in the double boiler, it’s time to add the final touch to your homemade furniture polish – essential oils! Essential oils not only add a lovely fragrance to the polish, but also provide additional benefits such as antibacterial and antifungal properties. Here are the steps to add essential oils:
- Choose your essential oils: Depending on your personal preference, you can choose from a variety of essential oils such as lavender, lemon, peppermint, or eucalyptus. Each oil has its own unique scent and benefits.
- Measure the essential oils: Using a dropper, add about 10-15 drops of essential oils to the melted beeswax and oil mixture. Be careful not to overdo it with the essential oils as they can be overpowering and even irritating to the skin or lungs in large amounts.
- Mix the essential oils in: Use a wooden spoon or spatula to thoroughly mix the essential oils into the melted mixture. Be sure to mix well to ensure that the scent and benefits of the essential oils are evenly distributed throughout the polish.
Adding essential oils to your homemade furniture polish is a simple but important step that can make a big difference in the final product. Not only does it impart a lovely scent, but it also provides additional benefits for your furniture and home.
Step 4: Pour Mixture into Container and Allow to Cool
After all the ingredients have been thoroughly mixed, pour the furniture polish mixture into a container and allow it to cool. Here’s how you can do it:
| 1. | Select a Container: |
| Choose a container that is suitable for storing the furniture polish. Make sure that it has a tight-fitting lid to prevent the mixture from drying out or becoming contaminated. You can also reuse old containers that are clean and dry. | |
| 2. | Pour the Mixture: |
| Carefully pour the warm furniture polish mixture into the selected container. It is important to do this while the mixture is still warm and liquid. If you wait too long and the mixture solidifies, you may have to melt it again. | |
| 3. | Cool the Mixture: |
| Allow the furniture polish mixture to cool and solidify completely in the container. This may take several hours, depending on the size of the container and the room temperature. Do not disturb the container while the mixture is cooling. |
Once the mixture has cooled, you can begin using it to polish your furniture. It is important to note that the furniture polish will remain in a semi-solid state, and you will need to apply it sparingly to your furniture with a soft cloth. Store the container in a cool, dry place to avoid any contamination or spoilage.
Tips for Use and Storage
Now that you’ve made your own beeswax furniture polish, you want to ensure that you use and store it correctly to get the most out of it. Here are some helpful tips to keep in mind. Take note of these suggestions to optimize the performance and longevity of your homemade furniture polish.
Apply Polish Sparingly
When it comes to using the furniture polish made with beeswax, it’s important to remember that a little goes a long way. Applying too much polish can lead to a buildup on your furniture, making it look greasy and attracting even more dust and debris. Here are some tips to keep in mind when using this homemade polish:
| Tip #1: | Start with a clean surface. Before applying the polish, make sure the surface is free of dust and debris. This will help the polish adhere evenly and produce a more polished finish. |
| Tip #2: | Use a soft cloth or brush. A soft cloth or brush will help you apply the polish evenly and avoid any scratches or damage to the surface of the furniture. |
| Tip #3: | Apply the polish in a thin layer. Use a small amount of polish and spread it evenly over the surface, focusing on one area at a time. This will prevent buildup and give you a more polished, professional look. |
| Tip #4: | Buff the surface well. Once you’ve applied the polish, use a clean cloth to buff the surface until it shines. This will help remove any excess polish and give your furniture a beautiful, polished look. |
By following these tips and applying the furniture polish sparingly, you can protect and beautify your furniture for years to come.
Store in a Cool, Dry Place
Proper storage is essential to ensure the longevity and effectiveness of your homemade furniture polish. To maintain its quality, it is important to store the polish in a cool, dry place.
One of the main ingredients in the polish is beeswax, which has a melting point of around 62-64°C. So, it is crucial to avoid storing the polish in a location where it can become too warm or hot. Exposure to heat can cause the polish to melt, losing its texture and consistency.
In addition to heat, moisture can also damage the polish. Avoid storing it in humid locations such as a bathroom or a damp basement. Moisture can cause the polish to break down, reducing its effectiveness and also promoting the growth of mold and bacteria.
To keep your homemade furniture polish in good condition, store it in an airtight container to prevent moisture and air from entering. A jar with a tight-fitting lid, such as a canning jar, is ideal for storing the polish. Make sure the container is clean and dry before pouring the polish into it.
Lastly, keep the container away from direct sunlight. Sunlight can accelerate the breakdown of oils and other ingredients in the polish, resulting in a shorter shelf life. Find a location in your home that is cool, dry, and out of direct sunlight to store your homemade furniture polish.
To summarize, proper storage of your homemade furniture polish is key to maintaining its effectiveness and longevity. Keep it in a cool, dry place, away from heat and moisture, in an airtight container, and out of direct sunlight.
Conclusion
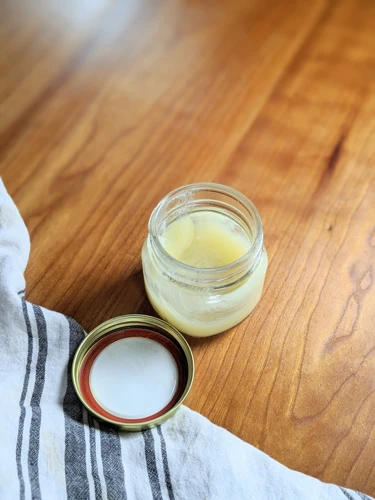
After following these simple steps, you should have a jar of homemade furniture polish that will not only leave your furniture looking beautiful and shiny, but also clean and protected. The beeswax and oils used in this recipe provide a natural barrier against dirt and moisture, making sure your furniture stays in top condition for years to come.
Not only is this DIY polish great for your furniture, it’s also a wonderful way to reduce your carbon footprint and avoid using harmful chemicals that can be found in store-bought products. By using natural ingredients, you can feel good about the products you’re putting in your home.
Remember to apply the polish sparingly and store it in a cool, dry place. Your furniture will thank you for the extra TLC. So why not give this easy, eco-friendly recipe a try and enjoy the benefits of natural furniture polish on your wooden pieces?
Frequently Asked Questions
FAQs
1. Can I use any type of beeswax for this recipe?
Yes, any type of beeswax will work for making furniture polish.
2. Is it necessary to use essential oils?
No, the essential oils are optional and can be left out if desired.
3. Can I use vegetable oil instead of olive oil?
Yes, any type of oil can be used in this recipe including vegetable oil.
4. How long does the polish last?
The furniture polish can last up to 6 months when stored in a cool, dry place.
5. Can I use this polish on any type of furniture?
It is safe to use on most types of furniture, but it’s always best to test on a small, hidden area first.
6. How often should I use the polish?
It depends on the amount of use the furniture gets, but generally using the polish once a month will keep it looking its best.
7. Can I make a bigger batch of the polish to save for later?
Yes, simply double or triple the recipe to make a larger batch of polish.
8. How do I apply the polish?
Apply a thin layer of polish to the furniture using a soft cloth and allow it to dry before buffing with another clean cloth.
9. Is the polish safe to use around children and pets?
Yes, the polish is safe for normal use, but it’s always wise to keep children and pets away from freshly polished furniture until it has fully dried.
10. Can I add more essential oils to the recipe for a stronger scent?
Yes, you can add more essential oils to the recipe, keeping in mind that a little goes a long way and that some oils may be overpowering in larger amounts.