As an artist or DIY enthusiast, have you ever found yourself bogged down by the task of replacing brushes that you thought were beyond repair? It can be a frustrating and expensive experience. But, what if we told you that there’s actually a way to revive those old and worn-out brushes? Intriguing, right? In this article, we’ll explore the benefits of reviving old brushes, how to assess whether your brushes are revivable, the tools needed for the job, step-by-step instructions on how to revive your brushes, and tips and tricks to maintain your brushes so that they last as long as possible. So, buckle up and let’s dive into the world of brush revival!
Why Revive Old Brushes?

Have you ever wondered what to do with your old and worn-out brushes? Instead of throwing them away, there are some simple and cost-effective ways to revive them. Reviving old brushes has both environmental benefits, by reducing waste, and cost savings, as you can avoid buying new brushes frequently. Before we dive deeper into how to revive old brushes, let’s explore the advantages of this practice in more detail. If you want to learn more about various types of brushes and how to choose the best one for your needs, check out our article on tips for choosing brushes.
Environmental Benefits
Reviving old and worn-out brushes doesn’t just benefit your wallet, it also has environmental benefits that are worth considering. By reusing old brushes instead of constantly buying new ones, you reduce the amount of waste that goes into landfills. This helps to conserve natural resources and minimize the impact on the environment. Plus, if you take good care of your brushes, you can extend their lifespan and reduce the frequency of replacements, which is ultimately more sustainable.
Additionally, cleaning and reviving old brushes is a great way to reduce the amount of harsh chemicals and solvents used in brush cleaning processes. Regular cleaning of brushes with natural and non-toxic solutions, such as soap and water, vinegar, and fabric softener, can reduce exposure to harmful cleaning chemicals, which is beneficial for both your health and the environment.
By investing in eco-friendly cleaning methods and taking care of your brushes, you can make a small yet meaningful contribution to a healthier environment. For more tips on environmentally-friendly ways to clean and maintain your brushes, check out our article on different types of cleaning brushes or read up on the benefits of cleaning with natural bristle brushes.
Cost Savings
Reviving old and worn-out brushes not only benefits the environment, but also saves you money in the long run. Instead of constantly buying new brushes, you can extend the life of your existing brushes with these simple techniques.
Cost Saving Benefits of Brush Revival
| Buying New Brushes | Reviving Old Brushes |
|---|---|
| Can be expensive, depending on the quality and quantity of brushes needed | Costs significantly less than buying new brushes |
| May need to constantly replace brushes due to wear and tear | Can prolong the life of brushes, allowing for continued use |
| May have to replace brushes due to improper cleaning or maintenance | Regular cleaning and maintenance can prevent the need for replacements |
As shown in the table above, constantly buying new brushes can be expensive and wasteful. By reviving old brushes, you can save money and reduce your environmental impact by reducing the amount of waste you produce.
Of course, some situations may require purchasing new brushes, such as when the brush bristles have become too short or the brush has become too damaged to be revived. However, reviving brushes can significantly cut down on the amount of new brushes you need to purchase.
In addition to cost savings, properly caring for your brushes can also ensure that they last longer and perform better. By following proper cleaning and maintenance techniques, you can keep your brushes in top condition and avoid the need for frequent replacements.
Properly cleaning and storing your brushes is an important part of maintaining their longevity. You can also make your own brush cleaners to use between deeper cleanings. Using high-quality brushes, such as those from top cleaning brush brands, can also help prolong the life of your brushes.
By reviving old brushes and properly maintaining them, you can save money, reduce waste, and ensure that your brushes perform at their best. For more tips on brush cleaning and maintenance, check out our guide on dos and don’ts of brush cleaning and maintenance or learn about the history and evolution of cleaning brushes.
When to Revive Old Brushes?
As an artist or craftsman, you may find yourself faced with the dilemma of deciding when to give up on an old and worn-out brush and purchase a new one. However, before you toss that brush away, consider reviving it using some easy and effective techniques. Assessing Brush Condition is crucial in determining whether or not it is worth the time and effort to restore a brush. In this section, we will explore the various factors to consider when deciding whether to revive old brushes or purchase new ones. For more information about regular brush maintenance, check out our article on cleaning with brushes.
Assessing Brush Condition
Before reviving old brushes, it’s important to assess their condition to determine if they can be salvaged. Brushes in poor condition may not be worth reviving and can affect the quality of your artwork. Below is a table that outlines the factors to consider when assessing the condition of your brushes.
| Factor | Assessment Criteria |
| Hairs | Are the hairs broken, frayed, or tangled? Are the hairs still firmly attached to the brush? |
| Shape | Is the shape of the brush intact, or is it misshapen or splayed? |
| Ferrule | Is the ferrule (the metal part that attaches the hairs to the handle) dented or rusted? |
| Handle | Is the handle cracked or broken? |
If the hairs are broken, frayed, or tangles, and if the brush is misshapen, splayed, or the ferrule and handle are damaged, it may be time to retire the brush. However, if the brush is still in relatively good condition, it can be revived using the methods outlined in this article. By reviving old brushes, you can both save money and reduce your impact on the environment.
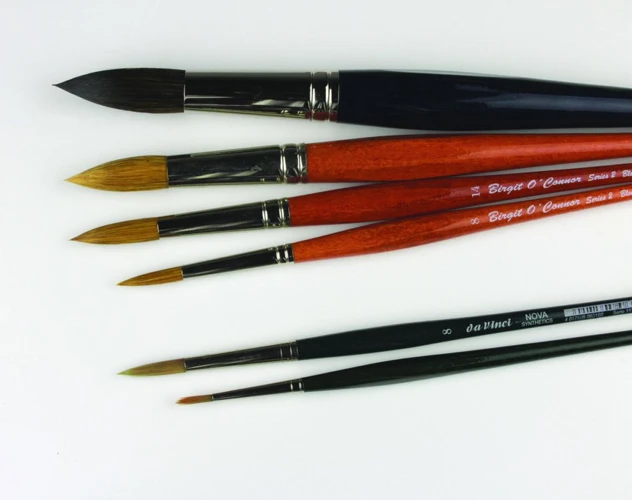
Types of Brushes to Revive
When it comes to reviving old brushes, it is important to consider the type of brush you are working with. Different types of brushes have different bristle materials and sizes, which can affect the success of the revival process. Here are some of the most common types of brushes that can be revived:
1. Paintbrushes
Paintbrushes are the most common type of brush that is used for painting a variety of surfaces. They come in different sizes, shapes, and bristle types. The bristles can be made of natural materials like hog hair or synthetic materials like nylon. It is important to note that synthetic bristles are more durable and easier to clean than natural bristles.
2. Makeup Brushes
Makeup brushes are another type of brush that can be revived with proper cleaning techniques. They are used for applying makeup products such as powder, blush, and foundation. These brushes are often made of synthetic materials like nylon or natural materials like goat hair. It is essential to clean makeup brushes regularly to prevent bacteria buildup.
3. Hair Brushes
Hair brushes are used to manage and style hair. They are made of a variety of materials, including plastic, wood, and metal. The bristles can be made of synthetic or natural materials like boar hair. It is recommended to clean hair brushes regularly to remove hair and debris buildup.
4. Wire Brushes
Wire brushes are used for heavy-duty cleaning tasks like removing rust or paint from metal surfaces. They come in different shapes and sizes and can have either brass or steel bristles. It is vital to wear protective gloves when using wire brushes to avoid injury.
By considering the type of brush you are working with, you can determine the best way to revive it and ensure it stays in good condition.
Tools Needed
To effectively revive old and worn-out brushes, you’ll need to have a few essential tools at your disposal. These tools will not only remove any built-up paint and debris but also help restore the shape and texture of the bristles. Here are the indispensable tools required for successful brush revival: a sturdy wire brush, soap and water, vinegar, and fabric softener. With these tools, you’ll be able to breathe new life into your favorite brushes and save yourself the expense of buying new ones.
Wire Brush
One of the essential tools needed for reviving old and worn-out brushes is the wire brush. A wire brush is a cleaning tool that is used to remove tough stains, paint, rust, and other debris from hard surfaces. It is ideal for cleaning brushes with dried paint or other tough-to-remove substances. The wire brush comes in different types and sizes, and it’s important to select the right type of wire brush for the job.
To use a wire brush effectively, it’s important to apply enough pressure to remove the debris, but not too much pressure that it damages the bristles of the brush. It’s also important to choose the correct gauge of wire brush depending on the type and thickness of the bristles of the brush being cleaned.
Here is a table of the different types of wire brushes and their suitable applications:
| Wire Brush Type | Suitable Applications |
| Carbon Steel Wire Brush | Removal of rust or paint from metal surfaces |
| Brass Wire Brush | Cleaning delicate surfaces, such as glass or sensitive metal surfaces |
| Stainless Steel Wire Brush | Cleaning and texturing metal surfaces, including removal of heavy rust or paint |
| Nylon Wire Brush | Cleaning sensitive surfaces, including finished wood or painted surfaces |
It’s important to note that, for reviving and cleaning brushes, a nylon wire brush is the best option to use. This is because its bristles are softer and gentler on brushes, reducing the chances of damaging or scrubbing off the bristles. The nylon wire brush can easily remove any dry paint and dirt in the bristles of your brush without applying too much pressure. It is important to choose the right type of wire brush for the job to avoid damaging the brush you are trying to revive.
Soap and Water
When it comes to cleaning old and worn-out brushes, using soap and water is a reliable and effective method. This is particularly true for brushes used with water-based paints such as acrylics and watercolors. Below are the steps to follow when reviving your brushes using soap and water.
| Step 1: | First, remove any excess paint from the brush by wiping it off onto a paper towel or cloth. Be gentle so as not to damage the bristles. |
| Step 2: | Then, wet the brush bristles with warm water. Avoid using hot water as it can damage the bristles or cause them to deform. |
| Step 3: | Next, apply a small amount of dish soap to the brush bristles. Work the soap into the bristles using your fingers or a brush cleaning tool, creating a lather. |
| Step 4: | Rinse the brush bristles thoroughly under running water until no soap remains. Gently squeeze out any excess water from the brush bristles. |
| Step 5: | Repeat the process if needed until the brush bristles are clean and free of paint residue. |
It’s important to note that when cleaning brushes with soap and water, it’s best to use a mild soap like dish soap. Avoid using harsh chemicals or solvents, as these can damage the bristles or affect the longevity of the brush. After cleaning with soap and water, you can proceed with other methods like soaking in vinegar or fabric softener to further restore the brush to its original condition.
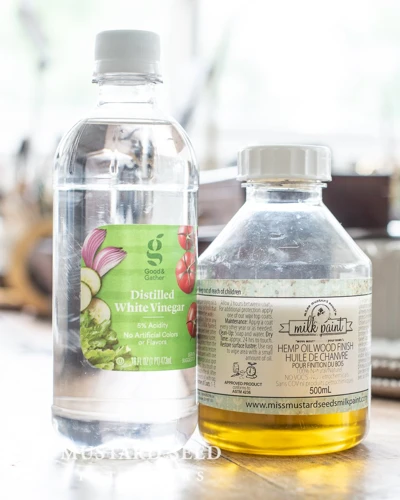
Vinegar
Vinegar is a powerful natural cleaning agent that can effectively remove built-up grime and dirt from old and worn-out brushes. It is a safe and eco-friendly alternative to harsh chemical cleaners, making it an ideal choice for those who want to revive their brushes without causing harm to the environment.
To use vinegar to clean your brushes, you’ll need to create a solution by mixing vinegar and water in a ratio of 1:2. This means one part vinegar to two parts water. You can use any type of vinegar, but white vinegar is the most commonly used variety.
Vinegar cleaning solution ratio: 1 part vinegar to 2 parts water
Once you’ve mixed the solution, submerge the brushes in the mixture and let them soak for up to an hour. This will help break down any buildup on the bristles. After soaking, rinse the brushes under cold water until the water runs clear.
Steps for using vinegar to clean brushes:
| Steps | Description |
|---|---|
| 1. | Mix vinegar and water in a ratio of 1:2 |
| 2. | Submerge brushes in the mixture and let them soak for up to an hour |
| 3. | Rinse brushes under cold water until the water runs clear |
After cleaning with vinegar, you can rinse the brushes once more with warm water and mild soap to remove any remaining vinegar smell.
It’s important to note that while vinegar is a safe and effective cleaner, it can damage natural bristles like those made from animal hair. If your brushes have natural bristles, it’s best to avoid using vinegar and opt for a gentler cleaning solution instead.
Vinegar is a cheap and effective cleaning solution that can help revive old and worn-out brushes. It’s a great alternative to harsh chemicals and is safe for the environment. Remember to always rinse thoroughly after using vinegar and avoid using it on natural bristle brushes.
Fabric Softener
Fabric softener is another method to revive old and worn-out brushes. Using fabric softener will not only clean your brushes but also help soften the bristles. Here is a step-by-step guide on how to use fabric softener to revive your paint brushes:
- Step 1: Prepare your materials
- Step 2: Mix the fabric softener with water
- Step 3: Soak the brushes in the mixture
- Step 4: Rinse the brushes
- Step 5: Dry the brushes
- Step 6: Repeat if necessary
Before using fabric softener on your brushes, make sure that you have the necessary materials. You will need a container, water, and fabric softener.
Mix equal amounts of water and fabric softener in the container. Stir the mixture well.
Soak the brushes in the mixture for about 30 minutes. This will allow the bristles to absorb the fabric softener, which will help soften them.
After soaking, rinse the brushes with warm water to remove any remaining fabric softener.
Gently squeeze out any excess water from the brushes and shape the bristles. Leave them to dry in a well-ventilated area.
If your brushes are still stiff, repeat the process.
Fabric softener is a great alternative for those who find wire brushing or soaking in vinegar too harsh for their brushes. It is a gentle yet effective way to bring life back to your old and worn-out brushes. However, it is important to note that fabric softener may not be suitable for all types of brushes, so be sure to check the manufacturer’s instructions before using this method.
How to Revive Your Brushes

Now that you have assessed the condition of your old and worn-out brushes and have gathered the necessary tools, it’s time to revive your brushes. Don’t throw them away just yet! By following these simple tips and tricks, you can bring new life to your brushes and save money in the process. Follow these step-by-step instructions to learn how to revive your brushes using a wire brush, soap and water, vinegar, and fabric softener. With just a little bit of effort, your brushes can be as good as new. Let’s dive in!
Using a Wire Brush
One method for reviving old brushes is by using a wire brush. This can help remove excess paint and restore the bristles to their original shape. Here are the steps to use a wire brush:
- Step 1: First, gather all the necessary materials, including a wire brush and a container of warm water.
- Step 2: Dip the brush into the water, making sure that the bristles are fully submerged.
- Step 3: Begin using the wire brush to gently brush the bristles in a back-and-forth motion.
- Step 4: Continue brushing until all the excess paint has been removed and the bristles are soft and pliable.
- Step 5: Rinse the brush thoroughly in warm water to remove any remaining paint or debris.
It’s important to note that wire brushes should be used with caution as they can damage delicate bristles. If you have a brush with very delicate bristles, consider using a softer cleaning method such as cleaning with soap and water or soaking in a vinegar solution.
Cleaning with Soap and Water
Cleaning with Soap and Water is a simple yet effective way to revive old and worn-out brushes. This method is particularly suitable for brushes used with water-based paints, such as acrylics or watercolors. Here’s how you can do it:
1. Fill a container with lukewarm water. You can use a plastic tub, a bucket, or your sink.
2. Add a small amount of mild dish soap to the water. You don’t need much – a few drops should be enough.
3. Swirl the brush in the soapy water, making sure the bristles are fully submerged. Use your fingers to gently massage the bristles, working the soap into the fibers.
4. Rinse the brush thoroughly under running water. Make sure all the soap is washed away.
5. Gently shake out any excess water from the brush.
6. Use a clean cloth or paper towel to pat the bristles dry. Be careful not to pull or twist the bristles, as this can damage them.
7. Shape the brush to its original shape. While the bristles are still slightly damp, gently reshape them with your fingers, making sure they’re pointing in the right direction.
It’s important to note that this method may not work with extremely dirty or caked brushes. In such cases, you may need to use a more intensive cleaning method, or even resort to using a wire brush or vinegar solution.
Here’s a summary of the steps for cleaning with soap and water:
| Step 1: | Fill a container with lukewarm water |
| Step 2: | Add a small amount of mild dish soap to the water |
| Step 3: | Swirl the brush in the soapy water, making sure the bristles are fully submerged. Use your fingers to gently massage the bristles, working the soap into the fibers |
| Step 4: | Rinse the brush thoroughly under running water. Make sure all the soap is washed away |
| Step 5: | Gently shake out any excess water from the brush |
| Step 6: | Use a clean cloth or paper towel to pat the bristles dry. Be careful not to pull or twist the bristles, as this can damage them |
| Step 7: | Shape the brush to its original shape. While the bristles are still slightly damp, gently reshape them with your fingers, making sure they’re pointing in the right direction |
Following these steps should leave your brushes looking clean and new.
Soaking in Vinegar Solution
One effective way to revive your old and worn-out brushes is by soaking them in a vinegar solution. Vinegar is a natural and non-toxic substance that can help break down the buildup of paint and other substances on your brushes. Here’s how to do it:
| Step 1: | Fill a glass jar with vinegar. White distilled vinegar is the most commonly used type for this process. |
| Step 2: | Place your brushes in the jar, making sure they are completely submerged in the vinegar solution. |
| Step 3: | Let the brushes soak for several hours or overnight, depending on the level of buildup on the brushes. |
| Step 4: | After soaking, remove the brushes from the vinegar solution and rinse them thoroughly with water. |
| Step 5: | Reshape the bristles of the brushes with your fingers and let them dry completely before using them again. |
Soaking your brushes in vinegar is especially effective for removing paint buildup and can also help restore the softness of the bristles. However, it’s important to note that vinegar may not be suitable for all types of brushes, particularly those with delicate or natural bristles, as it can potentially damage them. Be sure to assess the condition of your brushes before attempting this method.
Softening with Fabric Softener
Softening your old and worn-out brushes with fabric softener is another great way to revive them. This method works particularly well for brushes with stiff bristles that have been left to dry out for too long, as it helps to loosen up the bristles and restore their flexibility.
To soften your brushes with fabric softener, you will need the following tools and materials:
| Tools | Materials |
| Bucket | Fabric softener |
| Water | Soft-bristled brush |
Here’s how to do it:
1. Fill a bucket with warm water and add a capful of fabric softener.
2. Submerge the brush in the solution, making sure that the bristles are fully covered.
3. Leave the brush to soak for a few hours or overnight, depending on how stiff the bristles are.
4. Remove the brush from the solution and rinse it thoroughly under running water.
5. Use a soft-bristled brush to gently comb through the bristles, starting at the base and working your way up to the tips. This will help to loosen up any remaining stubborn paint.
6. Rinse the brush once again, and gently squeeze out any excess water.
7. Reshape the bristles with your fingers, making sure they are even and not clumped together.
8. Leave the brush to dry completely before using it again.
Remember that fabric softener can be harsh on some types of brushes, so it’s important to test a small area first to make sure that it doesn’t damage the bristles. This method works best for natural hair bristle brushes, but can also be used on synthetic brushes with caution.
By taking the time to revive your old and worn-out brushes, you’ll not only be saving money, but you’ll also be doing your part for the environment by reducing waste. With a little bit of care and the right tools, your brushes will be as good as new and ready to tackle your next painting project.
Drying and Storing Your Brushes
As important as it is to revive old and worn-out brushes, it is equally important to learn how to properly dry and store them. Without proper drying and storage techniques, your brushes may become damaged or unusable after only a few uses. After investing time and effort into reviving your brushes, it’s important to take the necessary steps to ensure they remain in good condition so you can continue creating works of art with them for years to come. So, let’s take a look at some tips and tricks on how to properly dry and store your brushes.
How to Properly Dry Brushes
Once you have cleaned your brushes thoroughly, it is important to properly dry them to avoid any damage to the bristles. To properly dry your brushes, follow these steps:
- Remove Excess Water: Begin by gently squeezing out any excess water from the bristles. Use a paper towel or a clean cloth to remove any remaining moisture from the brush.
- Reshape the Brush: Reshape the bristles of your brush into their original form with your fingers. This is especially important for brushes with natural hair bristles, as they can lose their shape when wet.
- Dry Flat: Lay your brushes flat on a clean surface to dry. This will help maintain the shape of the brush and prevent any excess water from pooling at the base of the bristles. Avoid standing brushes up to dry, as this can cause water to run down into the ferrule, loosening the glue holding the bristles in place.
- Avoid Heat: Do not use a hair dryer or any other heat source to dry your brushes, as this can damage the bristles and cause them to lose their shape.
- Wait for Complete Drying: Allow your brushes to dry completely before using them again. This will ensure that no moisture is left in the bristles, which can lead to mold and mildew growth.
Properly drying your brushes can help extend their lifespan and prevent damage to their bristles. Make sure to follow these steps every time you clean your brushes to maintain their quality and effectiveness.
Storing Brushes After Use
After cleaning and drying your brushes, proper storage is essential to keep them in good condition for future use. Here are some tips and tricks for storing your brushes after use:
| Tip: | Description: |
| 1. | Store brushes vertically with the bristles facing up. This will prevent your brushes from getting bent out of shape and protect the bristles from damage. |
| 2. | Consider using a brush holder or roll-up case to keep your brushes organized and protected. This can also be helpful for taking your brushes with you when you’re on-the-go. |
| 3. | Avoid storing brushes in sealed containers or bags, as this can cause moisture to build up and lead to mold growth or bristle damage. |
| 4. | Keep your brushes in a cool, dry place away from direct sunlight, as heat and exposure to moisture can cause the bristles to warp or dry out. |
| 5. | Separate your brushes by type and size to help you easily find the brush you need for a particular task. |
| 6. | Inspect your brushes regularly for signs of damage or wear, and replace them as needed. Proper storage can help extend the life of your brushes, but eventually, they will need to be replaced. |
By following these tips and tricks for storing your brushes after use, you can help ensure that your brushes stay in good condition and are ready for your next project. Remember to always clean and dry your brushes thoroughly before storing them, and keep them organized and protected to help prolong their lifespan.
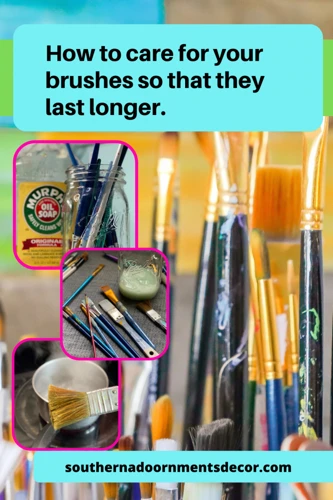
Tips and Tricks to Maintain Brushes
Keeping your brushes in good condition is essential for achieving professional results in your painting projects. With the right care and maintenance, you can extend the life of your brushes and maximize their performance. In this section, we will share some tips and tricks to help you maintain your brushes for years to come. From regular cleaning to preventing paint from drying on your brushes, we’ll cover everything you need to know to keep your brushes in top shape. So, let’s dive in and learn how to take care of your brushes like a pro!
Regular Cleaning
It is important to regularly clean your brushes to maintain their quality and prolong their lifespan. Here are some tips for effectively cleaning your brushes:
- Immediately after use, wipe off excess paint using a paper towel or cloth.
- Rinse the brush under running water to remove any remaining paint.
- Clean the bristles by using a brush cleaning solution or soap and water. Gently massage the bristles, working the cleaner into the brush, and then rinse thoroughly.
- Dry the brush gently, using a clean towel or cloth to remove excess water.
- Reshape the bristles by gently forming them back into their natural shape.
- Allow the brush to air dry completely before using or storing it. Avoid using a hairdryer to speed up the process as this can damage the bristles.
By incorporating regular cleaning into your brush maintenance routine, you can prevent paint build-up and keep your brushes in top condition for longer.
Preventing Paint from Drying on Brushes
One of the best ways to extend the life of your brushes is to prevent paint from drying on them. Here are some tips to help you do just that:
- Clean your brushes: Before dipping your brushes into paint, make sure they are clean and free of any old paint residue. If you’re switching between colors, rinse your brush thoroughly with soap and water or use a brush cleaner.
- Use enough paint: Avoid using too little paint, which can result in the brush scratching the surface and leaving behind paint residue. Use enough paint to allow your brush to glide smoothly without damaging the bristles.
- Avoid letting brushes sit in water: While it may seem logical to leave your brushes to soak in water to prevent paint from drying on them, this can actually cause the wood or metal to become warped or rusted. Instead, use a container with a brush holder to keep the brush suspended in the water just enough to keep the bristles moist.
- Avoid leaving brushes on surfaces: If you need to pause your work, don’t rest your brush on the surface as this may cause the bristles to spread and lose their shape. Instead, use a brush holder to keep the bristles clean and in their original shape.
- Store your brushes properly: When you’re done with your work, always make sure to clean and store your brushes properly. Hang them bristles-down or lay them flat to dry, and store them in a dry place in their original cover or wrapping. This will help keep the bristles from getting damaged or losing their shape while also preventing any residual paint from drying on them.
By following these tips on preventing paint from drying on your brushes, you can help extend their life and maintain their quality for your future art projects.
Proper Use and Handling of Brushes
When it comes to maintaining the longevity of your paint brushes, proper use and handling is essential. Here are some tips:
| Tip | Description |
|---|---|
| Use the right brush for the job | Using a brush that is too big or too small for the task can damage the bristles and decrease its effectiveness. |
| Avoid using brushes on rough surfaces | Brushes are not intended to be used on rough surfaces such as concrete or brick. This can cause the bristles to damage or wear down quickly. |
| Don’t apply too much pressure | Applying too much pressure can cause the bristles to bend and lose their shape. This can also lead to paint seeping into the ferrule and causing damage. |
| Use gentle strokes | Gentle strokes will preserve the shape and integrity of your brush. Avoid using a back-and-forth motion, which can cause the bristles to splay out. |
| Clean brushes immediately after use | Leaving brushes coated in paint for a prolonged period can cause the bristles to harden and become difficult to restore. |
| Store brushes properly | Store brushes upright or hanging, with the bristles facing upwards or downwards. Avoid resting the bristles on a surface as this can cause them to bend and damage. |
| Protect brushes during transportation | If you need to transport your brushes to a different location, store them in a brush holder or wrap them carefully in paper or cloth. |
Using your brushes properly and handling them with care can extend their lifespan and improve their overall performance. By following these guidelines, you can ensure that your brushes are always in good condition and ready to use for your next painting project.
Conclusion
In conclusion, reviving old and worn-out brushes is not only eco-friendly but also a cost-effective approach to maintaining quality tools for your painting projects. By assessing the condition of your brushes and using the appropriate tools such as a wire brush, soap and water, vinegar, or fabric softener, you can restore the life of your brushes and avoid the need for disposing of them unnecessarily.
It is important to note that proper maintenance and care of your brushes can also prevent them from becoming worn-out or damaged in the first place. Keeping them clean and preventing paint from drying on them by using proper techniques can extend their lifespan and save you money in the long run.
Remember to always properly dry and store your brushes after use to ensure they stay in good condition. By following these tips and tricks, you can keep your brushes in great shape for your next painting project.
Overall, with just a bit of effort and the right tools, you can revive your old brushes and continue to use them for years to come. Not only will you save money and reduce waste, but you’ll also have the satisfaction of knowing you’re doing your part for the environment.
Frequently Asked Questions
Can I revive all types of brushes?
No, some brushes may be too damaged to revive, and some may not respond well to certain cleaning methods.
What are the benefits of reviving old brushes?
Reviving old brushes can save you money and reduce waste, while also helping you maintain the quality of your work.
How often should I clean my brushes?
It is recommended to clean your brushes after every use to prevent paint from drying on the bristles and to extend the life of the brush.
What should I do if paint has already dried on my brush?
You can try soaking the brush in a vinegar solution or using a brush-cleaning product specifically designed for dried paint.
How long should I soak my brushes in the vinegar solution?
Soak your brushes for about 30 minutes, then rinse thoroughly with water and reshape the bristles while they are still wet.
Why should I use fabric softener to revive my brushes?
Fabric softener can help make your brushes softer and more pliable, which can improve their performance and extend their lifespan.
How should I store my brushes?
Store your brushes in a dry place with the bristles facing up or hanging upside down to prevent damage and maintain their shape.
Can I use dish soap to clean my brushes?
Yes, dish soap can be effective for cleaning brushes, but be sure to rinse them thoroughly to remove all soap before using them again.
What are some signs that indicate I need to revive my brushes?
If your brushes are frayed, have hardened bristles, or are not applying paint evenly, it may be time to revive them.
Can I use the same cleaning method for different types of paint?
No, different types of paint may require different cleaning methods. Consult the instructions on your paint or ask a professional for guidance.