
As polishing is a crucial step in achieving a flawless finish on any surface, the use of spray polish has become increasingly popular. However, with so many different types of sprays and polishes available, it can be confusing to choose the right one for your needs. Additionally, proper application and preparation are crucial for achieving a streak-free finish. In this article, we will provide step-by-step guidance on selecting the appropriate spray polish for your surface, preparing it for polishing, applying the spray correctly, and special techniques for achieving a streak-free finish on glass surfaces.
Choosing the Right Polish and Spray
When it comes to spray polishing, selecting the right product is crucial in achieving a streak-free finish. However, with numerous options available, it can be perplexing to choose the ideal polish and spray for your surface. Factors such as the type of spray and the right polish for the material must be considered. Additionally, it’s essential to know the difference between aerosol and pump polishes and the benefits of spray polish versus traditional polish. In this section, we will discuss how to choose the right polish and spray and its impact on achieving the perfect shine for your surface. To learn more about the benefits of spray polish versus traditional polish, check out our detailed article.
Selecting the Right Type of Spray
There are several types of spray polishes available in the market, each suitable for various surfaces and finishes. To achieve the desired results, it is essential to choose the right type of spray for the job at hand. The following table outlines some of the common types of spray polishes and the surfaces they work best on:
| Spray Polish Type | Suitable Surfaces |
|---|---|
| All-Purpose | Wood, metal, plastic, glass, and ceramic surfaces |
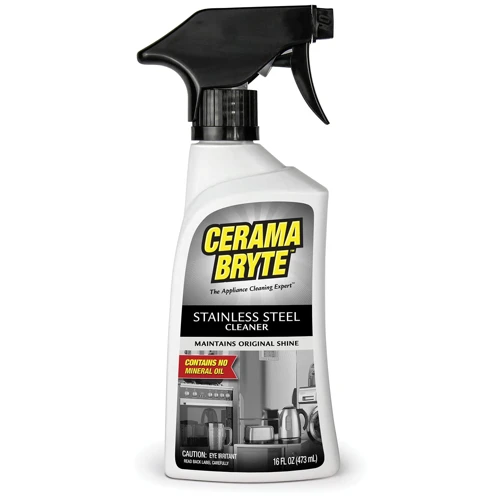
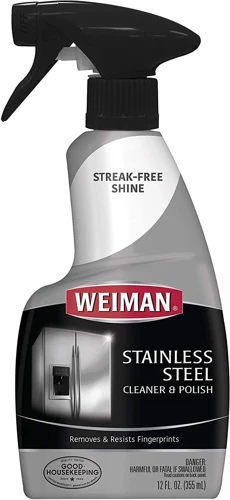
| Stainless Steel | Stainless steel appliances and fixtures |
| Glass | Glass surfaces, including mirrors and windows |
| Furniture | Wooden furniture surfaces |
All-purpose spray polishes are suitable for a wide range of surfaces, making them a versatile option for general use. However, for specific surfaces such as stainless steel or wood furniture, it is best to use specialized spray polishes designed for those materials. If you are unsure which spray polish to use for a particular surface, refer to the manufacturer’s instructions or seek advice from a professional.
If you are looking for top spray polishing products, you can check out our article on Top Spray Polishing Products for Appliances. If you want to apply spray polish on wood furniture, be sure to read our guide on How to Apply Spray Polish on Wood Furniture.
Alternatively, you may also want to consider the difference between aerosol and pump sprays by reading our article on Aerosol vs. Pump Polishes: Which One Should You Use?
Choosing the Right Polish for the Surface
When it comes to choosing the right polish for the surface, it’s important to consider the material you’re working with. Using the wrong polish can lead to damage or a streaky finish. Here are some factors to consider:
| Surface Material | Recommended Polish Type |
|---|---|
| Painted Surfaces | A mild to medium abrasive polish can be used on painted surfaces. This will help to remove small imperfections and bring out the shine. |
| Chrome Surfaces | Chrome polishes are specifically designed for use on chrome surfaces. These polishes will provide a protective layer and help to prevent rust and corrosion. |
| Plastic Surfaces | There are specific polishes designed for use on plastic surfaces. These polishes are less abrasive and will prevent scratching and damage. |
| Metal Surfaces | For metal surfaces, use a metal polish that is appropriate for the type of metal you’re working with. Some metals, like aluminum, require a specific type of polish to avoid damage. |
It’s important to note that there are also multipurpose polishes available that can work on a variety of surfaces. However, for the best results, it’s recommended to use a polish specifically designed for the material you’re working with. Additionally, always read the manufacturer’s instructions and warnings before using any polish.
Preparing the Surface for Spray Polishing
Before jumping right into spray polishing, it’s important to properly prepare the surface to achieve the best results. This process involves a few crucial steps, including thoroughly cleaning the surface to remove any dirt, debris, or residue that might interfere with the polishing process. Additionally, any visible scratches and scuffs should be addressed before applying the spray polish, as they can be further magnified or worsened by the polishing process. Finally, it’s important to protect any sensitive areas that may be affected by the spray or the polishing process, such as plastic or rubber trims. By completing these steps, you can ensure that your spray polishing achieves the desired streak-free finish.
Cleaning the Surface Thoroughly
One of the most critical steps in achieving a streak-free finish with spray polishing techniques is cleaning the surface thoroughly. This step ensures that the surface is free from any dust, dirt, or grime, which could affect the final result.
To clean the surface correctly, you will need a few supplies, such as a bucket, some soap, and a soft-bristled brush. Here are some steps for cleaning the surface thoroughly:
- Gather your supplies: Start by getting everything you need to clean the surface. Make sure that your cleaning supplies are suitable for the specific surface you are working on.
- Remove any loose dirt or debris: Use a soft-bristled brush or a vacuum cleaner to remove any loose dirt, dust, or debris from the surface.
- Mix soap and water: Fill a bucket with lukewarm water and add a small amount of soap. Make sure that you use the right soap for the surface you are cleaning. For example, you may need a specific type of soap for a car or furniture.
- Clean the surface: Dip your soft-bristled brush in the soapy water and gently scrub the surface, making sure to cover any nooks and crannies. Rinse the brush frequently in the water to avoid spreading dirt or grime. Be careful not to apply too much pressure while scrubbing, as this could scratch the surface.
- Rinse the surface: Rinse the surface thoroughly with clean water to remove all traces of soap. Be sure to rinse away all of the soap residue, as this can affect the finish.
- Dry the surface: Use a soft, lint-free cloth to dry the surface completely. Make sure that you leave no wet spots, as this could cause streaking or water spots.
By following these steps, you can ensure that the surface is clean and ready for spray polishing application. Remember, taking the time to clean the surface thoroughly is crucial for achieving a streak-free finish.
Removing Scratches and Scuffs
One of the most important steps in preparing a surface for spray polishing is removing scratches and scuffs. These imperfections can cause the spray polish to appear uneven and may even cause further damage to the surface if left untreated.
To remove scratches and scuffs, you will need an abrasive compound and a buffing pad. The type of compound and pad you use will depend on the surface you are working on. For example, a softer pad and compound may be suitable for polishing car paint, while a more abrasive pad and compound may be needed for metal surfaces.
First, you should test the compound on a small, inconspicuous area of the surface to ensure that it is compatible and effective. Next, apply a small amount of compound to the pad and work it into the scratched or scuffed area using light pressure and circular motions.
Be sure to work in small sections at a time, and keep the pad moving to avoid overheating and damaging the surface. Once the scratches and scuffs have been removed, wipe the surface clean with a microfiber cloth and inspect the area for any remaining imperfections.
Repeat the process as needed, working on one section at a time until the entire surface is smooth and free of scratches and scuffs.
After this step, the surface is now ready for the next stage of preparing it for spray polishing.
Protecting Sensitive Areas
When it comes to spray polishing, it is important to take necessary precautions to protect sensitive areas from accidental exposure to the chemicals in the spray. Here are some steps you can take to protect these areas:
- Cover the surrounding areas: Cover the areas surrounding the surface you plan to polish with a plastic sheet or a drop cloth to ensure that no spray gets on unintended areas. This is especially important if you plan to polish a car or any other object with sensitive areas, such as headlights and taillights.
- Mask off sensitive areas: Use painter’s tape to mask off any sensitive areas, such as rubber trim, upholstery, and other areas that may be damaged by the spray polish. This will help to prevent any accidental harm to these areas and ensure that they remain unaffected by the chemicals in the polish.
- Choose the right polish: Choosing the right type of spray polish for the surface you plan to polish is crucial. If the surface is sensitive, use a gentle spray polish that is designed specifically for sensitive surfaces. This will reduce the risk of damaging the surface and ensure that it remains protected throughout the polishing process.
- Avoid harsh chemicals: Some spray polishes contain harsh chemicals that can damage sensitive areas. Read the label carefully and ensure that the spray polish you choose is safe to use on the surface you plan to polish. If in doubt, test the spray polish on a small inconspicuous area before proceeding with the entire surface.
- Work in a well-ventilated area: Spraying polish creates fumes, so it is important to work in a well-ventilated area to reduce the risk of inhaling harmful chemicals. Open windows and doors or use a fan to ensure that there is proper ventilation while you work.
By taking these steps, you can ensure that sensitive areas remain protected while you polish the surface, and achieve a beautiful, streak-free finish without any harm.
Applying Spray Polish Correctly
The application of spray polish is a crucial step in achieving a streak-free finish on any surface. However, incorrect application can result in wasted product, uneven surfaces, and unsatisfactory results. Paying attention to the correct techniques is of paramount importance. In this section, we will explore the correct way to apply spray polish, from shaking the can to buffing the surface with a microfiber cloth. Keep reading to learn how to get the most out of your spray polish and achieve that perfect finish.
Shaking the Spray Can Before Use
Before using the spray can, it is important to shake it thoroughly to ensure the contents are well mixed. Failure to do so can result in uneven application of the spray polish, resulting in an unsightly finish. The contents of the can may settle or separate over time, so it is important to give it a good shake before each use. Follow these tips to shake the spray can properly:
- Tip #1: Hold the can upright and away from your face.
- Tip #2: Ensure the nozzle is pointed away from any people, pets, or objects.
- Tip #3: Shake the can vigorously for at least 30 seconds to a minute.
- Tip #4: If the can has been sitting for an extended period of time, it may be necessary to shake it for a longer period of time to ensure proper mixing of the contents.
- Tip #5: If the can continues to sputter or produce uneven spray after shaking, it may be necessary to replace the nozzle or clean it with warm water to remove any blockages.
Proper shaking of the spray can before use is a simple but important step to ensure a streak-free and even finish. Be sure to follow these tips to shake the can properly before use.
Applying in a Well-Ventilated Area
It is crucial to apply spray polish in a well-ventilated area to avoid inhaling harmful chemicals. When using spray polish, it releases chemicals in the form of fumes that can be hazardous to health. These fumes can cause dizziness, headaches, and even nausea. In severe cases, fumes can cause respiratory problems and other health issues.
To highlight the importance of a well-ventilated area, we can create a table. The table will provide an organized way to present the information and draw attention to the importance of this step.
| Step | Description |
|---|---|
| Step 1 | Choose a well-ventilated area for the application of the spray polish. |
| Step 2 | Make sure there is proper ventilation in the room, such as an open window, door, or fan. |
| Step 3 | Avoid using spray polish in confined areas or small rooms. |
| Step 4 | Wear a face mask or respirator if there is limited access to fresh air. |
By following these steps, users can ensure that they are working in a safe environment while applying spray polish. Applying spray polish in a well-ventilated area not only protects your health but also guarantees that the product will be applied correctly, resulting in a streak-free finish.
Applying the Spray in Thin Layers
When applying spray polish, it’s critical to apply it in thin layers. Here are some tips for achieving a streak-free finish:
- Hold the can about 6-8 inches away from the surface: This distance allows for a more even distribution of the spray polish, reducing the risk of over-spraying and wasting product.
- Mist the surface evenly: Spray the polish evenly across the surface, being careful not to focus on one spot for too long. This can lead to an uneven finish and an excess amount of product in one area.
- Lift your finger off the spray nozzle: Once you’ve applied a thin, even layer of the spray polish, lift your finger off the spray nozzle to avoid overspray or dripping.
- Wait between coats: For best results, wait at least a minute or two between coats to give the polish time to dry. Applying several thin layers of polish is generally more effective than one thick layer, which can lead to streaking and uneven results.
Remember to use a microfiber cloth to buff the surface gently after applying the spray polish. This not only helps to remove any excess product, but it also helps to distribute the polish evenly and avoid streaks. By following these tips, you can achieve a beautiful, streak-free finish when using spray polish on your surfaces.
Using a Microfiber Cloth to Buff the Surface
When it comes to achieving a streak-free finish after spray polishing, the choice of cloth is just as important as the spray and polish. It’s best to use a microfiber cloth since it has a fine texture that doesn’t scratch surfaces, and it’s highly absorbent, which means it can pick up dust and dirt easily, leaving a clean and polished surface behind. Here’s how to use a microfiber cloth to buff the surface:
- First, fold the microfiber cloth into quarters to create multiple cleaning surfaces.
- Next, lightly spray the surface with the polish, making sure to apply it in thin layers for the best results.
- Using gentle, circular strokes, slowly work the polish into the surface with the microfiber cloth. Avoid pressing down too hard as this can cause streaks or scratches on the surface.
- As you buff, make sure to flip the cloth over to a clean side frequently to avoid spreading dirt and debris across the surface.
- Keep buffing until the surface looks clean and shiny. If you notice any streaks, simply re-fold the cloth and buff the affected areas gently until the streaks disappear.
Remember, when using a microfiber cloth to buff, it’s important not to use too much pressure or to over-buff the surface as this can cause damage. By following these steps, you can ensure that your polished surface looks smooth and streak-free.
Avoiding Over-Spraying and Wasting Product
When applying spray polish, it’s important to be mindful of how much product you’re using to avoid over-spraying and wasting precious polish. Here are a few ways to minimize wastage and ensure an even application:
- Start Small: Begin with a small amount of spray polish and gauge how far it goes. You can always apply more if needed, but it’s difficult to remove excess polish without starting the entire process over.
- Hold Can at Proper Distance: Holding the spray can too close to the surface can lead to over-spraying and uneven coverage. Always hold the can at the recommended distance suggested by the manufacturer on the label.
- Move the Can Gradually: When applying spray polish, use sweeping motions and gradually move the can from side to side or up and down to avoid saturating one particular area with too much product.
- Allow for Drying Time: Before applying additional layers, wait for the product to dry completely. This not only helps to build a better finish, but it also helps you evaluate how much product you really need to achieve the desired result.
By following these guidelines, you can ensure a more efficient use of spray polish and achieve a streak-free finish without wasting valuable product. So, take your time and work smart, not hard!
Special Techniques for Glass Surfaces
When it comes to achieving a streak-free finish on glass surfaces, it can be a bit more challenging than other surfaces. Glass has a tendency to show every smudge and streak, making it essential to use special techniques for polishing. Thankfully, with the right tools and a bit of know-how, you can achieve a crystal-clear result that will leave your glass surfaces looking flawless. In this section, we will explore the best techniques and products for polishing glass surfaces like a pro.
Choosing the Right Glass Cleaner
When it comes to cleaning glass surfaces, choosing the right cleaner is crucial for achieving a streak-free finish. Here are some factors to consider when selecting the right glass cleaner:
- Type of Glass: Different types of glass may react differently to certain cleaners. For example, tempered or coated glass may require a gentler cleaner than standard glass. It’s important to check the manufacturer’s guidelines for recommended cleaning products.
- Residue: Some glass cleaners may leave behind a residue that can contribute to streaking. Look for cleaners that are specifically formulated to leave no residue.
- Ammonia: While ammonia-based cleaners are effective at cutting through grease and grime, they can also be damaging to certain types of surfaces, such as tinted or coated glass. Opt for an ammonia-free cleaner if you’re not sure about the type of glass you’re cleaning.
- Foaming vs. Spray: Foaming cleaners may be easier to apply and control, but they can also leave behind more residue. Spray cleaners, on the other hand, can be more precise and have a lighter touch, but may require more effort to apply evenly.
By considering these factors, you can choose a glass cleaner that is best suited for your specific needs and the type of glass surface you’re working with.
Using a Squeegee for a Streak-Free Finish
For a streak-free finish on glass surfaces, it is highly recommended to use a squeegee. This tool is very efficient at removing excess water and cleaning solution, leaving a crystal clear surface behind.
How to Use a Squeegee:
| Step | Description |
|---|---|
| Step 1 | Start at the top of the glass surface and slowly pull the squeegee down. Use light pressure to avoid damaging the surface. |
| Step 2 | Wipe the squeegee blade with a clean cloth after each pass to remove excess water and cleaning solution. |
| Step 3 | Overlap each pass slightly to avoid leaving streaks or missed spots. |
| Step 4 | Work your way across the surface in a zigzag pattern, starting from the top and working downwards. |
| Step 5 | Use a dry microfiber towel to wipe any remaining moisture or streaks from the surface. |
| Step 6 | Repeat the process until the entire surface is streak-free and sparkling clean. |
By following these steps and using a squeegee correctly, you can achieve a professional-level cleaning result that will leave your glass surfaces looking their best. Don’t forget to also use a high-quality glass cleaner and a microfiber towel to avoid leaving any streaks or residue behind.
Using a Microfiber Towel to Buff the Glass Clean
When it comes to achieving a spotless and streak-free finish on glass surfaces, using a microfiber towel for buffing is a crucial step. The reason for this is that traditional towels or even paper towels can leave behind lint or fibers that can further mar the surface. On the other hand, microfiber towels are specifically designed to attract and trap any debris or residue on the glass surface.
Here are the steps to using a microfiber towel effectively for glass cleaning:
| Step 1: | Fold the microfiber towel in half and then in half again so that you have a small, manageable square. |
| Step 2: | Spray a small amount of glass cleaner onto the surface you want to clean. Be careful not to apply too much cleaner as this will require more effort to buff out any streaks or residue. |
| Step 3: | Using gentle circular motions, wipe the surface with one side of the microfiber towel. Be sure to cover every inch of the glass, including the edges. |
| Step 4: | Using the other side of the towel or a fresh towel, go over the surface one more time. This ensures that any remaining debris or residue is removed for a streak-free finish. |
By using a microfiber towel to buff the glass clean, you can be sure that the surface is left completely residue-free and with a sparkling finish. Just be sure to wash the towel regularly to avoid any build-up of dirt or debris that may affect the cleaning ability of the fabric.
Avoiding Direct Sunlight to Reduce Streaking
When it comes to cleaning glass surfaces, one of the most important factors to consider is the lighting conditions. Direct sunlight can cause streaking and make it difficult to achieve a truly streak-free finish. Here are some tips to help you avoid this problem:
- Choose the right time of day: One of the easiest ways to avoid direct sunlight is to choose the right time of day to clean your glass surfaces. Early morning or late afternoon, when the sun is low in the sky, is usually the best time.
- Use shade: If you must clean your glass surfaces during the day, try to use shade to your advantage. Work in areas that are shaded from direct sunlight, or use an umbrella or canopy to create your own shade.
- Clean the glass in sections: Another way to avoid streaking caused by direct sunlight is to clean the glass in sections. This will allow you to focus on one area at a time, reducing the amount of time the surface is exposed to direct sunlight.
- Use a cooler cleaning solution: Hot temperatures can also increase the risk of streaking. Try to use a cooler cleaning solution to reduce the chances of streaks and keep the glass from heating up too much.
By taking these steps, you can reduce the impact of direct sunlight on your glass surfaces and achieve a more streak-free finish. Remember to always work carefully and methodically, taking your time to avoid mistakes and ensure a clean, clear surface.
Conclusion
In conclusion, spray polishing is a convenient and effective way to achieve a streak-free finish on various surfaces. One key factor in achieving optimal results is choosing the right polish and spray for the surface being treated. It’s important to consider both the type of spray and the specific polish that is appropriate for the material being polished.
Another crucial step is properly preparing the surface to be polished by cleaning it thoroughly, addressing any scratches or scuffs, and protecting sensitive areas if necessary. By taking these steps, you can ensure that the spray polish will adhere properly and leave a flawless finish.
When it comes to applying the spray polish, it’s important to do so correctly. This involves shaking the spray can before use, applying in a well-ventilated area, and applying in thin layers to avoid over-spraying and wasting product. It’s also important to use a microfiber cloth to buff the surface and avoid leaving behind any streaks.
For glass surfaces, there are some special techniques that should be considered. These include choosing the right glass cleaner, using a squeegee for a streak-free finish, using a microfiber towel to buff the glass clean, and avoiding direct sunlight which can lead to streaking.
In summary, spray polishing is a great way to achieve a streak-free finish on various surfaces, but it’s important to follow the steps outlined in this article to ensure optimal results. By choosing the right products, preparing the surface properly, and applying the spray correctly, you can achieve a flawless finish that will leave your surfaces looking brand new.
Frequently Asked Questions
What is a spray polishing technique?
Spray polishing is a process that involves applying a spray-on polish to a surface to restore its shine and remove imperfections.
Is it necessary to use a specific type of spray for spray polishing?
Yes, it is important to choose a spray that is specifically designed for the type of surface you are polishing, such as metal, plastic, or glass.
What type of polish should I choose for the surface?
The type of polish you choose should depend on the material of the surface. For instance, for metal surfaces, you might want to use a polishing compound, while for plastics or painted surfaces, you’ll want a more gentle cleaner.
Is surface preparation important before spray polishing?
Yes, it’s crucial to prepare the surface properly before spray polishing. This ensures the best results and prevents damage to the surface.
How do I clean the surface beforehand?
You should start by removing any dirt, grime, or debris from the surface using a gentle cleaner and soft cloth. If there are any scratches or scuffs, you might need to remove them with a specialized product before you polish.
How do I protect sensitive areas during spray polishing?
You can protect sensitive areas by covering them with masking tape before you start spraying. This helps prevent the polish from getting onto areas where it shouldn’t be.
What precautions should I take before spraying?
Before using any spray product, be sure to shake the can well and apply in a well-ventilated area to avoid inhaling fumes. You should also wear gloves and protective eyewear to protect your hands and eyes.
What is the best way to apply spray polish?
It’s important to apply the spray in thin, even layers to avoid over-spraying and wasting product. Use a microfiber cloth to buff the surface gently until it’s shiny and streak-free.
Are there any special techniques for polishing glass surfaces?
Yes, to polish glass surfaces, you’ll need a specialized glass cleaner and a squeegee to remove any streaks. Use a microfiber towel to buff the surface after using the squeegee to ensure a clear and shiny finish.
Why should I avoid direct sunlight when polishing glass?
Direct sunlight can cause the cleaner to dry too quickly, leaving behind streaks and residue that are difficult to remove. It’s best to polish glass surfaces in shaded or indoor areas to avoid this issue.