
As we spend more time in our homes, we begin to notice the wear and tear that daily use can have on our furniture. Scratches, scuffs, and a lackluster shine can make even the sturdiest piece of wood furniture look dull and uninviting. Many commercial wood polishes on the market contain harsh chemicals, and their cost can add up over time. But have you ever thought about making your own wood polish? With just a few ingredients, you can create affordable, eco-friendly, and customizable wood polishes right at home. Here are five DIY recipes for homemade wood polish to give your furniture the shine and care it deserves.
Why make your own wood polish?
Maintaining the natural beauty of wooden furniture requires proper care and attention. One of the most essential things in the care and maintenance of wooden furniture is polishing. While there are many commercial wood polishes available in the market, many people prefer to make their own homemade wood polish. But why go through the trouble of making your own wood polish when there are plenty of options available at the store? Let’s take a look.
It’s affordable
Most commercial wood polishes can be expensive, especially the ones that contain natural ingredients. When you make your own wood polish, you can save a significant amount of money as the ingredients are usually readily available and cost-effective. You don’t have to replace the entire bottle of commercial polish if you run out. Instead, with homemade polish, you can make as much or as little as you need.
It’s eco-friendly
Many commercial wood polishes contain harsh chemicals that can be harmful to the environment. Homemade wood polish, on the other hand, can be made using natural ingredients like oils, vinegar, and citrus, making it environmentally friendly. You can also avoid using aerosol sprays by making your own polish, which further reduces the impact on the environment.
You can customize it
One of the biggest advantages of making your own wood polish is that you can customize it to suit your preference. You can choose from a variety of natural ingredients and create a polish that not only cleans and shines but also provides nourishment and protection to the wood. You can control the scent of the polish by adding essential oils of your choice.
In addition to the above benefits, homemade wood polish is also easy to make and can provide similar results to commercial polishes. However, it is crucial to select the right ingredients and use the proper application techniques to achieve the desired results. Before making homemade wood polish, it is recommended to research and experiment with different recipes to ensure compatibility with your furniture type and finish.
Using natural ingredients in your homemade wood polish can provide additional benefits to your furniture’s longevity and appearance. Knowing the difference between wax and polish can also help you decide which recipe is appropriate for your furniture.
It’s affordable
Maintaining the shine and beauty of your wooden furniture is crucial in keeping your home looking elegant and inviting. However, commercial wood polishes can sometimes be expensive, leaving you with no choice but to neglect the care of your wooden furniture. Fortunately, making your own homemade wood polish is possible, making it an affordable option for anyone looking to cut down on expenses while still taking care of their furniture’s maintenance. In this article, we’ll explore the affordability factor of homemade wood polishes and how they can help you save money without compromising the integrity of your furniture. And if you want to know more about choosing the right wood polish for your furniture or some common mistakes in polishing wood, you can check out the links in the next paragraphs.
It’s eco-friendly
Making your own wood polish is not only affordable, but also eco-friendly. By using natural ingredients instead of harsh chemicals, you can reduce your impact on the environment. Homemade wood polish does not contain any of the harmful chemicals found in commercially-produced polishes, which can be dangerous for your health and the environment. Many commercial wood polishes also come in aerosol cans that release harmful chemicals into the air.
Using natural ingredients is also better for the wood itself. Harsh chemicals in commercial polishes can strip the wood of its natural oils, leading to dryness and cracking over time. Homemade wood polish, on the other hand, helps to nourish and protect the wood.
Making your own wood polish allows you to be in control of what goes into it. You can choose to use organic ingredients, thereby reducing your exposure to pesticides and other harmful chemicals. You can also experiment with different recipes and find what works best for you and your specific furniture.
By making your own wood polish, you are not only saving money, but also taking a step towards a more eco-friendly and sustainable lifestyle.
You can customize it
When making your own wood polish, you have the advantage of being able to customize it to your liking. You can experiment with different ingredients to achieve the desired effect on your wood furniture or floors. One way to customize your wood polish is by adjusting the ratio of the ingredients used. For example, if you’re looking for a more moisturizing polish, you can increase the amount of oil used in your recipe. On the other hand, if you prefer a lighter polish that’s easier to buff, you can decrease the amount of oil and use more vinegar or tea.
Another way to customize your wood polish is by adding a few drops of essential oils. This not only adds a pleasant scent to the polish, but also provides additional benefits for your wood. Some essential oils, such as lemon and lavender, have natural antibacterial properties that can help clean and disinfect your wood surfaces. You can even combine different oils to create your own unique scent.
Lastly, you can experiment with different types of oils to see which ones work best for your wood. While olive oil is a popular choice, you can also try using coconut oil, jojoba oil, or even walnut oil. Each oil has its own unique properties and benefits for the wood. For example, coconut oil has a high level of saturated fats that help it penetrate deeper into the wood, while jojoba oil is known for its moisturizing and protective properties.
By customizing your own wood polish, you can ensure that it meets your specific needs and preferences. However, it’s important to remember that not all wood polishes are created equal. Before applying any homemade polish, be sure to read up on the best practices for wood polishing to avoid any common mistakes or damage to your furniture or floors. You can find helpful tips and tricks by visiting resources like /polish-wood-furniture/ or /common-mistakes-polishing-wood/.
How to make homemade wood polish
Making homemade wood polish is surprisingly easy, and it can be a fun DIY project for anyone looking to take a more hands-on approach to their home maintenance. Here are five different recipes to try out:
Recipe #1: Olive Oil and Vinegar
This is a time-tested recipe that is often recommended as a natural and effective way to polish wood. To make this polish, pour a quarter cup of white vinegar into a spray bottle and add a few drops of olive oil. Shake well, and then spray onto a microfiber cloth or directly onto the wood. Rub the polish onto the wood in a circular motion until it is absorbed. You can also add a few drops of essential oil to this recipe to add a pleasant scent.
Recipe #2: Beeswax and Essential Oils
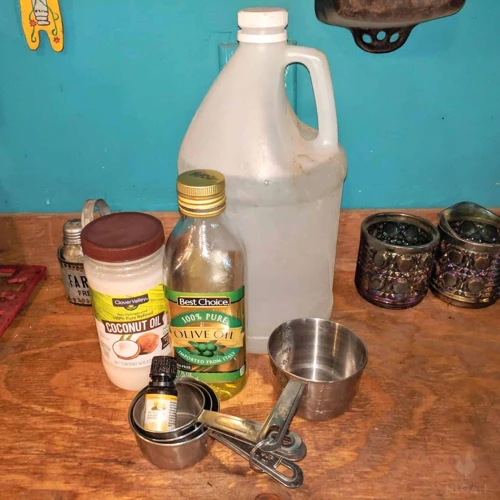
This recipe is great for people who like to experiment with scents and textures. You will need one cup of grated beeswax, one cup of almond oil, and a few drops of essential oils of your choice. Melt the beeswax in a small saucepan over low heat, then stir in the almond oil and essential oils. Once everything is combined, pour the mixture into a jar and let it cool. This recipe will make a solid polish that you can apply with a cloth.
Recipe #3: Citrus and Jojoba Oil
If you like the smell of citrus, this recipe is perfect for you. First, mix equal parts of jojoba oil and water in a spray bottle. Then, add a tablespoon of lemon or orange zest to the mixture. Shake well, and spray the mixture directly onto the wood or onto a cloth before polishing.
Recipe #4: Coconut Oil and Lemon Juice
This recipe is great for adding shine to your wood furniture. Mix two parts coconut oil and one part lemon juice in a bowl, and then apply the mixture to a cloth. Rub the cloth onto the wood in small circles, making sure to cover the entire surface. Once you’re finished, use a clean cloth to remove any excess.
Recipe #5: Tea and Olive Oil
This recipe uses the natural tannins in tea to help bring out the natural color of your wood. Steep a black tea bag in a cup of boiling water for about five minutes, and then let it cool. Mix the tea with a tablespoon of olive oil and pour into a spray bottle. Shake well, and then spray onto a cloth or directly onto the wood. Rub the polish onto the wood in a circular motion until it is absorbed.
All of these recipes are easy to make and can be customized to your liking. However, it’s important to note that not all wood polish recipes will work well on every type of wood. It’s always a good idea to test the polish on a small area of your furniture before applying it to the entire piece. For more information on choosing the right wood polish, check out this article.
Recipe #1: Olive oil and vinegar
One of the easiest and most popular DIY recipes for homemade wood polish is a simple mixture of olive oil and vinegar. This affordable and eco-friendly solution can be customized with essential oils for a pleasant scent, and it is safe to use on all finished wood surfaces. Before diving into the recipe, it’s important to understand the advantages of making your own wood polish. By doing so, you’ll have a better understanding of how it can benefit your home and furniture care routine. Want to learn more about the differences between wood wax and polish? Check out our guide to wood wax vs. polish.
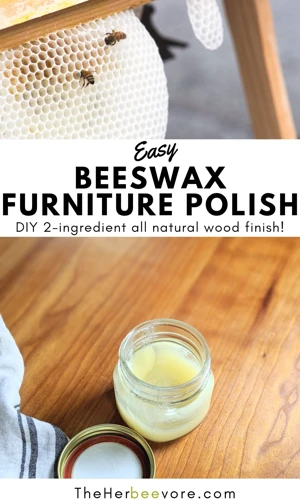
Recipe #2: Beeswax and essential oils
One of the best recipes for homemade wood polish is made with beeswax and essential oils. This polish is great for bringing shine and protection to your wooden furniture. Here’s the recipe:
- Melt 1 cup of grated beeswax in a double boiler.
- Remove from heat and add 1 cup of olive oil or coconut oil to the melted beeswax, stirring well.
- Add in 15-20 drops of your favorite essential oil, such as lavender or lemon. These oils will not only give your furniture a pleasant scent, but they also have natural cleaning and disinfecting properties.
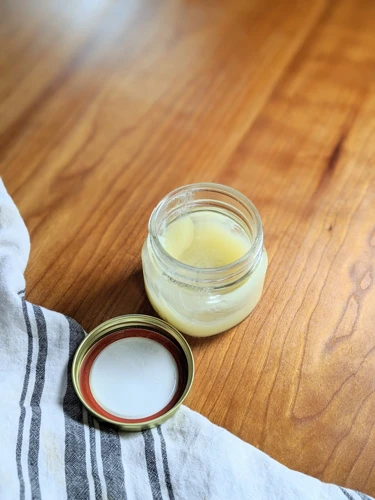
- Pour the mixture into a glass jar and let it cool to room temperature before using.
Note: If you prefer a firmer polish, add more beeswax, and if you prefer a more liquid polish, add more oil.
This DIY wood polish made with beeswax and essential oils is ideal for people who want an all-natural and safe solution for their wooden furniture. It’s important to note that this polish is safe for all types of wood, but it’s recommended to test it in a small area first.
If you’re looking for more tips on the best wood polish techniques, you can check out our article on the best wood polish techniques for more guidance. And if you want to know more about how to care for your wood floors, we also have an article on wood floor polish care that can help.
When polishing antique wood furniture, it’s recommended to follow some tips and tricks. You can find some of these tips in our article on polishing antique wood furniture tips and tricks.
Recipe #3: Citrus and jojoba oil
For a fresh and citrusy-smelling wood polish that’s also moisturizing for your wood furniture, try making a homemade wood polish using citrus and jojoba oil.
Ingredients:
- 1/4 cup of jojoba oil
- 1/4 cup of fresh-squeezed citrus juice (lemon, lime, or grapefruit)
Jojoba oil is a great oil to use for wood polish because it doesn’t go rancid, which means it can help preserve your wood furniture for a longer time. Citrus juice, on the other hand, contains natural cleaning agents and has a lovely refreshing scent.
Instructions:
- Mix the jojoba oil and citrus juice in a bowl until well combined.
- Transfer the mixture to a clean spray bottle.
- Shake well before use.
Note: Since the mixture contains fresh citrus juice, it’s best to store it in the fridge and use it within a week.
This wood polish is easy to make and safe for most types of wood furniture. However, it’s always a good idea to test a small, inconspicuous area before using any new solution on your furniture. If you’d like to learn more about wood polish that’s safe for all types of wood furniture, check out our article on wood polish safe for all wood.
Recipe #4: Coconut oil and lemon juice
Have you ever considered using coconut oil and lemon juice as a wood polish? This natural and affordable solution is a great option for those looking for a non-toxic alternative to commercial wood polishes.
To make this recipe, you will need:
- 1/2 cup of coconut oil
- 2 tablespoons of lemon juice
- A small container for mixing
- A clean, soft cloth for application
First, melt the coconut oil in a microwave-safe container for about 20-30 seconds or until it is melted. In a separate container, measure out the lemon juice. Once the oil is melted, add the lemon juice to the container and stir well to combine.
To use this wood polish, follow these simple steps:
- Clean the surface: Use a clean, lint-free cloth to wipe down the wood surface and remove any dirt and debris.
- Apply the polish: Dip a separate clean cloth into the polish mixture and apply it evenly to the wood surface. Be sure to cover the entire surface and avoid using too much polish.
- Buff and shine: Use another clean cloth to buff the wood surface and give it a shiny finish.
As with all wood polishes, there are precautions you should take when using this recipe:
- Avoid using on unfinished wood: This recipe is best suited for finished or sealed wood.
- Try on a small, inconspicuous area first: Before using this wood polish on a large or noticeable area, test it out on a small area first to ensure it doesn’t damage the wood.
- Avoid using too much polish: Using too much polish can leave a greasy residue and attract dirt and dust.
This coconut oil and lemon juice wood polish is a simple and effective DIY solution for those looking to avoid harsh chemicals and save money. Give it a try and see the difference it can make on your wood surfaces.
Recipe #5: Tea and olive oil
One interesting recipe for a homemade wood polish that you can make is by using tea and olive oil. This recipe is perfect for those who want to use natural ingredients and don’t want to spend a lot of money on specialized products. Here is how to make it:
| Ingredients | Amount |
|---|---|
| Tea bags | 2 |
| Boiling water | 1 cup |
| Olive oil | 1/2 cup |
To start, steep the two tea bags in one cup of boiling water for about ten minutes. After the tea has cooled down, strain it to remove any tea leaves. Then, mix in 1/2 cup of olive oil and stir well.
The tea will provide gentle and natural tannins, which help to darken and enrich wooden surfaces, while the olive oil will naturally moisturize and protect them.
You can store this mixture in a sealed container for up to six months. Before using, give the mixture a quick stir to blend in any ingredients that may have separated.
When applying, make sure your wooden surfaces are clean and dust-free. Apply the polish mixture with a clean cloth, in the direction of the grain. Let it sit for a few minutes before wiping off any excess with another clean cloth. Finally, buff the surface until it is shiny and smooth.
This natural and affordable homemade wood polish is perfect for those who want something gentle and eco-friendly to use on their wooden furniture and home decor.
How to apply the homemade wood polish
Once you’ve made your homemade wood polish, it’s time to apply it to your wood furniture or other items. Applying homemade wood polish is simple and can leave your wood looking shiny and new. Below are the steps to follow:
Clean the surface: Before applying any wood polish, it’s important to clean the surface. Use a damp cloth or sponge to remove any dust, dirt, or debris that may have accumulated on the wood surface. Make sure the wood is completely dry before moving on to the next step.
Apply the polish: Depending on the recipe you chose, the application process may differ slightly. For recipe #1, mix equal parts olive oil and vinegar and apply the mixture to the wood surface with a soft cloth. For recipe #2, melt beeswax in a double boiler and add in your desired essential oils. Apply the mixture to the wood using a brush or cloth. For recipe #3, mix citrus oil and jojoba oil and apply it to the wood using a soft cloth. For recipe #4, mix equal parts coconut oil and lemon juice and apply it to the wood with a soft cloth. For recipe #5, brew tea and mix with olive oil. Apply the mixture to the wood with a soft cloth. Apply the polish in a circular motion, making sure to cover the entire wood surface evenly.
Buff and shine: Once the polish has been applied to the wood surface, it’s time to give it a buff and shine. Use a clean, dry cloth to buff the wood surface in a circular motion. Continue buffing until you see a shine. The more you buff, the shinier the wood surface will become.
Remember these precautions when using homemade wood polish:
Avoid using on unfinished wood: Homemade wood polish is meant to be used on finished wood only. Avoid using it on unfinished wood as it may seep into the wood and cause damage.
Try on a small, inconspicuous area first: Before applying the wood polish on the entire wood surface, it’s always a good idea to try it out on a small, inconspicuous area. This will allow you to see how the wood reacts to the polish and ensure that it doesn’t cause any damage.
Avoid using too much polish: Using too much polish can leave a residue on the wood surface and make it look dull. Use a moderate amount of polish and buff it well for a shiny finish.
By following these steps and precautions, you can successfully apply homemade wood polish to your wood furniture or other items, and enjoy the benefits of shiny, polished wood.
Clean the surface
Before applying the homemade wood polish, it’s essential to prepare the wood surface adequately. Cleaning the wood will ensure that the polish adheres well, resulting in a smooth and even finish. To begin the cleaning process, use a soft, dry cloth or a vacuum cleaner to remove any dust, dirt or debris from the wood. If there are stubborn stains, gently wipe the wood with a damp cloth and let it air dry before proceeding. A clean surface will provide the best foundation for an effective wood polish.
Apply the polish
Once you have prepared the homemade wood polish, it’s time to apply it to the surface of your furniture. To apply the polish, you will need a clean, soft cloth. Here are some general steps to follow:
| Step 1: | Take a small amount of the polish on your cloth. Be careful not to use too much, as too much polish can cause a sticky residue. |
| Step 2: | Rub the polish onto the surface using a circular motion. |
| Step 3: | Apply the polish in a thin, even layer. Be sure to pay attention to any scratches or rough spots on the surface of the wood. |
| Step 4: | Allow the polish to soak into the wood for a few minutes. |
| Step 5: | Use a fresh, clean cloth to buff the surface of the wood. This will help to remove any excess polish and bring out the shine in the wood. |
It’s important to note that the exact method of application may vary depending on the specific recipe you are using. For example, some recipes may require you to warm the polish slightly before applying, while others may require you to mix the polish with water. Be sure to follow the specific instructions for your chosen recipe.
Buff and shine
After you have applied the homemade wood polish, it’s time to buff and shine the surface. This will help bring out the natural beauty of the wood and leave it looking glossy and well-maintained.
Materials: Soft, clean cloth or microfiber towel
Instructions:
| Step | Action |
|---|---|
| 1 | Using a soft, clean cloth or microfiber towel, gently buff the surface of the wood in circular motions. |
| 2 | Continue buffing until the surface begins to shine. |
| 3 | Check for any areas that may need additional polishing. |
| 4 | Once you are satisfied with the shine, use a clean area of the cloth or towel to remove any excess polish. This will prevent the wood from becoming sticky or attracting dust. |
It’s important to note that excessive polishing can actually damage the wood. Avoid using too much pressure, and remember that less is more when it comes to applying and buffing the homemade wood polish. With these tips, your wood furniture and floors will look amazing and stay protected for years to come.
Precautions when using homemade wood polish
When using homemade wood polish, it’s important to take certain precautions to ensure the best results and to prevent any damage to your wood surfaces. Here are some important tips to keep in mind:
Avoid using on unfinished wood: Homemade wood polish is designed for use on finished wood surfaces only. If your wood is unfinished, meaning it has not been treated with any protective coatings or sealants, the wood will absorb the polish and may become damaged.
Try on a small, inconspicuous area first: Before applying the homemade wood polish to your entire wood surface, test it on a small, inconspicuous area first. This will help you determine if the wood is reacting well to the polish and if the color and finish are to your liking.
Avoid using too much polish: When applying the polish, it’s important to use only a small amount. Using too much polish can cause buildup and may result in a streaky or dull finish.
By following these simple precautions, you can enjoy the benefits of using homemade wood polish without the risk of damaging your wood surfaces. Always approach with caution and use common sense when applying any type of cleaner or polish to your wood surfaces.
Avoid using on unfinished wood
While homemade wood polish can be a great option for finishing and maintaining the appearance of your furniture, it’s important to understand that not all types of wood can handle it. In particular, it’s best to avoid using homemade wood polish on unfinished wood, as this can lead to damage and discoloration. If you’re unsure about whether your wood is finished or not, it’s always better to err on the side of caution and test the polish on a small, inconspicuous area first. By taking these precautions, you can help ensure that your DIY wood polish is a success without causing any unwanted harm to your furniture.
Try on a small, inconspicuous area first
Before applying any homemade wood polish to your furniture or other wooden items, it is important to test it on a small, inconspicuous area first to avoid any damage or discoloration. This step is especially important if you are using a new recipe or have never used a homemade wood polish before.
To perform the test, follow these simple steps:
- Select a small area: You should choose a small spot that is not very obvious or noticeable, such as the underside or back of the item.
- Apply the polish: Apply a small amount of polish to the test area and spread it evenly with a cloth.
- Wait: Leave the polish on the test area for a few minutes, or as directed in the recipe.
- Check for damage: After the recommended time has passed, inspect the test area for any signs of damage, discoloration, or other unwanted effects.
- Proceed with caution: If the test area looks good and there are no signs of damage, you can proceed to use the polish on the rest of the item. However, if there are any issues, you should not use the recipe on the rest of the item and should consider trying a different recipe or seeking professional advice.
Remember, it’s better to be cautious and test a small area first than to risk damaging your furniture or other wooden items. Happy polishing!
Avoid using too much polish
When applying homemade wood polish, it’s important to avoid using too much of it. Using an excess amount of polish can lead to a buildup on the surface of the wood, making it look cloudy and possibly even attracting more dust and dirt. Here are a few tips to keep in mind when applying the polish:
- Start with a small amount: Begin by applying a small amount of polish to a clean cloth or sponge. You can always add more if necessary, but it’s harder to remove excess polish once it’s already on the wood.
- Apply in thin layers: Rather than applying one thick layer of polish, it’s better to apply several thin layers. This ensures that the polish is evenly distributed and helps to avoid buildup.
- Buff off excess: After applying the polish, it’s important to buff off any excess with a clean cloth. This not only removes any buildup, but it also helps to give the wood a polished, shiny finish.
- Wait between coats: If you do need to apply multiple coats of polish, it’s important to wait for each layer to dry completely before applying the next. This will help to avoid buildup and ensure that each layer is evenly distributed.
By following these tips, you can ensure that your homemade wood polish is applied in the correct amount, resulting in beautifully polished and protected wood surfaces.
Conclusion
In conclusion, homemade wood polish is an affordable, eco-friendly, and customizable alternative to store-bought options. By using natural ingredients like olive oil, vinegar, beeswax, essential oils, citrus, jojoba oil, coconut oil, lemon juice, and tea, you can create a wood polish that not only makes your furniture shine but also helps protect it from damage.
When applying the wood polish, it’s essential to clean the surface beforehand and avoid using too much polish to prevent build-up. It’s also crucial to try on a small, inconspicuous area first and avoid using the polish on unfinished wood.
By making your own wood polish, you’re not only doing something good for your furniture but also for the environment. You’re reducing your carbon footprint by eliminating harmful chemicals that are often found in store-bought wood polishes.
So, next time you’re polishing your wood furniture or floors, consider making your own wood polish using one of these simple and natural recipes. Your furniture, wallet, and the planet will thank you.
Frequently Asked Questions
Can I use homemade wood polish on any type of wood?
It’s important to first test the polish on a small, inconspicuous area of the wood to ensure that it doesn’t cause any damage or discoloration. Some woods may be more sensitive and require specific products.
How can I store homemade wood polish?
Store the polish in a sealed container at room temperature. Keep it away from direct sunlight or heat sources.
Is homemade wood polish safe for pets and children?
Most DIY wood polishes are made with natural ingredients and are generally safe for pets and children, but it’s always a good idea to keep them out of reach and supervise their use.
Can I substitute the oils in the recipes?
Yes, you can substitute oils in the recipes based on their properties and what you have on hand. However, keep in mind that different oils may produce slightly different results.
Do I need to use a specific type of vinegar in the olive oil and vinegar recipe?
You can use any type of vinegar, but white vinegar is the most common choice for this recipe.
How often should I polish my wood furniture?
It depends on how frequently you use and clean your wood furniture. As a general rule, it’s recommended to polish wood furniture every few months to maintain its appearance and protect it from damage.
Can I apply the wood polish with a cloth or do I need a specific applicator?
You can use a clean, dry cloth or a soft-bristled brush to apply the wood polish. The key is to apply it evenly and buff it out well for a smooth finish.
Is it normal for the wood polish to have a strong scent?
Some wood polishes may have a stronger scent due to the essential oils or other natural ingredients. If the scent is too strong, you can try using less of the polish or opening windows for ventilation.
Do I need to wear gloves when applying homemade wood polish?
It’s not necessary to wear gloves, but if you have sensitive skin or are using strong ingredients like vinegar, it may be a good idea to protect your hands.
Can I use homemade wood polish on outdoor furniture?
If your outdoor furniture is made of wood and is sealed or finished, you can use homemade wood polish on it. However, keep in mind that outdoor furniture may require more frequent maintenance and protection from the elements.