As household items age over time, they begin to lose their shine and appeal. But what if there was a natural solution to restore the lustre and longevity of your belongings? There is! Beeswax has long been used as a natural polish to protect and rejuvenate a variety of materials. From furniture to metal tools, beeswax polish is a simple and effective way to breathe new life into your items. In this article, we’ll share with you 10 different ways you can use beeswax polish to transform your household items. But first, let’s explore why beeswax polish is so beneficial.
Why use beeswax polish?
When it comes to polishing furniture, protecting leather goods, and sealing wooden utensils, you have many options to choose from. But, have you ever considered using beeswax polish? Beeswax polish has a long-standing history in many cultures, and it’s still commonly used today for its many benefits. This natural material offers a variety of protective and aesthetic benefits that other polishes simply can’t match. From its ability to provide natural shine to surfaces to making them last longer, beeswax polish is a versatile product that you’ll want to try on all your household items. Want to know more about the benefits of using beeswax polish? Keep reading! (source: /beeswax-polish-furniture-benefits/)
Protects against water damage
One of the reasons why beeswax polish is a popular household item is because it offers protection against water damage. This is especially important for wooden items that are regularly exposed to moisture such as kitchen cabinets, wooden furniture, and wooden floors.
The following are some of the ways that beeswax polish protects against water damage:
- Creates a protective barrier: Beeswax polish acts as a barrier that prevents water from seeping into the surface of the wood. This is because beeswax is a hydrophobic material, which means it repels water.
- Prevents staining: Water can cause staining on wooden surfaces, which can be difficult to remove. Beeswax polish helps prevent water from leaving unsightly stains on your wooden items.
- Reduces warping: When wood is exposed to water, it can warp or become misshapen. Beeswax polish helps reduce this risk by protecting the surface of the wood and preventing moisture from penetrating it.
Using beeswax polish can increase the lifespan of your wooden items and help protect them from the damaging effects of water. To make your own beeswax polish at home, check out our article on how to mix beeswax furniture polish. It’s important to store your beeswax polish correctly to maintain its effectiveness. Read our storage tips for beeswax polish to learn how.
Makes surfaces last longer
Using beeswax polish on various surfaces can help them last longer. The wax acts as a protective layer on top of the item, preventing damage and wear and tear. Here is a table outlining how different surfaces can benefit from beeswax polish:
| Surface | Benefits of Beeswax Polish |
|---|---|
| Wooden furniture | Prevents scratching and fading of the wood. Adds a layer of shine for a polished look. (source) |
| Leather items | Conditions and protects leather from drying out and cracking. Adds a layer of water resistance to prevent damage. (source) |
| Metal items | Prevents rust and corrosion from forming. Adds a layer of protection against moisture and air exposure. |
| Granite or stone countertops | Seals the surface to prevent staining and water damage. Adds a layer of shine to the surface for a polished finish. |
| Cutting boards | Conditions the wood to prevent cracking and damage from moisture exposure. Keeps the wood healthy and free of bacteria. |
| Outdoor items | Creates a barrier against moisture to prevent cracking and splitting. Adds further protection against sun damage and fading. |
| Candles | Keeps the wax moisturized and prevents cracking or discoloration. Adds a layer of protection against melting and heat exposure. |
| Hand tools | Prevents rust and corrosion from forming on the metal parts. Keeps screws and bolts lubricated for smooth operation. |
| Zippers and snaps | Makes them easier to use and less likely to get stuck. Also adds a layer of protection against the elements to prevent damage. |
| Wooden utensils | Seals the wood to prevent moisture damage and keep them healthy for food use. Adds a layer of shine for a polished look. |
By using beeswax polish on items at home, you can significantly increase their lifespan and maintain their appearance for years to come.
Provides natural shine
One of the reasons why using beeswax polish is a great option for household items is that it provides a natural shine. This can elevate the look of furniture, floors, and other surfaces in a way that synthetic polishes can’t match.
Beeswax acts as a natural sealant and also reflects light, which helps to bring out the natural beauty of the surface it’s applied to. It’s not only for making things shiny but also for preserving items.
Some household items that can benefit from the natural shine of beeswax polish include:
| Item | Why Use Beeswax Polish? |
|---|---|
| Wooden floors | The natural shine of beeswax can make hardwood floors look like new again, while also providing a protective layer that repels stains and water damage. |
| Antique furniture | Beeswax can help to restore the original shine and beauty of antique furniture while also preserving its authenticity for years to come. |
| Painted surfaces | When applied to painted surfaces, beeswax can create a subtle shine that brings out the colors and depth of the paint, while also protecting against wear and tear. |
| Stone countertops | Not only does beeswax polish shine up granite countertops and other stone surfaces, but it also acts as a sealant to prevent water damage and staining. |
Using beeswax polish is a great way to get a natural shine for your household items, and it provides the added benefits of protection and preservation. With a little bit of effort, you can give your furniture, floors, and other surfaces the perfect shine that they deserve.
Different ways to use beeswax polish
When it comes to cleaning and maintaining household items, finding a versatile solution is always a win. That’s where beeswax polish comes in – a natural and effective way to protect and extend the life of your furniture, leather goods, and other surfaces. But did you know that there are many different ways to use beeswax polish beyond just shining up your dining table? In this section, we’ll explore some surprising and creative ways to utilize this versatile product throughout your home. From preserving metals to sealing wooden utensils, beeswax polish has a range of uses that are sure to impress.
1. Furniture wax
One of the most popular and traditional use of beeswax polish is for furniture wax. Beeswax when combined with other natural oils can be used as a protective coating for wooden furniture. Furniture wax can help in maintaining and enhancing the natural beauty of wood because of its moisture-resistant property.
To make furniture polish from beeswax, you will need a few ingredients including beeswax pellets, oil such as jojoba oil or coconut oil, and essential oil for fragrance (optional). Here are the steps for making furniture wax:
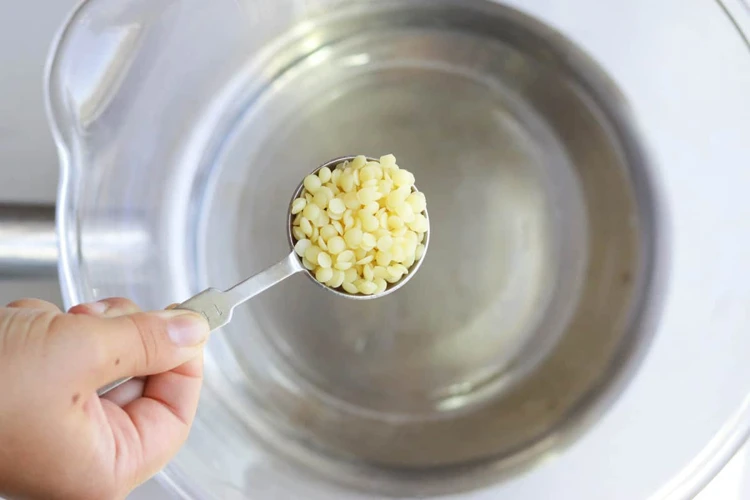
- Melt the beeswax: In a double boiler or microwave, melt 1 cup of beeswax pellets. It is important to melt the beeswax slowly to avoid scorching it.
- Add oil: Once the beeswax has melted, add 1 cup of oil to it. Stir the mixture well and let it cool for some time.
- Add fragrance (optional): If you want to add fragrance to your furniture wax, add a few drops of your desired essential oil to the mixture and stir it until it is combined.
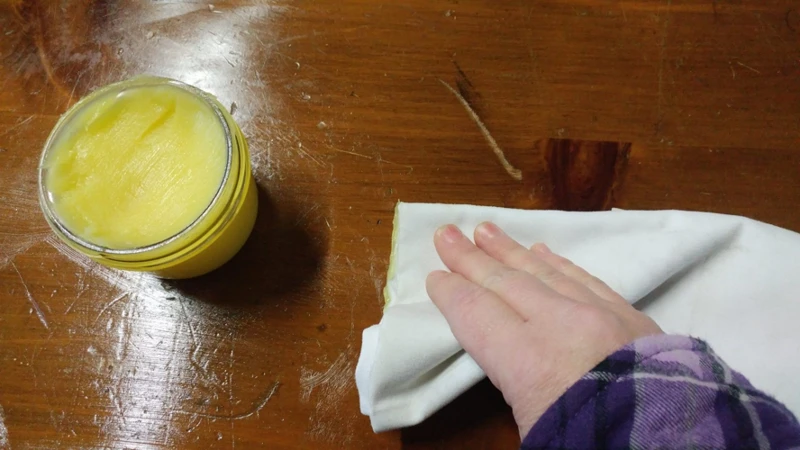
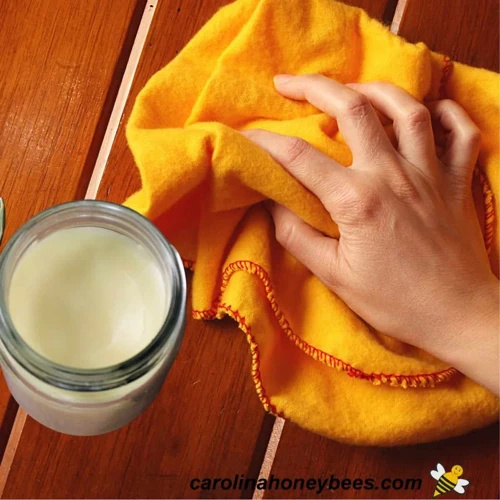
- Apply the wax: Using a soft cloth or brush, apply the beeswax polish onto your wooden furniture. Make sure to apply it in thin, even layers to prevent buildup. Let the wax dry for a few minutes.
- Buff the surface: Using a clean cloth, buff the surface of the furniture in circular motions. This will help to remove any excess wax and create a smooth finish.
Furniture wax made from beeswax helps to protect the wood from wear and tear, minor scratches, and water damage. Additionally, it creates a beautiful shine and natural gloss to your furniture that brings out the grain and texture of the wood.
Before using beeswax furniture polish on your furniture, it is important to make sure that the surface is clean and free from dust and debris. You can use a soft cloth or brush to remove any buildup or debris. It is also important to check that the wood surface is compatible with beeswax polish to avoid any damage or discoloration.
2. Leather conditioner
Leather items such as shoes, bags, and belts can become dry and cracked over time, leading to a shorter lifespan. However, using beeswax polish as a leather conditioner can help prevent this damage, keeping your leather goods looking and feeling their best for years to come. Here are a few steps to follow when conditioning your leather items with beeswax polish:
- Clean the leather: Before applying beeswax polish to your leather items, it’s essential to clean them thoroughly to remove any dirt or debris that may be on the surface. Use a soft, dry cloth to wipe off any dirt or dust, and then use a damp cloth to clean the leather. Let the leather dry completely before moving onto the next step.
- Apply the beeswax polish: Using a soft, clean cloth, apply a thin layer of beeswax polish to the leather item in small, circular motions. Make sure to cover the entire surface and pay extra attention to any areas that may be prone to cracking or drying out, such as the toes of shoes or the handles of bags.
- Let the beeswax polish absorb: After applying the beeswax polish, allow it to absorb into the leather for at least 30 minutes. This will give the leather time to soak up the conditioning properties of the beeswax.
- Buff the leather: Once the beeswax polish has had time to absorb, use a clean, dry cloth to buff the leather in a circular motion. This will help to remove any excess polish and give the leather a shiny, polished finish.
By conditioning your leather items with beeswax polish, you can help to extend their lifespan and keep them looking and feeling great. Plus, beeswax is a natural and sustainable alternative to many synthetic leather conditioners, making it an eco-friendly choice.
3. Metal preservative
Maintaining the shine and quality of metal items is important for their longevity. Using beeswax polish as a metal preservative is an effective way to protect metal items from rust, tarnish, and oxidation. Here are the steps to use beeswax polish as a metal preservative:
| Steps | Instructions |
|---|---|
| Step 1 | First, clean the metal item thoroughly to ensure that there is no dirt or grime on it that could interfere with the application of beeswax polish. |
| Step 2 | Next, apply a thin layer of beeswax polish to the metal item with a soft cloth or brush. |
| Step 3 | Make sure to cover all parts of the metal item, including hard-to-reach areas. |
| Step 4 | Let the beeswax polish dry for a few minutes before using a clean cloth to buff it off. |
| Step 5 | Repeat the process of applying beeswax polish once a month or whenever you notice that the metal item starts losing its shine or getting tarnished. |
By using beeswax polish as a metal preservative, you can protect your metal items for a long time while adding a natural shine. Not only it is an effortless solution to maintain your metal items, but it is also budget-friendly as a small amount of beeswax polish can go a long way in preserving your metal items.
4. Granite countertops and stone sealant
Granite countertops and other stone surfaces can benefit from the protective properties of beeswax polish. By using a beeswax sealant, you can help prevent damage from water and other liquids, as well as keep the stone looking shiny and new. Here are the steps to using beeswax polish on granite countertops and other stone surfaces:
| Materials | Instructions |
|---|---|
| Beeswax polish | Begin by obtaining a high-quality beeswax polish. Make sure it is specifically designed for use on stone surfaces. |
| Soft cloth | Choose a soft cloth that won’t scratch or damage the stone surface. A microfiber cloth is often a good choice. |
| Clean the surface | Before applying the beeswax polish, make sure the granite countertop or other stone surface is clean and dry. You can use a mild soap and water solution to clean the surface, and then let it dry completely. |
| Apply the beeswax polish | Using a small amount of beeswax polish, apply a thin layer to the stone surface. Work in small sections, and use a circular motion to apply the polish evenly. Make sure to cover the entire surface. |
| Let it dry | Let the beeswax polish dry for at least 30 minutes before buffing. It’s best to let it sit overnight, if possible. |
| Buff the surface | Using a clean, soft cloth, buff the surface of the granite countertop or stone surface. Use a circular motion to buff, and continue until the surface is shiny and smooth. |
Using beeswax polish on granite countertops and other stone surfaces helps protect against water damage, which can cause staining and dullness over time. It also helps to enhance the natural shine of the stone, and keep it looking new for longer. By following these simple steps and applying beeswax polish regularly, you can keep your granite countertops and other stone surfaces looking beautiful for years to come.
5. Condition wood cutting boards
Using beeswax polish to condition wood cutting boards can help rejuvenate them and extend their lifespan. Here are a few steps to follow:
- Clean the cutting board: Before applying beeswax polish, make sure the cutting board is clean and free of any debris. Use a mixture of warm water and mild soap to clean the board, then rinse it with clean water and let it dry completely.
- Apply the beeswax polish: Using a soft cloth, apply a thin layer of beeswax polish to the wooden cutting board, making sure to cover the entire surface. Allow the beeswax to soak into the wood for a few minutes, then wipe off any excess with a clean cloth.
- Buff the surface: To ensure an even and polished look, use a clean cloth to buff the surface of the cutting board after applying the beeswax polish.
- Repeat as necessary: Depending on how often you use the cutting board, you may need to reapply the beeswax polish every few months to keep the wood in good condition.
By conditioning your wood cutting board with beeswax polish, you can help prevent damage from moisture and keep it looking like new for years to come.
6. Water repellent for outdoor items
Water repellent for outdoor items
Beeswax polish can be used as a natural water repellent for various outdoor items. Here are some examples:
| Outdoor Item | Beeswax Polish Application Method |
|---|---|
| Boots and Shoes | Melt the beeswax polish and apply it to the boots or shoes using a soft cloth. Make sure to get in all the nooks and crannies of the shoes. Let dry overnight, and buff with a clean cloth if desired. |
| Tents and Tarps | Melt the beeswax polish and apply it directly to the surface of the fabric. Make sure to cover the entire surface area. Let dry overnight before using the tent or tarp. |
| Garden Tools | Apply a thin layer of beeswax polish to metal garden tools such as shovels, rakes, and hoes. This will help protect the metal from rust and water damage. |
| Outdoor Furniture | Apply a thin layer of beeswax polish to wooden outdoor furniture to protect it from rain and humidity. |
Using beeswax polish on outdoor items not only helps it repel water, but it also provides a layer of protection that can extend the life of the item. Additionally, since beeswax is a natural product, it’s safer for the environment compared to chemical water repellents.
7. Wax candles
Beeswax polish is not just limited to furniture and household items – it can also be used for candle-making! Beeswax candles have become increasingly popular due to their natural, non-toxic and hypoallergenic properties. They also have a longer burn time and release a natural honey scent when lit. Here are the steps to making your own beeswax candles using beeswax polish:
- Prepare the materials: You will need beeswax pellets, wicks, and a double boiler or a makeshift one using a pot and a heatproof bowl.
- Melt the wax: Heat the beeswax pellets in the double boiler until they are completely melted. Stir occasionally to ensure even melting.
- Prepare the wicks: While the wax is melting, prepare the wicks by cutting them to the desired length and tying them to a skewer or pencil. Make sure the wick is centered in the skewer or pencil.
- Pour the wax: Once the wax is melted, remove it from the heat source and let it cool slightly. Then, slowly pour the wax into the candle molds. Make sure to leave some space at the top for the wick.
- Insert the wick: Place the skewer or pencil across the top of the mold and let the wick hang down into the melted wax. Make sure the wick is centered and straight.
- Let the wax cool: Let the wax cool completely (usually about 4-6 hours) until it has solidified.
- Remove the candles: Once the wax has completely solidified, gently pull the candles out of the molds. Trim the wicks to the desired length.
Using beeswax polish to make candles is a fun and easy DIY project that anyone can do. Not only are the candles non-toxic and hypoallergenic, but they also have a natural honey scent that will fill your home with a warm and welcoming aroma. Give it a try and experiment with different scents and shapes!
8. Protects hand tools from rusting
Hand tools are an essential part of any household, but they require proper maintenance to stay in good working condition. A simple and effective way to protect your hand tools from rusting is by using beeswax polish. Here are some steps to follow:
- Clean the tools: Before applying the beeswax polish, make sure the tools are clean and dry.
- Melt the beeswax: Use a double boiler or a small pot to melt the beeswax. Make sure to use a low heat setting and stir the wax occasionally.
- Add a carrier oil: Once the beeswax is melted, mix in a carrier oil such as coconut or jojoba oil. This will help to spread the wax more evenly on the tools.
- Apply the wax: Dip a soft cloth into the wax mixture and apply it evenly to the tools. Make sure to cover all surfaces, especially the areas prone to rust.
- Buff: After applying the wax, use a clean cloth to buff the tools. This will help to remove any excess wax and give the tools a nice shine.
Beeswax polish not only protects hand tools from rusting, but it also helps to prevent them from corroding or becoming brittle over time. Plus, it’s a natural and eco-friendly alternative to many chemical rust preventatives on the market. By regularly applying beeswax polish to your hand tools, you can extend their lifespan and ensure they’re always ready for use.
9. Lubricates zippers and snaps
Beeswax polish also makes a great lubricant for zippers and snaps. Instead of using harsh chemicals or oils that can damage the materials, try using beeswax polish to keep them functioning smoothly.
To use beeswax polish for zippers and snaps, follow these simple steps:
| Step 1: | Clean the zipper or snap with a soft cloth to remove any dirt or debris. |
| Step 2: | Apply a small amount of beeswax polish to the zipper or snap. |
| Step 3: | Gently work the beeswax polish into the zipper or snap by moving it up and down or back and forth. |
| Step 4: | Wipe away any excess beeswax polish with a clean cloth. |
The beeswax will create a smooth surface that will help the zipper or snap slide more easily. This is especially useful for items like jackets, tents, or bags that get a lot of use and need to withstand the elements.
Using beeswax polish instead of other lubricants also has the added benefit of being more eco-friendly and sustainable. Beeswax is a natural and renewable resource, unlike many synthetic oils or sprays.
By using beeswax polish to lubricate your zippers and snaps, you can keep them functioning smoothly while also being kind to the environment.
10. Seal wooden spoons and utensils
Wooden spoons and utensils are a staple in every kitchen. They are durable and versatile, but they also require proper maintenance to ensure longevity. Beeswax polish can help with this, as it effectively seals the wooden surface to prevent water damage and prolong the life of your kitchen tools.
To seal your wooden spoons and utensils with beeswax polish, follow these simple steps:
| Step 1: | Wash and dry the wooden items thoroughly before applying the beeswax polish. |
| Step 2: | Apply a thin layer of beeswax polish to the entire surface of the wooden item using a soft cloth. Be sure to cover all sides and edges. |
| Step 3: | Allow the beeswax polish to dry for at least 30 minutes. |
| Step 4: | Buff the surface of the wooden item with a clean, dry cloth to remove any excess wax and to create a smooth, glossy finish. |
By using beeswax polish to seal your wooden spoons and utensils, you are protecting them from moisture and oil absorption, which can cause cracking, warping, and potential bacterial growth. Not only will your kitchen tools look better, they will also last longer and stay safe to use.
Tips on Using Beeswax Polish
As with any household product, there are certain techniques and tricks that can help you get the most out of your beeswax polish. Here are some valuable suggestions for maximizing the effectiveness of beeswax polish and ensuring that your items receive the best possible care. By following these tips, you’ll be able to keep your belongings looking shiny and new for years to come.
1. Apply in thin layers
To ensure a smooth and even finish when using beeswax polish, it is important to apply it in thin layers. This will prevent buildup and allow the wax to fully absorb into the surface. Applying too much beeswax polish at once can also lead to an uneven finish and make it more difficult to buff out.
Here are some tips for applying beeswax polish in thin layers:
- Start with a small amount of polish and build up as needed.
- Apply using a soft cloth or sponge in a circular motion.
- Focus on one section at a time, rather than trying to cover the entire surface at once.
- Allow the wax to dry before applying another layer.
- Avoid applying too much pressure while buffing, as this can also cause buildup.
Remember, less is more when it comes to using beeswax polish. By applying thin layers and allowing adequate drying time between coats, you can achieve a beautiful, long-lasting finish on your household items.
2. Use a soft cloth
When using beeswax polish, it’s important to choose the right cloth to apply it with. The texture of the cloth can affect how the polish adheres to the surface, so using a soft cloth is crucial. Here are some tips on choosing the right cloth for your application:
- Avoid using abrasive materials: Rough cloths such as a loofah or an abrasive sponge can scratch the surface you’re applying polish to. They can also push dirt, dust, or other particles into the wax, which can make the polish less effective.
- Choose a lint-free cloth: Using a cloth that leaves behind lint can be frustrating and may require additional cleaning to remove the unwanted fibers. A soft, lint-free cloth such as a microfiber cloth or an old T-shirt can be a good option.
- Make sure the cloth is clean: Dust, dirt, and debris can transfer onto the wax and cause bumps or other imperfections. Ensure that the cloth is clean and free of any debris before using it to apply the wax.
- Use a cloth that won’t leave behind residue: When using beeswax polish, you want to make sure that only the wax is left behind on the surface. A cloth that leaves behind residue can cause the surface to look dull or cloudy.
Remember, a good quality soft cloth is an essential part of any beeswax polishing application. It will ensure that the wax is applied smoothly and evenly, leaving behind a natural shine and protecting the surface for years to come.
3. Buff after application
After you have applied the beeswax polish, it’s important to buff the surface to ensure a smooth and even finish. Buffing involves gently rubbing the surface with a soft cloth to remove any excess wax and bring out a natural shine.
Why is buffing important?
Buffing helps distribute the wax evenly across the surface and removes any excess wax that may have been left behind. It also helps bring out a natural shine that enhances the appearance of the item.
How to buff after application?
To buff the surface after applying beeswax polish, follow these simple steps:
| Step 1: | Take a soft cloth and fold it into a small pad. You can use a microfiber cloth or an old cotton t-shirt. |
| Step 2: | Gently rub the surface with the cloth in circular motions. Apply light pressure and avoid pressing too hard. |
| Step 3: | Continue buffing until you have covered the entire surface. Check for any areas that need extra attention. |
| Step 4: | Once you have finished buffing, wipe the surface with a clean cloth to remove any remaining wax residue. |
Benefits of buffing with beeswax polish
Buffing with beeswax polish has several benefits, including:
- Enhances the natural shine of the item
- Helps distribute the wax evenly
- Removes excess wax
- Protects the item from moisture and damage
What to avoid while buffing?
When buffing with beeswax polish, it’s important to avoid the following:
- Using too much pressure or rubbing too hard, as this can damage the surface
- Leaving excess wax on the surface, as this can attract dirt and dust
- Using a rough or abrasive cloth, as this can scratch the surface
- Skipping the buffing step altogether, as this can result in an uneven finish
By following these simple tips for buffing with beeswax polish, you can ensure that your household items look their best and are protected from damage.
4. Store in a cool, dry place
Proper storage of beeswax polish is crucial to maintain its effectiveness and extend its shelf life. Beeswax is a natural wax that can soften or melt when exposed to high temperatures. It is important to store beeswax polish in a cool, dry place to prevent the wax from melting or becoming too sticky.
Here are some tips for storing beeswax polish:
| Tip | Description |
| 1. | Keep in a dark area |
| 2. | Store at room temperature |
| 3. | Avoid direct sunlight |
| 4. | Use airtight containers or bags |
| 5. | Avoid extreme temperature fluctuations |
Keeping beeswax polish in a dark area helps prevent discoloration of the wax. Direct sunlight can cause the beeswax to break down, resulting in a sticky and less effective product. It is best to keep the beeswax polish in a shaded location.
Room temperature is ideal for storing beeswax polish. If exposed to hot temperatures, the beeswax can melt and become too viscous. Conversely, extremely cold temperatures can cause the wax to harden and become brittle. An ideal temperature range for storing beeswax polish is between 60-80°F (15-27°C).
It is also important to keep the beeswax polish in airtight containers or bags to prevent moisture and air from getting in. Exposure to moisture can cause the wax to deteriorate and become rancid over time.
Extreme temperature fluctuations should also be avoided. Abrupt temperature changes can cause the wax to expand and contract, potentially compromising its integrity.
By following these simple storage tips, you can ensure that your beeswax polish remains effective and in good condition for longer periods of time.
Conclusion
In conclusion, beeswax polish is a versatile and natural product that can be used in various ways around the house. Its ability to protect surfaces against water damage, make them last longer, and provide a natural shine make it a great addition to any household cleaning kit.
From furniture and leather to metal and stone, beeswax polish can be used in a wide range of applications. It can protect outdoor items from water damage, preserve cutting boards, and even prevent hand tools from rusting. Additionally, it can be used to lubricate zippers and snaps, as well as seal wooden spoons and utensils.
To ensure the best results, it’s important to apply beeswax polish in thin layers with a soft cloth and buff afterwards. It should also be stored in a cool, dry place to maintain its effectiveness.
Overall, beeswax polish is a natural and environmentally-friendly option for cleaning and protecting household items. Its many uses and benefits make it a must-have product for any eco-friendly and sustainable household.
Frequently Asked Questions
1. Can beeswax polish be used on all types of furniture?
Yes, beeswax polish can be used on all types of furniture. It is especially good for wood and can help protect against water damage and provide a natural shine.
2. Is beeswax polish safe to use on leather?
Yes, beeswax polish is safe to use on leather. It can help condition and protect the leather from drying out and cracking over time.
3. Does beeswax polish work on all types of metals?
Beeswax polish can be used on most metals, but it is best for items that are not regularly exposed to water or moisture. It can help protect against rust and provide a natural shine.
4. Can beeswax polish be used on stone countertops?
Yes, beeswax polish can be used on granite countertops and other types of stone surfaces. It can help provide a natural sealant and protect against stains and water damage.
5. Is beeswax polish safe to use on cutting boards?
Yes, beeswax polish is safe to use on cutting boards. It can help condition the wood and protect against water damage, while also providing a natural shine.
6. Can beeswax polish be used on outdoor items?
Yes, beeswax polish can be used on outdoor items such as wooden furniture, decks, and garden tools. It can help protect against water damage and give a natural water repellent.
7. Can beeswax be used to make candles?
Yes, beeswax can be used to make candles. It is a natural wax that burns cleanly and provides a subtle honey scent.
8. Can beeswax protect hand tools from rusting?
Yes, beeswax can be used to protect hand tools from rusting. It can provide a natural barrier against moisture and help keep the tools in good condition.
9. Can beeswax lubricate zippers and snaps?
Yes, beeswax can be used to lubricate zippers and snaps. It can help make them easier to open and close, while also providing a protective layer against water damage and rusting.
10. Can beeswax seal wooden spoons and utensils?
Yes, beeswax can be used to seal wooden spoons and utensils. It can help protect the wood and make it easier to clean, while also providing a natural shine.