Achieving a polished and lustrous look for your wooden furniture can be a daunting task, especially if you’re unsure of the techniques involved. With countless wood polish products available on the market, it can be challenging to choose the right one that suits your needs. Applying the wood polish improperly can result in a non-uniform and unsatisfactory finish. However, fear not! In this article, we will provide you with a comprehensive guide to applying wood polish step by step. From preparing the surface to choosing the right polish, and applying it using different tools and techniques, we’ve got you covered. So, let’s get started on achieving that perfect shine and finish for your wooden furniture!
Prepare the Surface
One of the most important steps in achieving a beautiful and long-lasting wood finish is preparing the surface properly. This step involves cleaning the wood, sanding it if needed, and applying a stain (if desired). By prepping the surface correctly, you will create a smooth and even base for applying the wood polish. This will ensure that the polish penetrates the wood deeply and provides the ultimate protection and shine. If you want to learn more about the benefits of using natural wood polish, check out our article on natural wood polish benefits.
Clean the Wood
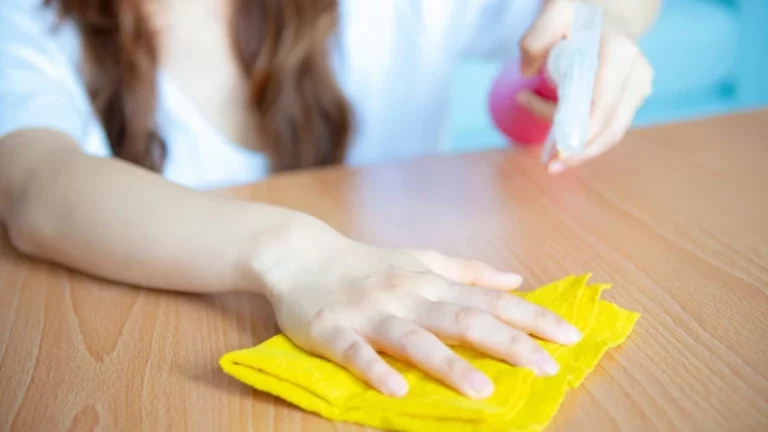
Cleaning the wood is an essential step before applying wood polish. Dirt, dust, and grime that accumulates on the surface of the wood can prevent the polish from properly adhering to the surface, resulting in a less-than-perfect finish. Here are some steps to follow when cleaning the wood:
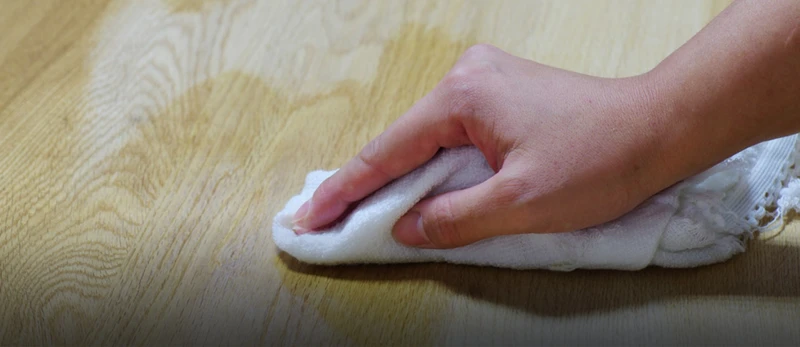
- Dust the surface: Use a microfiber cloth or soft-bristled brush to gently dust off the surface of the wood. Make sure to get into any nooks and crannies where dust might accumulate.
- Use a cleaner: Depending on the type of wood and the amount of dirt present, you may need to use a cleaner. You can either purchase a commercial cleaner or make your own using natural ingredients such as vinegar and olive oil. Apply the cleaner to a soft cloth or sponge and gently rub the surface of the wood, being careful not to oversaturate it with the cleaner.
- Rinse and dry: Once you have cleaned the surface of the wood, rinse it with clean water to remove any remaining cleaner. Dry the surface with a clean, dry cloth or allow it to air dry completely before moving on to the next step.
It’s important to note that some types of wood may require additional cleaning or prepping before applying polish. For example, if the wood has a wax coating or has been previously oiled, it will need to be stripped before polish can be applied. Additionally, if the wood has any deep scratches or damage, it may need to be sanded before applying stain or polish. Always refer to the manufacturer’s instructions or seek expert advice before starting the cleaning or polishing process.
Once the wood is clean, it’s time to move on to the next step of the polishing process. For more information on choosing the right polish for your needs, check out our article on how to choose the best wood polish for your furniture.
Sand the Wood (if needed)
Before applying wood polish, it is important to prepare the surface properly. Sanding the wood (if needed) is one step that should not be skipped. Sanding helps to remove any rough spots or imperfections in the wood and ensures that the surface is smooth and even. It also helps the wood to absorb the wood polish more effectively.
To sand wood properly, start by choosing the right type of sandpaper. The grit level of the sandpaper will depend on the condition of the wood. For rough wood surfaces, start with a lower grit sandpaper and gradually work your way up to a higher grit for a smoother finish.
Once you have selected your sandpaper, wrap it around a sanding block or use an electric sander for larger surfaces. Sand the wood in the direction of the grain, using light pressure and smooth, even strokes. Be sure to sand evenly across the entire surface to avoid creating any low spots or high spots.
After sanding, wipe down the wood with a clean, damp cloth to remove any dust or debris. This will ensure that the wood polish adheres properly when applied.
Note: Sanding may not be necessary if the wood surface is already smooth and free of any imperfections. Always test a small, inconspicuous area first to determine if sanding is necessary.
In addition to sanding, you can also consider applying a coat of stain to the wood for added color and protection. To learn more about this step, check out our article on polishing wood furniture.
Remember, proper preparation is key to achieving the best results when applying wood polish. Skipping steps or rushing through the process can result in a poor finish or damage to your wood surface.
Apply Stain (optional)
When it comes to applying wood polish, it’s important to consider whether or not you want to apply a stain. While not always necessary, a stain can help enhance the natural color and grain of the wood, as well as provide a protective layer.
Before applying any stain, it’s important to ensure that the wood is clean and sanded to a smooth finish. **Once the wood is prepped, here are the steps to follow for applying a stain:**
| Step | Action |
|---|---|
| Step 1 | Choose the right stain for your project. Stains come in a variety of colors and opacities, so it’s important to select one that matches your desired result. |
| Step 2 | Test the stain on a small, inconspicuous area of the wood to ensure you like the color and that it applies evenly. |
| Step 3 | If you’re happy with the test area, apply the stain generously to the wood using a brush, rag, or spray. Be sure to follow the manufacturer’s instructions for application and drying time. |
| Step 4 | Allow the stain to penetrate for the recommended time, usually around 10-15 minutes. Use a clean rag to wipe off any excess stain, making sure to wipe with the grain of the wood to avoid streaks. |
| Step 5 | Allow the stain to fully dry. This can take several hours, depending on the type of stain and humidity in your workspace. Once dry, assess the color and decide if you need to apply another coat. |
Remember that a stain is optional, and not every project requires it. However, if you do choose to apply a stain, be sure to follow these steps carefully for the best results.
For those interested in making their own wood polish, check out our article on 5 DIY Wood Polish Recipes.
Choosing the Right Polish
When it comes to applying wood polish, selecting the right product is crucial to achieving the desired results. Without the right polish, the wood can look patchy, uneven or dull. So, it’s important to understand how to choose the appropriate polish that will suit both the type of wood and the desired finish. In this section, we will discuss selecting the Best Type of Polish and the importance of Testing a Small Area before proceeding with the entire surface. It’s vital to understand what type of polish suits your wooden surface to bring out the best in it. However, there are many different types of polishes, so it can be difficult to select the right one. Let’s discuss the details to make this task easier to accomplish.
Selecting the Best Type of Polish
Choosing the best type of polish is an important step in achieving a beautifully polished wood surface. It is important to consider the type of wood you are working with as well as the desired finish. There are several types of polish to choose from including wax, oil, and varnish. Each has its own unique properties and advantages.
| Type of Polish | Advantages | Disadvantages |
|---|---|---|
| Wax | -Provides a natural, low-luster finish -Protects against moisture and stains -Easy to apply and maintain |
-Can be difficult to remove -Requires more frequent reapplication -May darken wood over time |
| Oil | -Provides a natural, low-luster finish -Penetrates wood to help protect against moisture and stains -Easy to apply and maintain |
-Does not provide the same level of protection as varnish or polyurethane -May require more frequent reapplication -May darken wood over time |
| Varnish | -Provides a durable, high-gloss finish -Protects against moisture, stains, and scratches -Can be tinted to add color -Long-lasting |
-May require multiple coats for desired finish -Can be difficult to apply without visible brush marks -May yellow over time |
It is important to note that not all wood polishes are safe for all types of wood. Always check the label to ensure that the polish is safe for use on your specific type of wood. Additionally, some polishes may be better suited for specific projects such as wood floors or antique furniture. When in doubt, consult a professional or do your research before selecting a polish.
If you want to learn more about common mistakes to avoid when polishing wood, check out our article on common mistakes. If you’re wondering how wood wax compares to wood polish, check out our comparison article for more information. And if you’re interested in learning more about selecting wood polish that is safe for all wood types, be sure to read our article on the topic.
Testing a Small Area
Before applying any polish, it is crucial to test a small area to ensure that the polish will give the desired result. Testing a small area will prevent any mishaps (such as discoloration or damage) on the entire surface. To perform the test, follow these steps:
- Step 1: Select an inconspicuous area of the wood, such as the underside or back of a piece of furniture.
- Step 2: Apply a small amount of the chosen polish to the area.
- Step 3: Use a clean rag or brush to spread the polish evenly and let it dry for the recommended time in the product instructions.
- Step 4: Observe the effects of the polish on the wood. Look for any signs of discoloration or damage.
- Step 5: If the results are satisfactory, proceed to apply the polish on the entire surface of the wood. However, if the results are unsatisfactory, try a different polish, or seek professional advice.
Remember that different types of wood polish react differently on various surfaces. Testing a small area is crucial for achieving the desired result and avoiding any costly mistakes. To learn more about caring for wood flooring, check out our article on wood floor polish care or read our polishing antique wood furniture tips and tricks.
Tools for Application
When it comes to applying wood polish, having the right tools can make all the difference. From selecting the proper brush or rag to deciding if an electric sander is necessary, the tools you use can impact the final result of your project. In this section, we’ll explore the various tools you may need for applying wood polish and how to choose the right ones for your specific project. Let’s dive in.
Selecting the Right Brush or Rag
When it comes to selecting the right tools for applying wood polish, there’s no shortage of options. Here are a few things to consider when choosing between brushes and rags:
- Type of Polish: Different types of polish may require different application tools. For example, oil-based polishes may require a specific type of brush or rag, whereas water-based polishes may require a different tool altogether.
- Size of Project: For larger projects, a brush may be more efficient than a rag, as it covers more surface area with each swipe. However, for smaller or more intricate projects, a rag may allow more precision and control.
- Material of Brush: If you opt for a brush, consider the material of the bristles. Bristles made from natural fibers, such as horsehair or boar bristle, tend to be gentler on wood and result in a smoother finish. Synthetic bristles, on the other hand, may be more durable and better suited for certain types of polish.
- Type of Rag: If you decide to go the rag route, consider the type of fabric used. A microfiber or lint-free cloth is best for a streak-free finish. Avoid using old t-shirts or towels, as they may leave behind fibers or lint.
Taking these factors into consideration can help you select the right tools for your specific wood polish project. Remember to choose tools that will work well with your chosen type of polish, and to practice proper application techniques to achieve a beautiful, long-lasting finish.
Using an Electric Sander (optional)
Using an electric sander can save you time and effort when preparing the wood surface for polishing. However, it’s important to use the right type of sander for the job to avoid causing damage to the wood. Before using an electric sander, it’s also important to ensure that the wood surface is free of bumps or rough patches that could cause the sander to slip or make uneven marks.
When selecting an electric sander for the job, consider the size of the job and the type of wood you’re working with. For small projects, a handheld orbital sander or a rotary tool with a sanding attachment may be sufficient. For larger projects, such as refinishing a deck or floor, a floor sander or a belt sander may be necessary.
Before using an electric sander on your wood surface, it’s important to wear protective gear, such as a dust mask, safety goggles, and earplugs. This will protect you from inhaling wood dust and reduce the risk of injury from flying wood particles.
When using an electric sander, it’s important to start with a coarse-grit sandpaper and work your way up to a finer grit to achieve the desired smoothness. Always use a light touch and move the sander in the direction of the wood grain to avoid making cross-grain scratches.
Once you’ve finished sanding with the electric sander, use a sanding sponge or sandpaper by hand to smooth out any areas the sander may have missed or left uneven. This will ensure that your wood surface is perfectly smooth and free of any rough patches before you begin polishing.
Remember, using an electric sander can be a great time-saver when preparing wood surfaces for polishing, but it’s important to use the right type of sander and take safety precautions to avoid injury or damage to the wood.
Application Techniques

When it comes to applying wood polish, the technique you use can make all the difference in the final result. There are a few different methods to choose from, each with their own advantages and disadvantages. From using a rag to applying with a brush, it’s important to consider which technique will work best for your specific project. In this section of the article, we’ll explore some of the most effective application techniques for achieving a beautiful, polished finish on your wood surface.
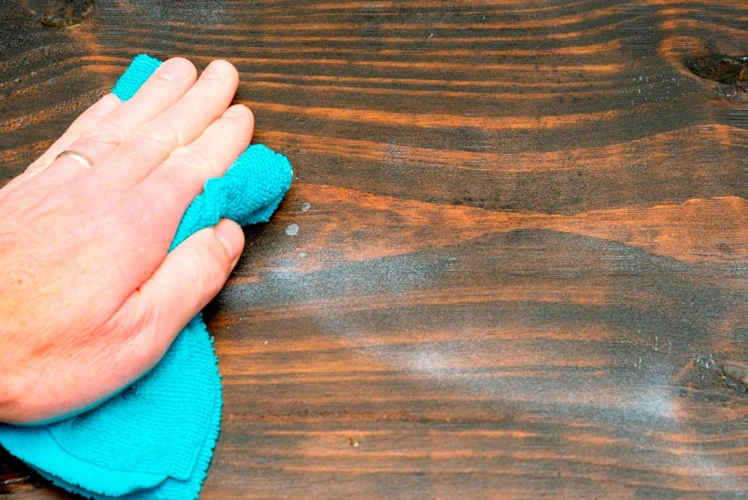
Applying Polish with a Rag
When applying polish with a rag, it is important to follow several steps to ensure a smooth finish. First, fold a clean rag into a small, manageable pad. Then, pour a small amount of polish onto the rag, being careful not to use too much at once. Excessive amounts of polish can lead to streaks or bubbling on the surface of the wood.
Tips for Applying Polish with a Rag:
| Step | Action |
| 1. | Fold a clean rag into a small, manageable pad. |
| 2. | Pour a small amount of polish onto the rag. |
| 3. | Spread the polish evenly across the rag by rubbing it in a circular motion. |
| 4. | Apply the polish to the wood in the direction of the grain. |
| 5. | Use a clean rag to wipe off any excess polish, again working in the direction of the grain. |
When using this method, it is important to work in small sections and to apply pressure evenly as you work. This will help to avoid streaks or spots on the finished surface. Once you have covered the entire surface of the wood, allow the polish to dry completely before moving on to the buffing and finishing stage.
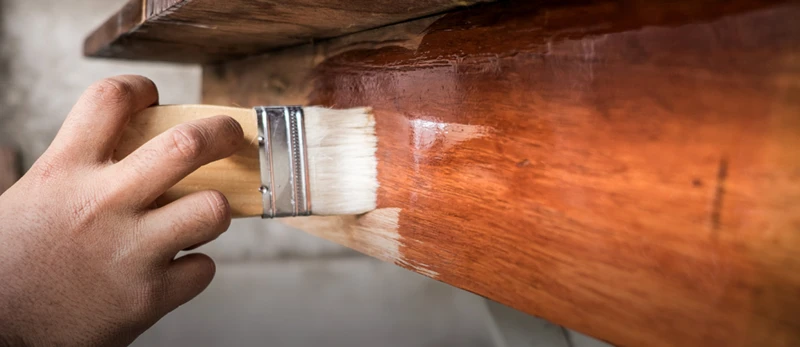
Applying Polish with a Brush
When applying polish with a brush, there are a few key steps to follow to ensure an even and professional-looking finish. Follow the steps below to achieve the desired results:
| Step | Action |
|---|---|
| Step 1 | Choose a high-quality brush with natural bristles. Synthetic brushes may not deliver the same results as natural ones. |
| Step 2 | Dip the brush into the polish, making sure to only coat the tips of the bristles. |
| Step 3 | Begin brushing the polish onto the wood, using long and even strokes in the direction of the grain. |
| Step 4 | Work in small sections and build up the polish gradually as you go. This will help avoid any drips or excess buildup. |
| Step 5 | Once you have covered the entire surface, let it dry according to the manufacturer’s instructions. |
| Step 6 | If a second coat is needed, repeat steps 2-5, allowing for adequate drying time between coats. |
Remember to take your time and apply the polish carefully to avoid any bubbles or streaks. With the right technique and tools, you can achieve a beautiful and long-lasting finish on your wood surfaces.
Using the Proper Technique when Sanding
When sanding the wood surface, it’s crucial to use the proper technique to avoid damage and ensure a smooth finish. Here are some important techniques to keep in mind:
| Technique | Description |
|---|---|
| Sand with the grain | Always sand with the grain of the wood, not against it. Sanding against the grain can leave unsightly scratches and damage the wood. |
| Use the right grit | The grit of the sandpaper determines how much material is removed from the surface. Coarse grits like 60-80 are best for removing old finishes and scratches, while finer grits like 120-220 are better for smoothing out the surface. |
| Change the sandpaper often | Sandpaper can become clogged with dust and lose its effectiveness. It’s best to change the sandpaper frequently, especially when working with a large surface area. |
| Don’t apply too much pressure | Applying too much pressure while sanding can create unevenness in the surface and cause damage. Keep the pressure light and let the sandpaper do the work. |
| Check for smoothness | After sanding with one grit, run your hand over the surface to check for smoothness. If there are still rough or uneven spots, continue sanding with a finer grit until the surface is completely smooth. |
By following these techniques, you can ensure that your sanding is effective without causing any damage to the wood surface.
Letting the Polish Dry
Once you have successfully applied wood polish onto your surface, it is important to give it enough time to dry and set. This step is crucial for achieving a glossy finish and protecting the wood from damage. However, it can be perplexing to determine how long you should wait for the polish to dry and what actions to take next. In the following section, we will guide you through the proper techniques for allowing the wood polish to dry effectively and how to prepare for a second coat, if necessary.
Allowing Proper Drying Time
Allowing proper drying time is crucial to achieving a successful wood polish application. Rushing the process or not allowing sufficient time for the polish to dry can result in an uneven finish or damage to the wood itself. Here are some tips to ensure you’re allowing enough time for the polish to dry:
- Read the manufacturer’s instructions: Different types of wood polish may recommend different drying times. It’s important to follow the specific instructions for the polish you are using to ensure proper drying time.
- Be patient: Rushing the drying process is never a good idea. Even if the surface of the wood seems to be dry, the polish itself may not be fully cured. It’s better to wait too long than not long enough.
- Test the polish: If you’re unsure if the polish is fully dry, you can test it by gently touching an inconspicuous area of the wood with a clean finger or cloth. If no polish residue rubs off onto the cloth or finger, it’s likely dry.
- Avoid high humidity: High humidity levels can prolong drying time, so it’s best to avoid applying wood polish on excessively humid days.
Proper drying time is essential for achieving a beautiful and long-lasting wood polish application. By following the manufacturer’s instructions, being patient, testing the polish, and avoiding high humidity, you’ll ensure your wood surface is properly protected and looking its best for years to come.
Preparing for a Second Coat (if necessary)
After allowing the first coat of wood polish to dry completely, assess whether a second coat is necessary. If additional shine or protection is desired, follow these steps to prepare for a second coat:
| Step 1: | Check the surface of the wood for any imperfections or bubbles that may have formed during the first application. If any are found, lightly sand with a fine-grit sandpaper to smooth out the surface. |
| Step 2: | Clean the surface with a dry cloth to ensure that it is free of any dust or debris that may have accumulated during the drying process. |
| Step 3: | If using the same polish as the first coat, shake the container well to ensure that the product is thoroughly mixed. This will ensure that the consistency and color of the polish is consistent with the prior application. |
| Step 4: | Using the same method as the first coat (rag or brush), apply a thin and even layer of polish onto the surface of the wood. Avoid applying too much, as excess polish can lead to a sticky surface that is difficult to buff. |
| Step 5: | Allow the second coat to dry completely before proceeding to buffing and finishing. Keep in mind that the drying time may be longer for the second coat, as the wood needs to absorb more polish than it did for the first coat. |
Remember to follow these steps carefully to ensure that the second coat of polish is applied correctly and evenly. Rushing through this process can lead to an uneven finish, bubbles, and other imperfections.
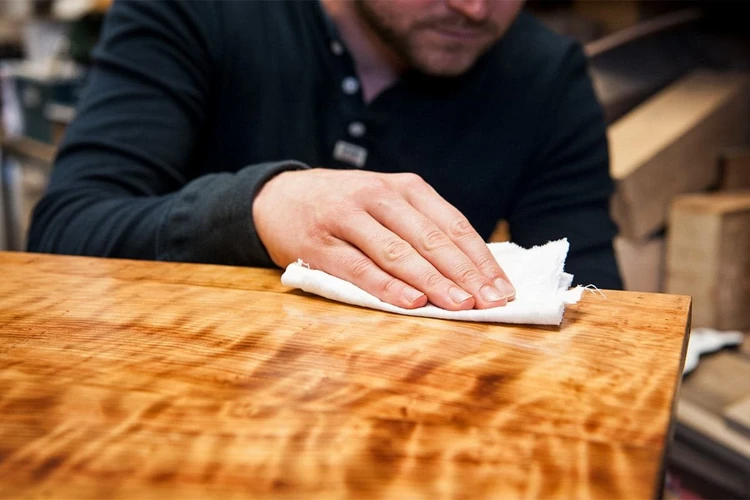
Buffing and Finishing

After you have applied the final coat of wood polish, the next step is to buff and finish the surface to achieve a smooth and lustrous appearance. This step requires a bit of finesse and attention to detail to get the perfect finish. With the right tools and techniques, you can achieve a professional-looking finish that will make your wood surface shine. Let’s explore some tips and tricks for buffing and finishing your wood polished surface.
Using the Correct Buffing Technique
When it comes to buffing your wood after applying polish, using the correct technique is crucial for achieving a smooth and even finish. Here are some tips and tricks to help you master the art of buffing:
- Choose the Right Cloth: Select a soft cloth that is made specifically for buffing wood. Avoid using rough or abrasive materials, as they can scratch the surface of the wood and ruin your hard work.
- Apply Even Pressure: When buffing, apply even pressure across the entire surface of the wood. This will help to ensure that the polish is distributed evenly and that the finish is uniform.
- Use Circular Motions: To buff the wood, use circular motions. This will help to blend the polish and create a smooth, seamless finish.
- Work in Small Sections: To prevent the polish from drying out before you have a chance to buff it, work in small sections. This will allow you to apply the polish and buff it before moving on to the next section.
- Buff in the Direction of the Grain: Always buff in the direction of the wood grain. This will help to avoid scratches and ensure that the finish is smooth and even.
- Don’t Over-Buff: Be careful not to over-buff your wood. If you buff too much, you can remove some of the polish and create an uneven finish. Stop buffing when you reach the desired level of shine.
By following these tips for buffing your wood, you can achieve a beautiful and long-lasting finish that will bring out the natural beauty of the wood. Remember to work slowly and carefully, and don’t rush the buffing process. With a little patience and practice, you can become a master at buffing wood to perfection.
Applying a Final Coat of Finish
After you’ve buffed the surface, it’s time to apply the final coat of finish. This is an important step to protect the wood from any damage or wear and tear.
To apply the finish, follow these steps:
| Step 1: | Select a high-quality finishing product that’s appropriate for the type of wood you’re working with. You may want to read reviews from other users or get recommendations from a professional before making a purchase. |
| Step 2: | Use a clean brush or rag to apply the finish. You can either dip the brush into the finish or pour some onto the surface and spread it out evenly with the brush or rag. |
| Step 3: | Work in small sections to ensure that the finish is applied evenly. Make sure you apply enough finish to cover the surface, but don’t over-apply, as this can create drips or bubbles. |
| Step 4: | Allow the finish to dry completely, typically for several hours or even overnight. Make sure the area is well-ventilated during the drying process. |
| Step 5: | Once the finish is dry, use fine-grit sandpaper to sand the surface lightly. This will help to remove any bumps, bubbles, or imperfections on the surface. |
| Step 6: | After sanding, wipe the surface again with a clean, dry cloth to remove any sawdust or debris left behind by the sanding process. |
| Step 7: | Apply a second coat of finish if desired, following the same process as before. This can help to create a more durable and long-lasting finish. |
| Step 8: | Allow the finish to dry completely before using the surface. This may take several days, so be patient and avoid using the surface until it’s completely dry. |
By following these steps, you can ensure that your final coat of finish is applied properly and will provide long-lasting protection for your wood surface.
Tips and Tricks

As you’re applying wood polish, there are some tips and tricks that can come in handy to make the process easier and to achieve a better result. These little hacks and pieces of advice can make all the difference and help you avoid common mistakes. Below are some insights that can help you polish your wood like a pro.
Warm vs. Cool Temperatures
When it comes to applying wood polish, temperature can play a big role in the final result. It is important to consider whether the room or the surface where the polish will be applied is warm or cool. Here are some things to keep in mind:
- Warm temperatures: If the room or surface is warm, the polish may dry too quickly, leaving streaks or bubbles. It is important to work quickly and in small sections to avoid this. You may also consider using a slower-drying polish or adding a bit of water to the mixture to help slow down the drying process.
- Cool temperatures: In cooler temperatures, the polish may take longer to dry and may not adhere as well to the surface. It is important to let the surface warm up to room temperature before applying the polish. You can also consider using a faster-drying polish or applying heat to the surface to speed up the drying process.
- Optimal temperature: Ideally, the room and surface should be at a moderate temperature (around 70°F to 75°F) to allow for optimal drying and adhesion of the polish.
By considering the temperature and taking the necessary precautions, you can ensure that the wood polish is applied smoothly for a beautiful and long-lasting finish.
How to Avoid Bubbles in the Polish
One of the main aesthetic issues that can arise when applying wood polish is the presence of bubbles. These can be caused by a number of factors, including improper mixing, inadequate drying time, and using a low-quality polish. To avoid this pesky problem, follow these expert tips:
| Tip #1: | Avoid shaking the polish vigorously before use. This can introduce air into the mixture, which can lead to bubbles. |
| Tip #2: | Use a high-quality polish that is specifically designed for the type of wood you are working with. Lower-quality polishes may have more air bubbles, which can be impossible to eliminate during application. |
| Tip #3: | Allow adequate drying time between coats. If you apply the polish too quickly, it can trap air bubbles that are released during the drying process. |
| Tip #4: | Apply the polish in thin, even coats, using a brush or rag that is only slightly damp. Applying too much polish at once can increase the likelihood of bubbles forming. |
| Tip #5: | Avoid working in environments that are too warm or too humid. High temperatures or humidity levels can increase the drying time of the polish and cause bubbles to form as it dries. |
By following these tips, you can help ensure that your wood polish goes on smoothly and evenly, without any unsightly bubbles. Remember to choose a high-quality polish that is appropriate for the type of wood you are working with, and to take your time during the application process, allowing each coat to dry thoroughly before applying the next one. With a little patience and attention to detail, you can achieve a beautiful, flawless finish on any piece of wood.
Common Mistakes to Avoid
As much as applying wood polish might seem like a simple task, there are actually several common mistakes that can occur during the process. It’s essential to be aware of these pitfalls to avoid ruining hours of hard work put into the wood surface. Sometimes the wood can end up looking worse than before the polish was applied. It’s vital to learn about the most common mistakes to avoid when applying wood polish to improve your success rate. So, let us take a closer look at these avoidable errors and how to prevent them.
Applying Too Much Polish
One common mistake people make when applying wood polish is using too much of it. This can lead to uneven coating, streaks, and an overall unappealing appearance. Here are a few tips to avoid applying too much polish:
- Start with a small amount: It’s always better to apply too little polish and add more as needed than to start with too much. Begin with a small amount, and add more as you go to ensure even coverage.
- Spread the polish evenly: Use a rag or brush to spread the polish evenly over the surface. Pay close attention to the corners and edges, as they tend to collect excess polish.
- Wipe away excess: After applying the polish, use a clean rag to wipe away any excess. This will help prevent streaks and ensure the wood looks smooth and even.
- Avoid applying in direct sunlight: Applying wood polish in direct sunlight can cause it to dry too quickly, leading to uneven coating and streaks. Try to apply in a shaded area, and allow ample drying time.
- Applying multiple thin coats is better than one thick coat: Applying multiple thin coats of polish is better than applying one thick coat. This will help the polish dry more evenly and avoid excess buildup.
By following these tips, you can avoid applying too much polish and achieve a smooth, elegant finish for your wood surfaces.
Using the Wrong Type of Polish
Using the wrong type of polish can be a costly mistake. It is important to choose a polish that is appropriate for your specific wood surface. Using the incorrect polish can lead to unsightly blemishes, poor adhesion, and lackluster finishes. It is crucial to take the time to research the right type of polish for your needs.
To avoid using the wrong type of polish, here are some tips to keep in mind:
| Tips | Explanation |
|---|---|
| Read the Label Carefully | Before purchasing any polish, ensure you read the label carefully to understand its intended purpose and recommended application. |
| Consider the Wood Species | Not all polishes are created equal. Consider the type and species of wood you are working with, and choose a polish that is compatible with it. |
| Choose the Right Finish | There are different types of finishes available, and each one is suited to specific wood surfaces. Using the wrong finish can lead to dull or overly shiny results, or even potentially damage the wood. |
| Test a Small Area First | Before applying polish to the entire surface, test the polish on a small, inconspicuous area first to ensure it produces the desired results. |
By taking these precautions, you can significantly reduce the risk of using the wrong type of polish and ensure that your wood surface maintains its natural beauty for years to come.
Skipping Steps
One of the biggest mistakes people make when applying wood polish is skipping important steps in the preparation process. Each step is essential for achieving a beautiful and long-lasting finish. Here are some of the most commonly skipped steps and why they are important:
| Skipped Step | Why it’s important |
|---|---|
| Cleaning the wood | Any dirt or dust on the surface will prevent the polish from adhering properly. Even if the wood looks clean, it’s essential to wipe it down with a damp cloth and/or use a cleaning solution designed for wood. |
| Sanding the wood | If the surface has any rough spots or bumps, the polish will not apply evenly. Sanding allows for a smoother surface and helps open the grain of the wood, allowing for deeper penetration of the polish. |
| Applying a stain | Stain can enhance the natural beauty of the wood and give it a uniform color. It also helps the polish adhere better and can provide an added layer of protection. |
| Choosing the right polish | Using the wrong type of polish can lead to poor adhesion, uneven coats, and diminished results. It’s important to select the right type of polish for the project and to test it on a small, inconspicuous area before applying it to the entire surface. |
| Letting the polish dry | Rushing the drying process can cause the polish to become tacky, attract dust, and result in a less-than-smooth finish. Following the drying time recommended by the manufacturer will ensure that the polish sets properly. |
| Buffing and finishing | Skipping this step can leave the surface looking dull and lackluster. Buffing and applying a final coat of finish will give the surface a beautiful shine and added protection. |
By taking the time to properly prepare the surface of the wood and following each step in the application process, you can achieve a beautiful and long-lasting finish. Skipping any step can result in a less-than-desirable outcome, so take the time to do it right.
Conclusion
In conclusion, applying wood polish is not a daunting task but requires following the right techniques for achieving a beautiful, durable finish. The process starts with proper surface preparation, including cleaning and sanding where necessary. Selecting the right polish and tools like brushes or rags, as well as an electric sander, can make the application process more manageable.
When it comes to applying the polish, techniques like using a rag or brush and sanding with the right technique can make a significant difference in the end result. Proper drying time and buffing are crucial steps in getting the desired finish, and avoiding mistakes like applying too much polish or using the wrong type of polish is important.
To achieve the best outcome, take the time to learn and follow the techniques and tips discussed in this article. Whether you are a professional or an amateur, applying wood polish should not be intimidating. With the right tools and techniques, anyone can achieve a polished, elegant finish that stands the test of time.
Frequently Asked Questions
Can I apply wood polish without sanding?
Sanding the wood before applying polish is ideal, but you can still apply polish without sanding. However, sanding will help the polish adhere better and give a smoother finish.
How do I clean the wood before applying polish?
Use a clean, damp cloth to wipe away any dust or dirt from the surface. If the wood is very dirty, you can use a mild soap solution.
What type of brush should I use for applying wood polish?
A soft-bristled brush or a rag is ideal for applying wood polish. Make sure the brush or rag is clean and free from any debris.
Can I apply wood polish with an electric sander?
Yes, you can use an electric sander to apply wood polish, but it’s not recommended. The sander may leave streaks or uneven polish application.
How long does wood polish take to dry?
It depends on the type of wood polish and the conditions in your work area. Typically, wood polish takes around 2-3 hours to dry completely.
Can I apply a second coat of wood polish?
Yes, you can apply a second coat of wood polish if necessary. Make sure the first coat is completely dry before applying the second coat.
What’s the best way to buff wood polish?
Use a clean, dry microfiber cloth to buff wood polish. Apply light pressure and buff in circular motions.
Can I apply wood polish in cold temperatures?
No, it’s best to apply wood polish in warm temperatures (around 70-80°F). Cold temperatures can cause the polish to dry too slowly or unevenly.
How can I avoid bubbles in wood polish?
Make sure to stir the wood polish thoroughly before applying. Avoid shaking the container or stirring too vigorously, as this can create air bubbles in the polish.
What’s the biggest mistake to avoid when applying wood polish?
The biggest mistake to avoid is applying too much polish at once. This can create a tacky or uneven surface. It’s better to apply thin, even coats and build up the finish gradually.