Maintaining the quality and shine of leather furniture can seem like a daunting task, especially if you don’t know where to start. Leather furniture requires specific care and attention to keep it looking pristine and new. However, with the right materials and a step-by-step guide, cleaning and polishing your leather furniture can be a breeze. From gathering the necessary supplies to tackling tough stains, this guide will provide you with expert tips and tricks to help you properly clean and polish your leather furniture. Get ready to transform your leather furniture from dull to dazzling!
Gather Materials
When it comes to properly cleaning and polishing your leather furniture, having the right materials is key. Without the proper tools and products, you risk damaging the leather or not getting it as clean as it should be. So before you start any type of cleaning or polishing, you’ll need to gather a few things. In this article, we’ll go over what you’ll need to get started on cleaning and polishing your leather furniture. From leather cleaner to conditioner and polish, we’ll cover all the basics. So let’s dive in and get started! And if you are a beginner at leather care, you might want to check out this guide for more information.
What You’ll Need
To properly clean and polish leather furniture, you’ll need a few essential materials. Here is a table of the items you will need:
| Materials | Descriptions |
|---|---|
| Leather cleaner | A solution specifically designed for cleaning leather |
| Sponge | A soft sponge for cleaning the leather |
| Clean, dry cloth | To wipe away excess cleaner and dry the leather |
| Leather conditioner | A product that moisturizes and protects leather from cracking |
| Buffing cloth | A soft, clean cloth for buffing and shining the leather |
| Leather polish | A product that adds shine and restores color to dull or faded leather |
| Leather protector | A spray or cream that protects leather from spills and stains |
| Vacuum cleaner | A vacuum with a soft brush attachment for removing dust and debris from the surface of the leather |
| Warm water | To dilute the cleaner and rinse the sponge |
| Cleaner and conditioner applicator | A soft-bristled brush or microfiber sponge for applying the cleaner and conditioner to the leather |
Having these materials on hand will ensure that you can properly clean and polish your leather furniture. It’s important to note that not all leather furniture is the same, so it’s always best to check the care label or manufacturer’s instructions before starting any cleaning or polishing process. If you don’t have all the necessary materials, they can easily be found at most home improvement or furniture stores.
Once you have gathered all the necessary materials, you can move onto the pre-cleaning stage.
Pre-Cleaning
As tempting as it may be to dive right into cleaning your leather furniture, taking a few extra steps before starting can ensure that the process goes much more smoothly. Pre-cleaning your leather can help you avoid any mishaps when it’s time to clean, condition, and polish. Plus, it can help you tackle any specific problem areas that may need extra attention. Before you begin, you’ll want to gather a few materials and take some time to check the label, vacuum, and spot test. By doing these things ahead of time, you’ll be one step closer to restoring your leather furniture to its former glory.
For more information on the benefits of leather polish or tips for removing tough stains from leather, be sure to check out our articles on leather polish benefits and removing tough stains from leather.
Check the Label
Before cleaning your leather furniture, it’s important to check the label for any specific cleaning instructions or recommendations. Not all leather is the same, and using the wrong cleaning agents or methods can lead to damage or discoloration. If the label contains specific instructions, follow them closely.
- If the label is missing or illegible, you should research the type of leather you have and make sure you’re using the appropriate products and methods. You can find information about various types of leather care on online resources and forums.
- If you’re not sure about the type of leather or how to clean it, it’s always best to consult a professional cleaner or furniture manufacturer before proceeding.
Checking the label is an important first step in taking care of your leather furniture, as it can help you avoid any damage and ensure that you clean and condition it properly.
Vacuum
Vacuum: Before starting the cleaning process, it’s important to remove any surface dirt or debris from the furniture. This is where the vacuum comes in handy. Use the upholstery attachment to gently vacuum the entire surface of the leather furniture, including the cracks and crevices. This will help remove any loose dirt or particles that can scratch the leather during cleaning.
After vacuuming, make sure to empty the vacuum canister or replace the bag to prevent any dirt or dust from re-entering the air. Once you have finished vacuuming, you can move on to the next step of pre-cleaning.
It’s important to note that while vacuuming can remove surface dirt and debris, it won’t remove any stains or deep-set grime. For these types of issues, you’ll need to move on to the proper cleaning techniques. For more information on polishing leather furniture, check out our top-rated leather polishes for car seats or our guide to making your own DIY leather polish with natural ingredients.
Spot Test
Before cleaning your leather furniture, it’s important to spot test the cleaner you’re planning to use. Even if a product claims to be safe for leather, it’s better to be safe than sorry.
Here’s how to do a spot test:
- Choose an inconspicuous spot on the leather, such as the back or underside of a cushion.
- Apply a small amount of the cleaner to a clean, white cloth.
- Gently rub the cleaner onto the spot in a circular motion.
- Leave the cleaner on the spot for a few minutes, then check for any adverse reactions.
- Look for any discoloration or damage to the leather.
- If there are no adverse reactions, you can proceed to clean the rest of the furniture.
Remember, different leathers may react differently to different cleaners. So it’s always best to do a spot test before using any cleaner.
Once the spot test is done, you’re ready to move on to the next step: cleaning the leather. But before that, make sure to gather all the necessary materials, including leather cleaner, conditioner, and polish. Check the label of the leather cleaner to ensure that it’s safe for your specific type of leather furniture. And don’t forget to vacuum the furniture first to remove any loose dirt or debris.
Cleaning the Leather
After completing the pre-cleaning steps, it’s time to move on to cleaning your leather furniture. This step is crucial in removing any dirt, grime, or stains that may have accumulated over time. It’s important to use the right products and techniques to ensure that the leather is cleaned thoroughly without causing any damage. Once you’re finished, your leather furniture will look refreshed and revitalized. But before we dive into the cleaning process, let’s make sure you have all the necessary materials.
Leather Cleaner
To properly clean your leather furniture, you will need a good leather cleaner. It’s important to choose a cleaner that is specifically designed for leather and won’t damage its delicate surface. Here are the steps to using a leather cleaner:
1. Choose a high-quality leather cleaner. Look for a product that is designed for the type of leather you have (i.e. aniline, semi-aniline, or pigmented). Read the label carefully to ensure that it doesn’t contain any harsh chemicals or abrasive materials.
2. Test the cleaner on a small, inconspicuous area of the furniture. This is important to make sure that the cleaner won’t damage or discolor the leather. Apply a small amount of the cleaner to a hidden area of the furniture and wait for it to dry. If the leather looks the same as before, you can proceed with cleaning the rest of the furniture.
3. Apply the cleaner to a clean cloth or sponge. Using a cloth or sponge, apply the leather cleaner to the furniture in a circular motion. Make sure to apply the cleaner evenly and work it into any creases or folds in the leather.
4. Work in small sections. It’s best to clean the furniture in small sections to ensure that you don’t miss any areas. Focus on one small section at a time, from top to bottom.
5. Wipe off any excess cleaner with a clean, dry cloth. Once you’ve cleaned a section of the furniture, wipe off any excess cleaner with a clean, dry cloth. This will help to prevent any streaks or residue from forming on the leather.
Remember that cleaning your leather furniture with a leather cleaner should be done on a regular basis to keep it looking its best. For tips on how frequently to use leather polish, check out our article “How Often Should You Use Leather Polish?” to learn more.
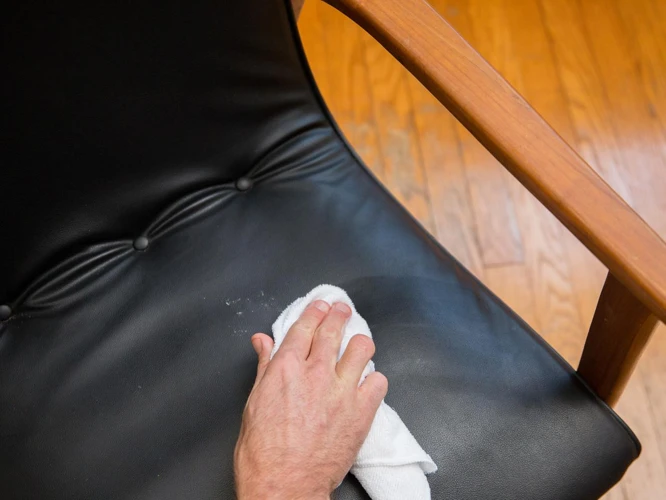
Clean with a Sponge
While cleaning the leather furniture, cleaning with a sponge is an important step. It helps to remove any dirt or grime that may have accumulated on the surface. Here’s how to do it:
- Wet the sponge with water.
- Squeeze out any excess water from the sponge.
- Apply the leather cleaner onto the sponge.
- Gently rub the sponge over the leather surface in circular motions.
- Avoid using too much water or cleaner, as it can damage the leather.
It’s essential to use a clean sponge to avoid spreading any dirt or stains from other surfaces. Also, make sure to use a soft sponge to prevent scratches on the leather.
If you’re still unsure of how to clean the leather, it’s best to seek advice from a professional cleaner or refer to the manufacturer’s cleaning instructions.
Once you’re done cleaning the leather, you can proceed with conditioning and polishing it to keep it looking sleek and shiny. Check the next sections to learn more about polishing the leather and conditioning the leather.
Blot and Dry
After cleaning the leather with a sponge and leather cleaner, it’s important to blot and dry it properly. This will help to remove any excess moisture and prevent water damage.
Here are the steps to follow for blotting and drying your leather furniture:
- Use clean, absorbent rags: Choose rags made from materials such as cotton or microfiber that can easily soak up moisture.
- Blot the leather: Gently press the rag against the leather to absorb any excess moisture. Don’t rub or scrub the leather, as this can cause damage.
- Repeat as needed: Continue blotting the leather with clean rags until no more moisture is being absorbed.
- Air dry: Allow the leather to air dry completely. Don’t use heat sources such as hair dryers or heaters, as these can cause the leather to crack or dry out.
Properly blotting and drying the leather will help to protect it and extend its lifespan, so be sure to take your time and follow these steps carefully.
Conditioning the Leather

As leather ages, it begins to lose its natural oils and can become dry and cracked. One way to combat this is by regularly conditioning the leather. Conditioning helps to restore the moisture and suppleness to the leather, prolonging its lifespan and keeping it looking its best. In this section, we’ll walk you through the steps of conditioning your leather furniture using leather conditioner, so you can keep it looking as good as new for years to come.
Leather Conditioner
Once you have cleaned your leather furniture, it is important to condition it to keep it looking and feeling soft and supple. Leather conditioner helps to keep the leather from drying out and cracking over time. Here are the steps for conditioning your leather furniture:
| Step | Description |
|---|---|
| Step 1 | Choose the right conditioner: There are many types of leather conditioners available, so it’s important to choose one that is appropriate for your furniture. Be sure to check the label and choose one that is compatible with the type of leather you have. |
| Step 2 | Apply the conditioner: Apply a small amount of conditioner to a soft, clean cloth and rub it into the leather in a circular motion. Be sure to apply the conditioner evenly and don’t use too much, as it can leave a sticky residue. |
| Step 3 | Let it soak in: After applying the conditioner, let it soak into the leather for at least 15 minutes. This will allow the leather to absorb the conditioner and become more supple. |
| Step 4 | Buff it out: After the conditioner has soaked in, use a clean, dry cloth to buff the leather. This will help to remove any excess conditioner and bring out the natural shine of the leather. |
Conditioning your leather furniture should be done every 6-12 months, depending on how often the furniture is used. This will help to keep the leather soft and supple, and prevent it from cracking and drying out over time.
Apply Conditioner
Once you have selected the appropriate leather conditioner, it’s time to apply it to the furniture. Here are the steps to follow:
- Prep the Leather: Before applying the conditioner, make sure the leather is clean and dry.
- Apply Conditioner: Use a clean, soft cloth to apply a small amount of leather conditioner onto the furniture. Avoid applying too much, as it can leave the leather greasy and attract dust and dirt.
- Focus on One Section at a Time: Work on one small section of the furniture at a time, applying the conditioner in circular motions. This ensures that the conditioner is distributed evenly and absorbed properly by the leather.
- Let It Soak into the Leather: Once you have applied the conditioner to a section, let it sit for a few minutes to allow it to soak into the leather. Do not let the conditioner dry on its own without absorbing it into the furniture.
- Buff the Leather: Use a clean, dry cloth to buff the leather in circular motions. This helps to remove any excess conditioner and create a shiny finish.
- Repeat the Process: Continue the process of conditioning, focusing on one section at a time, until the entire furniture piece is covered. It’s important to work in small sections to ensure that the conditioner is absorbed properly and evenly distributed.
Remember that conditioning the leather regularly can help prevent it from drying out and cracking. Aim to condition your leather furniture every 6-12 months, depending on how frequently it is used and the type of environment it is exposed to. By properly conditioning your leather furniture, you can help extend its lifespan and keep it looking beautiful for years to come.
Buff It Out
After applying the leather conditioner or polish, the final step is to “buff it out” to ensure the products are evenly distributed and the leather has a nice shine. Here’s how to do it:
| Step | Description |
|---|---|
| 1. | Get a clean, dry cloth. It’s important that the cloth is completely clean and free of dust, dirt, or debris that might scratch the leather. |
| 2. | Using firm yet gentle pressure, rub the cloth back and forth over the leather, covering the entire surface or area that you just conditioned or polished. |
| 3. | Pay special attention to any areas where there might be excess conditioner or polish. Use the cloth to buff out any streaks or spots until the leather looks even and smooth. |
| 4. | Continue buffing until you achieve the desired level of shine. Depending on the product you used and the type of leather you’re working with, you may need to spend more or less time buffing to achieve the level of shine you want. |
| 5. | Repeat the buffing process as needed. If you’re working on a large piece of furniture, you may need to work in sections to ensure you cover the entire area. Be patient and take your time to ensure you get the best results. |
Remember, buffing is an important final step in the leather cleaning and maintenance process. It not only ensures that any excess conditioner or polish is evenly distributed, but it also helps to restore the leather’s natural shine and luster.
Polishing the Leather
As we near the end of the leather cleaning process, it’s time to turn our attention to polishing the furniture. By applying a leather polish, you can restore the natural shine and luster of the material. Not only will this make your furniture look newer, but it will also help to protect it from scratches, scuffs, and other types of damage. Here’s how to properly polish your leather furniture to keep it looking great for years to come.
Leather Polish
Polishing your leather furniture can bring out its natural shine and protect it from everyday wear and tear. Here are the steps you should follow when applying leather polish:
- Choose the right polish: Make sure to select a leather polish that is compatible with the type of leather furniture you have. There are different polishes for different types of leather, such as aniline, nubuck, or suede. Read the label carefully before purchasing.
- Test a small area: Before applying polish to the entire piece of furniture, test a small, inconspicuous area to ensure that the polish doesn’t discolor or damage the leather.
- Apply the polish: Using a soft cloth or sponge, gently apply the polish in circular motions, making sure to cover the entire surface of the leather. Use a small amount of polish at a time, applying more as needed.
- Buff it out: Once the polish has been applied, use a clean cloth to buff the leather in circular motions. This will help to distribute the polish evenly and remove any excess polish, leaving a shiny finish.
- Allow time to dry: Let the furniture sit for at least an hour or two, or as long as the label on the polish recommends, to allow the polish to fully dry and set.
- Repeat as necessary: If you want a higher shine or more protection, repeat steps 3-5 until you achieve the desired result.
Remember to always follow the instructions on the leather polish label and avoid over-applying, as this can cause buildup and damage to the leather over time.
Apply Polish
To apply polish to your leather furniture, follow these steps:
- Clean the leather: Before applying polish, make sure the leather is thoroughly clean. Use a leather cleaner and sponge to remove any dirt or grime from the surface.
- Apply the polish: Using a soft, clean cloth or sponge, dab a small amount of leather polish onto the surface of the leather.
- Work the polish into the leather: Using circular motions, gently work the polish into the leather, making sure to cover the entire surface.
- Build up layers: Depending on the condition of the leather, you may need to apply several layers of polish to achieve the desired shine. Allow each layer to dry completely before applying the next.
- Avoid overapplication: Be careful not to apply too much polish, as this can leave a buildup on the surface of the leather that is difficult to remove. A little goes a long way.
Remember to always read the instructions on your leather polish carefully before using it, and test it in an inconspicuous area first to make sure it won’t damage the leather. Applying polish regularly can help protect your leather furniture and keep it looking beautiful.
Buff It Out
After applying the leather conditioner or polish, the next step is to buff it out to give the leather a smooth and shiny finish. Buffing can be done with a clean, dry cloth or a buffing brush. Here are the steps to properly buff out the leather:
| Step 1: | Take a clean, dry cloth or buffing brush and gently rub the leather in a circular motion. |
| Step 2: | Use a moderate amount of pressure to ensure the conditioner or polish is evenly distributed and the leather is fully covered. |
| Step 3: | Continue buffing until a smooth, shiny finish is achieved, and all excess conditioner or polish has been removed. |
| Step 4: | Repeat the process if necessary, using a small amount of conditioner or polish each time. |
Over-buffing the leather can cause damage, so it’s important to use a gentle touch and avoid aggressive rubbing. It’s also important to wait until the conditioner or polish has fully dried before buffing. This usually takes around 15-20 minutes, but can vary depending on the product used and the humidity in the air.
Properly buffed leather will have a beautiful, rich shine that adds to its overall appearance and longevity.
Protecting the Leather

Now that your leather furniture is clean and polished, you’ll want to keep it that way for as long as possible. This is where protecting the leather comes in. Leather is a natural material that can easily crack, fade or become stained if it’s not protected properly. Fortunately, there are a variety of leather protectors available that can help keep your furniture looking new for years to come. In this section, we’ll discuss the importance of using a leather protector and how to apply it correctly.
Leather Protector
To protect the leather furniture and ensure its longevity, it is essential to apply a leather protector to the surface. A leather protector provides a barrier to the leather against accidental spills, stains, and dirt, allowing you to easily clean the surface without damaging it. Applying a protector also helps to prevent fading and cracking of the leather over time. Here are the steps to correctly apply a leather protector:
| Step 1: | Choose a high-quality leather protector that’s suitable for the type of leather you have. |
| Step 2: | Test the protector on an inconspicuous part of the furniture to ensure it doesn’t cause any damage, discoloration or residue on the surface. |
| Step 3: | Clean the leather surface using a leather cleaner and allow it to completely dry before applying any protector. |
| Step 4: | Shake the protector bottle well before use. |
| Step 5: | Spray the protector evenly over the entire surface of the furniture, holding the bottle approximately 8-12 inches away from the surface. |
| Step 6: | Use a clean, soft cloth to rub the protector into the surface in circular motions, ensuring full coverage. |
| Step 7: | Leave the protector to dry for the recommended time on the product label before using the furniture again. |
By following these steps, you can protect your leather furniture from daily wear and tear while keeping it looking its best for years to come.
Apply Protector
After cleaning and conditioning your leather furniture, it’s important to protect it from future damage. A leather protector forms a barrier over the leather’s surface that helps repel spills and stains. Additionally, it can help prevent drying and cracking. Follow these steps to apply a leather protector:
| Step 1: | Choose a leather protector that’s appropriate for your furniture. Check the manufacturer’s instructions or ask a salesperson for advice. |
| Step 2: | Test the protector on a small, inconspicuous area of your furniture to ensure it doesn’t cause any discoloration or damage. |
| Step 3: | Apply the protector to your furniture using a clean, soft cloth. Make sure to apply it evenly and in a thin layer. |
| Step 4: | Allow the protector to dry completely before using or touching the furniture. This may take several hours. |
| Step 5: | Repeat the process every few months or as needed, depending on how much use your furniture gets. |
By applying a leather protector regularly, you can help extend the life of your leather furniture and keep it looking beautiful for years to come.
Dealing with Stains

When it comes to leather furniture, accidents can happen, and stains can become frustratingly stubborn. Some stains may appear on the surface, while others may seep deep into the leather. Regardless of the type of stain, it’s important to handle it promptly to prevent it from becoming a permanent blemish on your furniture. By following some simple steps and using the right techniques and materials, you can effectively remove stains from your leather furniture without damaging its texture or color. Let’s delve into some effective solutions for addressing stains on your leather furniture.
Gentle Stains
There are some gentle stains that you can clean with ease. All you need is some basic household items and a bit of patience. Here are some common gentle stains and how you can clean them:
| Stain Type | Cleaning Solution | Instructions |
|---|---|---|
| Ink Stains | Rubbing Alcohol | Apply rubbing alcohol to a cotton swab and gently rub over the stain. Don’t scrub too hard as this may damage the leather. |
| Food Stains | Mild Soap and Water | Dampen a clean cloth with mild soap and water and gently dab at the stain. Be sure to rinse the area with clean water and dry with a towel. |
| Blood Stains | Cold Water | Using a clean cloth, gently dab the stain with cold water. Do not use hot water as this may set the stain. Repeat as necessary until the stain is removed. |
Remember that it is important to always spot test any cleaning solution on a small, inconspicuous area of the leather first to ensure that it does not cause any damage or discoloration. For tougher stains, it may be best to call in a professional cleaner to avoid further damage to your leather furniture.
Tougher Stains
When it comes to tougher stains on your leather furniture, a bit more effort may be required to remove them completely. Here are some tips on how to deal with them:
| Stain Type | Recommended Solution |
|---|---|
| Grease or Oil | Dab a soft cloth in some rubbing alcohol and rub gently on the stain. Alternatively, sprinkle some cornstarch on the stain to absorb the grease, let it sit for a few hours, and then vacuum it up. |
| Ink | Mix equal parts of water and rubbing alcohol, and apply a small amount to a clean cloth. Gently rub the stain until it disappears. Do not use too much liquid, as it could damage the leather. |
| Blood | Dampen a clean cloth with cold water and gently blot the stain. Repeat until the stain is gone. Do not use hot water, as it could set the stain into the leather. |
| Urine | Mix equal parts of water and vinegar, dampen a clean cloth with the solution, and blot the stain gently. Repeat until the stain is gone. Do not use too much liquid, as it could damage the leather. |
| Mold or Mildew | Mix equal parts of rubbing alcohol and water, dampen a clean cloth, and gently wipe the affected area. Let the leather air dry completely, and then apply a leather conditioner to restore its texture. |
Remember that prevention is the best strategy, so try to address any spills or stains on your leather furniture right away. The longer you wait, the harder it may be to remove them completely.
Regular Maintenance
Maintaining the beauty and longevity of your leather furniture requires regular care and attention. Neglecting your leather can lead to cracking, fading and unsightly stains. Luckily, with just a few simple steps, you can keep your leather looking like new for years to come. In this section, we’ll explore the importance of regular maintenance and provide a detailed guide for quick clean-ups, conditioning, and polishing. Don’t let stubborn stains or fading colors ruin the beauty of your leather furniture, let’s dive in and learn how to maintain your investment.
Quick Clean-Ups
Maintaining regular cleaning schedules is essential to keep leather furniture looking its best. However, sometimes spills and stains happen, and you need to clean them quickly before they cause any damage. Here are some steps you can take to deal with quick clean-ups:
- Act Quickly: As soon as you notice a spill, don’t wait to clean it up. The longer it sits, the harder it will be to remove.
- Blot Gently: Use a soft, white cloth to blot the spill gently. Avoid rubbing or scrubbing the leather surface, which can cause further damage.
- Use Mild Soap and Water: If the spill is a water-based liquid, you can mix a small amount of mild soap with water and use it to clean the affected area. Make sure to rinse the area thoroughly with a damp cloth after cleaning and dry it with a soft, clean towel.
- Avoid Harsh Chemicals: While it may be tempting to use harsh chemicals to remove tough stains, they can often cause more damage to the leather. Stick to mild soap and water or a leather cleaner designed specifically for the type of leather on your furniture.
- Keep Leather Wipes Handy: Keep a supply of leather wipes near your furniture to quickly clean up any spills or stains. Look for wipes that are designed specifically for leather furniture and avoid using baby wipes or household cleaning wipes which can have harsh chemicals that damage the surface of the leather.
Remember that prevention is always the best course of action. Make sure to use coasters for drinks and avoid eating messy foods on your leather furniture. If you have pets, keep their nails trimmed to avoid scratches on the leather surface. These quick clean-up tips can help you address spills and stains quickly and effectively, but don’t forget to also perform regular cleaning, conditioning, and polishing to keep your leather furniture looking its best for years to come.
Conditioning
Keeping your leather furniture properly conditioned is crucial for maintaining its natural beauty and prolonging its lifespan. Leather conditioner replenishes natural oils that may have been lost during the cleaning process or over time due to wear and tear.
Here are the steps to properly condition your leather furniture:
- Clean the Surface: Before conditioning the leather furniture, make sure the surface is clean. Follow the cleaning steps outlined above to remove any dirt or grime that may have accumulated on the surface.
- Test the Conditioner: Test the leather conditioner on a small, inconspicuous area of the furniture to ensure that it doesn’t cause any discoloration or damage to the leather.
- Apply the Conditioner: Once the test is successful, apply the conditioner to the leather furniture using a clean, dry cloth or sponge. Be sure to apply the conditioner evenly, covering all areas of the furniture.
- Massage the Conditioner In: Massage the conditioner into the leather using circular motions. This helps the leather absorb the conditioner, ensuring that it penetrates deep into the fibers.
- Let it Soak In: Leave the conditioner on the furniture for at least 30 minutes to allow it to soak in and replenish the natural oils of the leather.
- Buff the Furniture: After allowing the conditioner to soak in, use a clean, dry cloth to buff the furniture. This helps remove any excess conditioner and also gives the furniture a polished finish.
Make sure to do this process at least twice a year to keep your leather furniture soft, supple, and beautiful. Conditioning your leather furniture regularly can help prevent cracks and dryness, extend its lifespan, and keep it looking its best for years to come.
Polishing
Polishing is the final step of the leather cleaning process. It helps to restore the shine and luster of the leather while also adding an extra layer of protection. Follow these steps to properly polish your leather furniture:
- Step 1: Choose a high-quality leather polish. Look for a product that specifically mentions the type of leather you have and avoid using any polishes that contain silicone or wax, as they can do more harm than good.
- Step 2: Apply a small amount of leather polish to a soft, clean cloth or rag. Be sure to use only a small amount, as using too much can cause a buildup and lead to discoloration or cracking over time.
- Step 3: Gently rub the polish into the leather using circular motions. Pay extra attention to areas that receive a lot of wear and tear, such as armrests and seat cushions.
- Step 4: Allow the polish to dry completely, which typically takes about 10-15 minutes. Avoid using the furniture during this time or you risk transferring the polish onto your clothing.
- Step 5: Once the polish is dry, buff the leather with a soft, clean cloth or buffing brush. This will help to bring out the shine and remove any excess polish.
Remember to always read the instructions on the leather polish before you begin and follow them carefully. By properly polishing your leather furniture, you can help to protect it from stains, fading, and other forms of damage.
Conclusion
In conclusion, properly cleaning and polishing your leather furniture is essential to prolonging its lifespan and maintaining its appearance. By gathering the necessary materials and following a step-by-step process, you can ensure that your leather furniture looks its best. Remember to always check the label, spot test, and vacuum before cleaning. Use a leather cleaner and sponge to gently clean the leather, then apply a leather conditioner to keep it supple and hydrated. Finally, polish the leather with a leather polish and apply a leather protector to prevent future damage. If dealing with stains, be sure to use the appropriate cleaning method. Regular maintenance, including quick clean-ups and conditioning, is key to keeping your leather furniture looking great for years to come.
Frequently Asked Questions
Can I use household cleaning products on my leather furniture?
No, it’s best to use a leather-specific cleaner and conditioner on your leather furniture. Household cleaning products could damage the leather and strip it of its natural oils.
How often should I clean and condition my leather furniture?
It’s recommended to clean and condition your leather furniture every 6-12 months, depending on usage and the environment it’s in.
What should I do if my leather furniture gets scratched?
You can try using a leather scratch repair kit, or you can seek the assistance of a professional leather repair service.
Can I use a hair dryer to dry my leather furniture after cleaning?
No, it’s best to let the leather air dry naturally. High heat can cause the leather to crack or become damaged.
What kind of sponge should I use to clean my leather furniture?
It’s best to use a soft sponge to clean your leather furniture. Avoid using abrasive sponges or cloths that could damage the leather.
What should I do if my leather furniture gets wet?
Immediately blot the wet area with a clean and dry cloth. Then, let the area air dry naturally. Do not use a hair dryer or apply heat to the wet area.
How do I know if a leather cleaner or conditioner is safe for my furniture?
Check the label of the cleaner or conditioner to ensure it’s safe for your specific type of leather furniture. If you’re unsure, do a spot test in an inconspicuous area before cleaning or conditioning the entire piece.
Can I use olive oil to condition my leather furniture?
No, it’s not recommended to use household products, such as olive oil, to condition your leather furniture. Use a leather-specific conditioner for best results.
What should I do if my leather furniture has an oily stain?
You can try using a leather degreaser to remove the oily stain. Be sure to follow the instructions on the degreaser and do a spot test first.
What should I do if my leather furniture starts to crack?
You can try using a leather conditioner to hydrate the leather and prevent further cracking. However, for severe cracking, it’s recommended to seek the assistance of a professional leather repair service.