Introduction
The gleaming shine of brass can add a touch of elegance and sophistication to any decor. However, achieving that perfect hand-polished shine can be a daunting task for even the most experienced cleaner. In this article, we will explore step-by-step tips and tricks for achieving a flawless hand-polished shine on brass. From cleaning and preparing the brass to polishing and finishing techniques, we’ll cover everything you need to know to make your brass shine like new. So, let’s dive in and uncover the secrets of achieving the perfect hand-polished shine on brass.
What is Brass?
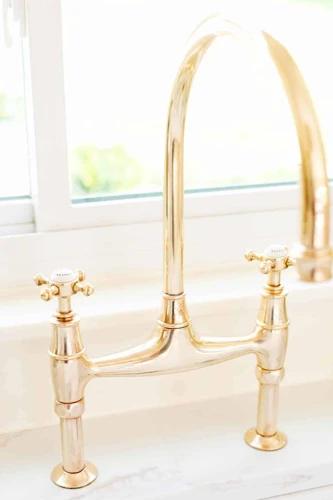
Brass is a widely used metal alloy that is highly valued for its durability, malleability, and attractive golden appearance. It is created by combining copper and zinc, typically in a ratio of 2:1. The resulting material is corrosion-resistant and can withstand high temperatures, making it a popular material for a wide range of applications.
Because of its pleasing appearance, brass is commonly used in decorative items such as lamps, candlesticks, and doorknobs. It is also used in a variety of musical instruments, including horns and percussion instruments. Its durability and resistance to corrosion make it a common material for plumbing fixtures, electrical components, and other hardware.
One of the characteristics of brass is that it forms a natural patina over time as it is exposed to air and moisture. While some people find this patina appealing, others prefer to maintain the shiny golden appearance of newly polished brass. In this article, we will discuss the techniques and tips for achieving a perfect hand-polished shine on brass.
To learn more about the benefits of hand polishing furniture, check out our article here.
Cleaning and Preparing Brass
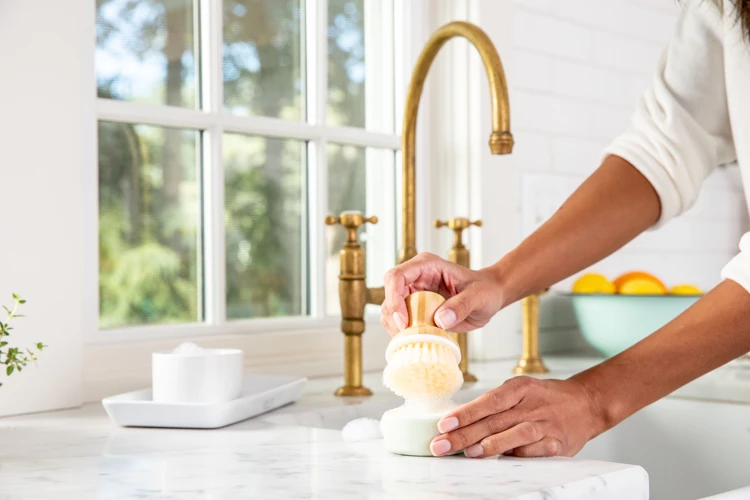
Getting a perfect hand polished shine on brass can seem like a daunting task, but with the right techniques, it can be achieved easily. The first step in achieving a perfect polish is cleaning and preparing the brass. This step is crucial to ensure that the brass is free from dirt and grime, and ready to shine. In this section, we’ll take a closer look at the cleaning and preparing process, including the best products to use and how to properly prepare the brass for polishing. To learn about other hand polishing techniques for different materials, check out our hand polish silverware guide.
Cleaning Products
When it comes to cleaning brass, there are many commercial cleaners available in the market. However, not all of them are suitable for achieving a perfect hand polished shine on brass. It is important to choose the right cleaning product that suits your brass item and your polishing technique. Some of the best cleaning products for brass are:
- Vinegar and Salt: Vinegar and Salt is a great cleaning agent for brass. It is especially useful for removing tough stains and tarnish. To use, mix equal parts of vinegar and salt to form a paste, apply on the brass surface, and rub gently with a cloth.
- Lemon and Baking Soda: Lemon and Baking Soda is another effective cleaning agent for brass. To use, mix baking soda and lemon juice to form a paste, apply on the brass surface, and rub gently with a cloth.
- Brass Cleaner: Brass cleaner is a commercial cleaner that is specifically designed for cleaning brass. It is effective in removing tarnish and restoring the shine of the brass surface. However, it is important to choose a brass cleaner that is safe for your brass item.
- Soap and Water: You can also clean your brass item with soap and water. However, this method is not as effective in removing tarnish as other cleaning agents. To use, mix mild soap with warm water, apply on the brass surface, and rub gently with a cloth.
It is important to note that before you use any cleaning product, you should test it on a small and inconspicuous area of the brass item to ensure that it does not damage the surface. Additionally, it is important to use a lint-free cloth for cleaning brass to avoid leaving fibers on the surface that can scratch the brass. For best results, you should use best polishing cloths for hand polishing that are specifically designed for polishing brass.
Preparing the Brass
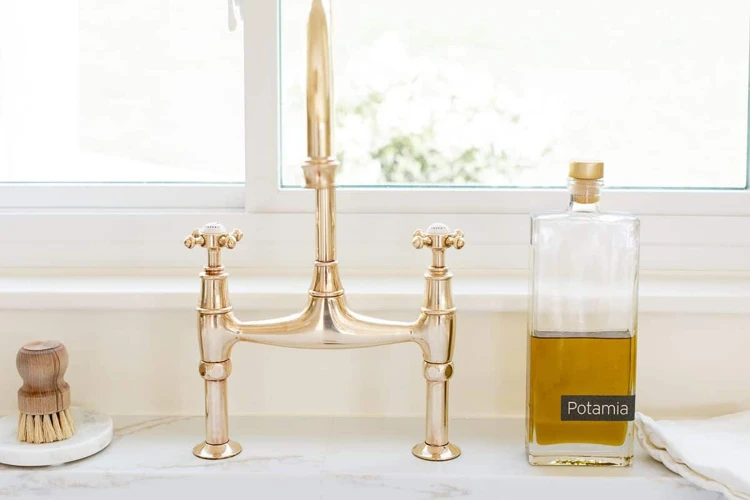
To achieve a perfect hand-polished shine on brass, proper preparation is essential. Preparing the brass involves removing any existing tarnish, grease or grime that may be on the surface of the material. This is necessary to ensure that the brass can be evenly polished and that there are no abrasive materials that can harm it during the polishing process.
The following table illustrates the steps needed to prepare the brass for polishing:
| Step | Description |
|---|---|
| Step 1 | Gather your cleaning supplies. Choose a cleaning product that is safe for use on brass. It may be helpful to look for a product specifically designed for brass cleaning. |
| Step 2 | Take apart any brass fixtures or objects. This can make cleaning easier and help you reach all areas of the brass. |
| Step 3 | Clean the brass. Apply the chosen cleaning product to the brass and rub it in with a cloth or soft-bristled brush. Rinse the brass thoroughly with clean water and dry it completely with a soft, dry cloth. |
| Step 4 | Remove any remaining tarnish. If there are still areas of tarnish on the brass after cleaning, use a tarnish remover or brass cleaner to remove them. Follow the product instructions carefully to avoid damaging the brass. |
| Step 5 | Protect the brass. Once the brass is cleaned and tarnish-free, apply a protective coating to prevent future tarnish or damage. A clear lacquer or wax can be applied to protect the surface. |
By following these steps, you can ensure that your brass is properly cleaned and prepared for hand polishing. Remember to take your time and handle the brass with care to avoid any damage during the preparation process.
For more information on hand polishing, check out our article on common mistakes to avoid during hand polishing or the benefits of hand polishing versus machine polishing. Additionally, make sure to read up on how often to hand polish wooden furniture and the differences between hand and chemical polishing.
Hand Polishing Techniques

When it comes to achieving a perfect shine on brass, many people prefer hand polishing over chemical solutions. Hand polishing not only creates a deeper, longer-lasting shine, but it also allows for a greater level of precision and customization. In this section, we will explore various hand polishing techniques that will help you achieve the perfect shine on your brass objects. For those interested in learning about the difference between hand and chemical polishing, check out our previous article on Hand vs Chemical Polishing.
Materials Needed
When it comes to achieving a perfect hand-polished shine on brass, having the right materials is crucial. Here is a list of materials that you will need:
- Microfiber cloths: To wipe and clean the brass surface without leaving any scratches.
- Gloves: Wear gloves to protect your hands from the polishing compounds and prevent any fingerprints from smudging the brass.
- Polishing compounds: You will need a specialized polishing compound for brass. The compound should be specific to the type of brass you are polishing to ensure a perfect finish.
- Polishing wheel: For larger areas of brass, you can use a polishing wheel with a cloth buff to reduce the amount of elbow grease required.
- Clean water: To rinse the brass and remove any polishing compound residue that may remain on the surface.
By using these materials, you will be able to achieve a high-quality polished shine on your brass items.
Techniques for Polishing Brass
To achieve a perfect hand-polished shine on brass, it is essential to be meticulous in your polishing techniques. Here are some techniques that you can use when polishing brass:
1. Circular Movements: The most basic technique for polishing brass involves using circular motions. To use this technique, apply a small amount of brass polish onto a soft cloth, and rub it onto the brass surface using circular motions. Make sure that you apply even pressure to the brass surface.
2. Back-and-Forth Movements: Another technique that you can use is the back-and-forth motion. Apply brass polish onto a soft cloth, and rub it onto the brass surface using back-and-forth motions. This technique is ideal for small brass surfaces or for intricate brass pieces.
3. Microfiber Cloth: When it comes to getting a brilliant shine on your brass, using a microfiber cloth can make all the difference. Microfiber cloths are made of ultra-fine fibers that are designed to pick up dust and dirt without leaving any residue behind. Use a microfiber cloth to buff the brass surface after applying polish.
4. Toothbrush: A toothbrush can be an excellent tool for polishing intricate brass pieces or pieces with intricate details. Apply brass polish onto a soft-bristled toothbrush, and gently rub it onto the brass surface using circular motions. This technique will help you get into all the crevices and corners.
5. Steel Wool: For brass pieces that are heavily tarnished or have caked-on dirt, you may need to use steel wool. However, be careful when using steel wool as it can scratch the brass surface if not used correctly. Apply a small amount of brass polish onto the steel wool, and gently rub it onto the brass surface using circular motions.
6. Final Wipe Down: Once you have finished polishing your brass piece, use a clean, dry cloth to buff the surface in circular motions. This technique will help you remove any remaining polish residue and give the brass a brilliant shine.
Using the right techniques when polishing brass can make a huge difference in the final result. Try out different techniques to see which one works best for you, and always be meticulous with your polishing techniques.
Buffing and Finishing
As you finalize your brass polishing project, achieving a perfect hand-polished shine is not complete without proper buffing and finishing. This stage is essential in creating that mirror-like finish that truly showcases the beauty of the brass. In this section, we will discuss the methods and supplies needed for buffing and finishing and provide techniques to help you achieve that exquisite shine.
Buffing Supplies
To achieve a brilliant shine on your brass, buffing is an essential step. The following supplies will aid in buffing and bring out the full potential of your brass:
1. Buffing wheel: A buffing wheel is the primary tool used in the buffing process. It works by rotating at high speeds and applying pressure to the brass. The wheel is typically made of muslin or other soft materials that won’t scratch the brass. It’s important to have a clean buffing wheel, as any debris or grime can cause scratches.
2. Buffing compound: Buffing compound is a paste or liquid that is applied to the buffing wheel. It’s the abrasive ingredient that helps remove scratches, stains, and other imperfections from the surface of the brass. There are various types of buffing compounds, each with its own grit level, so it’s important to choose the right one that matches the current state of your brass.
3. Safety equipment: Buffing can be a potentially dangerous process, so it’s essential to protect yourself with the right safety equipment. This includes safety goggles, a dust mask, and protective gloves. The goggles and dust mask will protect you from inhaling the dust and debris created during buffing, while the gloves will prevent burns and cuts.
4. Microfiber cloth: Once you’ve finished buffing your brass, it’s important to remove any excess buffing compound or debris from the surface. A clean microfiber cloth is perfect for this task, as it won’t leave any fibers or scratches on your newly polished brass.
5. Polishing wheel: After buffing, you can achieve an extra level of shine by using a polishing wheel. A polishing wheel is typically made of cotton or felt and is less abrasive than a buffing wheel. Use the polishing wheel in conjunction with a polishing compound to achieve a mirror-like finish on your brass.
By having these buffing supplies on hand, you can achieve a perfect, glossy shine on your brass that will make it stand out in any room.
Finishing Techniques
After buffing the brass, it’s time to move on to the finishing techniques. Here are some steps to follow:
- Step 1: Apply a thin layer of metal polish to the brass. Use a soft cloth to rub it in, covering the entire piece with a thin, even layer.
- Step 2: Let the polish sit on the brass for a minute or two. This will give it a chance to soften any remaining stains or discolorations.
- Step 3: Using a clean, soft cloth, begin rubbing the brass in small circles. Work outward, covering the entire piece. As you rub, you’ll start to see the brass shine and gleam.
- Step 4: Once you’ve covered the entire piece, use a separate clean cloth to wipe away any excess polish. Make sure to get into any crevices or corners to ensure that all the polish is removed.
- Step 5: For an extra shine, you can apply a coat of wax to the brass. This will help protect against future tarnishing and discoloration. Use a soft cloth to rub on the wax, then buff it off after a few minutes.
By following these finishing techniques, you’ll be able to achieve a perfect hand polished shine on your brass. It’s important to remember to take your time, work in small sections, and use the right materials to ensure a flawless finish.
Maintaining the Shine
After spending so much time and effort achieving a perfectly polished shine on your brass, it’s important to take steps to maintain that shine for as long as possible. Over time, brass can tarnish and lose its shine due to exposure to air and other factors. But with the right cleaning and maintenance techniques, you can keep your brass looking shiny and bright for years to come. In this section, we’ll discuss some tips and tricks for cleaning and maintaining polished brass to keep it looking like new.
Cleaning and Maintaining Polished Brass
Once you’ve achieved the perfect hand-polished shine on your brass items, it’s important to properly clean and maintain them to keep them looking their best. Here are some tips for cleaning and maintaining polished brass:
| Tip | Description |
|---|---|
| 1 | Avoid water Water can cause brass to tarnish quickly, so it’s best to avoid using water when cleaning your brass items. Instead, use a dry, soft cloth to dust and clean them. |
| 2 | Use appropriate cleaning products When cleaning polished brass, it’s important to use a product that is specifically designed for brass. Avoid using abrasive cleaners or solvents that can damage the finish on your brass items. |
| 3 | Maintain a regular cleaning schedule To keep your polished brass items looking their best, it’s important to maintain a regular cleaning schedule. Dust your items regularly with a soft, dry cloth, and clean them with an appropriate brass cleaner as needed. |
| 4 | Store properly When storing your polished brass items, make sure they are stored in a dry place free from humidity. Avoid storing them in direct sunlight or in areas that are prone to temperature or humidity fluctuations. |
| 5 | Handle with care Handle your polished brass items with care to avoid scratching or damaging the finish. Avoid placing them on rough surfaces, and use a soft cloth or gloves when handling them to avoid leaving fingerprints or oils on the surface. |
By following these tips and properly maintaining your polished brass items, you can keep them looking beautiful for years to come.
Conclusion
In conclusion, achieving a perfect hand-polished shine on brass is a meticulous process that requires proper cleaning, preparation, polishing, buffing, and finishing. With the right materials and techniques, you can transform your dull and tarnished brass pieces into shining and enduring treasures. Remember to use a soft touch throughout the process to avoid damaging the brass surface.
Once you’ve achieved the desired shine, it’s important to maintain it properly to prolong its longevity. Regular cleaning and maintenance will help prevent tarnishing and oxidation. Avoid exposing polished brass to direct sunlight and high humidity, as these can cause discoloration and dullness.
Overall, achieving a perfect hand-polished shine on brass requires patience, dedication, and attention to detail. By following the tips and tricks outlined in this article, you can achieve a beautiful and enduring shine on your brass pieces that will last for years to come. So, get to work on your tarnished brass items and marvel at the amazing results you can achieve with a little elbow grease and some patience.
Frequently Asked Questions
How often should I polish my brass?
The frequency of polishing depends on the use and environment of the brass. It is best to keep an eye on its shine and polish as needed.
What is the best type of cleaner for brass?
There are various types of brass cleaners available in the market. However, non-toxic and biodegradable cleaners are the best option for cleaning brass.
How should I prepare the brass before polishing?
Before polishing, it is essential to clean the brass thoroughly and remove any dirt, grime, or tarnish from its surface. Use a brass cleaner and a soft cloth to do this.
Can I polish brass without any special tools?
Yes, you can. However, using special tools such as a buffing wheel or a polishing cloth will make the job quicker and easier.
Can brass be damaged by over-polishing?
Yes, brass can become damaged by over-polishing. It is important to monitor the brass during the polishing process and stop when a perfect shine is achieved.
How long does it take to polish brass by hand?
It depends on the size and intricacy of the brass item and the amount of tarnish it has. It generally takes anywhere from a few minutes to a few hours to polish brass by hand.
Should I wear gloves when polishing brass?
It is recommended to wear gloves while polishing brass to prevent skin oils and fingerprints from leaving marks on the brass surface.
What should I do if I accidentally scratch the brass while polishing?
If you accidentally scratch the brass surface while polishing, try a fine-grit sandpaper or brass polish to remove the scratch. If it is a deep scratch, seek professional help.
How should I store my polished brass items?
Store polished brass items in a clean and dry place, preferably wrapped in a soft cloth or tissue paper to protect them from scratches and tarnishing.
Can I use a regular cloth to buff brass?
No, it is not advisable to use rough or abrasive cloths to buff brass as they can cause scratches and damage to the surface. Instead, use a soft microfiber cloth or a polishing cloth specially designed for brass.