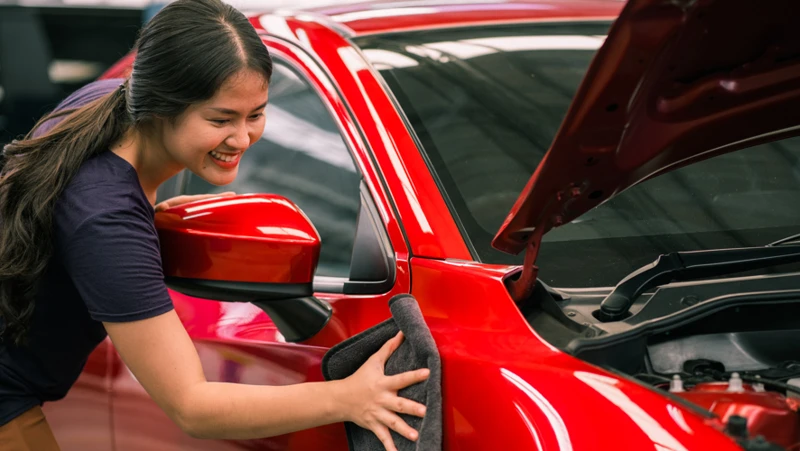
Your car is more than just a means of transportation. It’s a reflection of you and your personality. That’s why it’s important to keep it looking its absolute best. However, we all know that professional detailing can be expensive and sometimes out of reach. But don’t worry, there are still ways to achieve that polished look without breaking the bank. In this article, we’ll provide you with DIY tips and tricks for polishing your car on a budget. With a little bit of effort and the right supplies, you can have your car shining like it just rolled out of the showroom. Let’s get started!
Gather Your Supplies
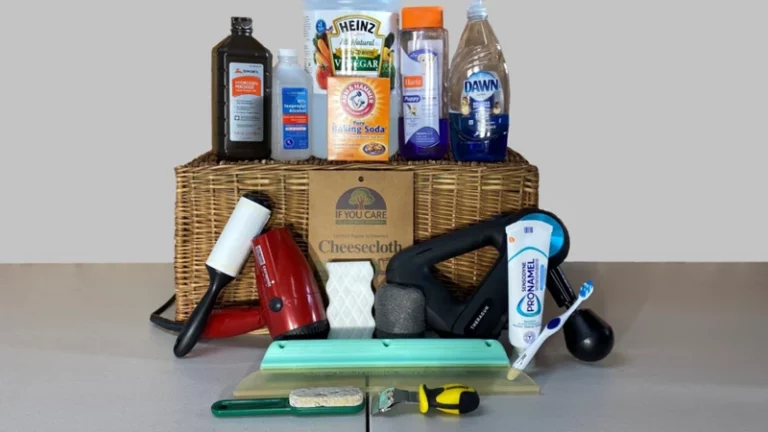
As you prepare to polish your car, the first step is to ensure you have all of the necessary supplies. Taking the time to gather the right cleaners, polishes, and equipment can make all the difference in achieving a professional and polished finish. Before diving into the polishing process, it’s important to consider the different options available and select the ones that are best suited for your specific needs. In this section, we’ll cover everything you need to know about selecting the right supplies for your DIY car polishing project, including the benefits of car polish, polishing frequency, proper prepping techniques, and the top 10 brands to consider. So, let’s get started!
Cleaners and Polishes
Before starting to polish your car, it’s essential to gather all the necessary cleaners and polishes to do the job correctly. There are many options available, and selecting the right ones for your car’s needs and your budget is crucial. Here are some of the best cleaners and polishes that you might consider using:
- Car shampoo – A car shampoo is a detergent-based cleaner that can remove dirt, road grime, and other contaminants from your car’s paint safely.
- Clay bar kit – A clay bar can help remove any remaining contaminants, such as tree sap or industrial fallout, from your car’s paint surface before polishing it.
- Polishing compound – Polishing compound is an abrasive material that can remove minor paint defects, such as swirl marks, scratches, and oxidation, from your car’s paint.
- Polishing pads – Polishing pads are used to apply a polishing compound to the paint surface gently. They come in different grades of abrasiveness, so you should choose the right one based on the degree of paint defects you’re trying to remove.
- Polishing machine – If you have a lot of paint defects, using an electric machine polish is often much faster and more effective than doing it by hand.
- Finishing polish – Finishing polish is a non-abrasive polish that gives your car’s paint a glossy shine after using a polishing compound.
- Wax – A wax can protect your car’s paint from the elements and UV rays, and give it a deep, wet-looking gloss. Wax varies in durability and price, and there is a significant difference between wax and sealant.
Keep in mind that there are different types of car polishes available on the market, and it’s essential to choose the right one for your car based on its color, age, and the type of paint job. Additionally, some car polishes may contain harsh chemicals, so it’s best to do research on the ingredients and choose a product that is safe for your car and the environment. If you’re unsure which cleaners and polishes to use, consult with a professional or read some helpful articles, like the benefits of car polish, wax vs. sealant, or top 10 car polish brands.
Tools and Equipment
To properly polish your car on a budget, you will need a few tools and equipment to get the job done. Here are some of the essential items you’ll need for a successful DIY car polishing project:
| Tools | Equipment |
|---|---|
| Microfiber towels | Polishing machine or pad |
| Soft-bristled brush | Electric buffer |
| Detailing clay | Water source |
| Polishing pad | Bucket |
| Masking tape | Water hose |
| Scratch remover | Power washer (optional) |
These tools and equipment will help ensure that your car looks its best after polishing. Microfiber towels are a must-have for polishing, as they are gentle on the car’s surface and won’t leave any scratches. A soft-bristled brush can be used for cleaning wheels and other hard-to-reach areas. Detailing clay is useful for removing any contaminants from the car’s surface before polishing.
When it comes to equipment, a polishing machine or pad can be used for machine polishing which can save ample time compared to hand polishing. An electric buffer may also be useful for larger areas. You’ll also need a water source, such as a hose or bucket, to wet down the car before washing and rinsing off any cleaning solutions. Masking tape may also come in handy to protect certain areas of the car from the polishing solution.
While a power washer is optional, it can make the washing process quicker and more efficient, especially if you have a larger car. However, it’s important to use it with caution to avoid harming your car’s paint.
Having the right tools and equipment is crucial for a successful car polishing project. With these essential items, you can achieve a professional-looking finish without spending a lot of money.
Wash and Prep Your Car
Before diving into the exciting world of polishing your car, it is essential to make sure that it’s properly washed and prepped. A clean and prepped surface ensures that the polish is applied effectively and efficiently, making your car look brand new. Prepping your car includes a proper wash, drying, and masking process. If done right, you can be sure that the results will be impressive. So let’s take a closer look at the different steps you should take before polishing your car to perfection. To get started, make sure you have all the necessary supplies, which we covered in the previous section.
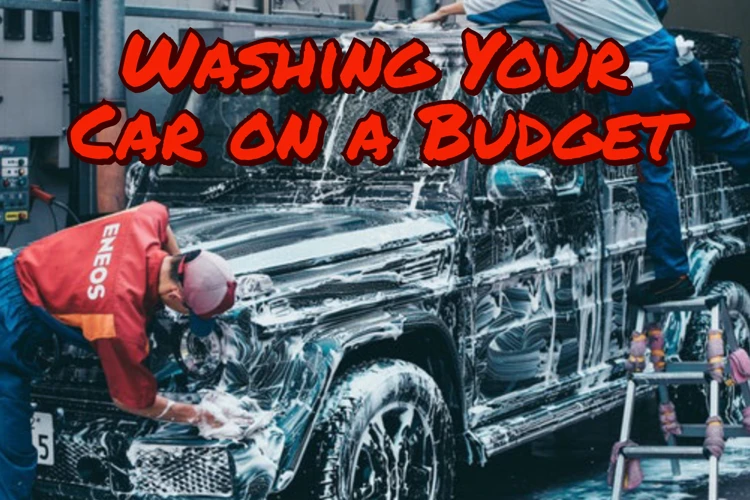
Washing Your Car
Washing Your Car
Washing your car is crucial before polishing it. The car needs to be cleaned thoroughly to remove any dirt, grime, or debris that could scratch the paint during the polishing process. Here are the steps to properly wash your car:
| Step | Description |
|---|---|
| 1 | Rinse your car with a hose or pressure washer to remove loose dirt and grime. |
| 2 | Fill a bucket with water and add car shampoo according to the manufacturer’s instructions. |
| 3 | Using a microfiber wash mitt, start washing the car from the top down. Make sure to thoroughly scrub all areas, including the wheels and tires. |
| 4 | Rinse the car thoroughly with a hose or pressure washer to remove all soap and suds. |
| 5 | Dry the car completely with a microfiber towel to avoid water spots. |
It’s important to note that you should never use dish soap to wash your car as it can strip the wax and damage the paint. Stick to using a car-specific shampoo.
For more information on the importance of prepping your car before polishing, check out our article on the importance of prepping your car for polishing.
Drying Your Car
After washing your car, it’s crucial that you dry it properly to avoid water spots and ensuring that the polish adheres well. Here’s how to dry your car like a pro:
- Use a microfiber towel: Avoid using an old t-shirt or bath towel to dry your car. Instead, invest in a good quality microfiber towel which is gentle on your car’s paint.
- Start from the top: Start drying from the top of the car and work your way down. This way, any excess water will drip down to the lower parts of the car, which you can dry later.
- Blot instead of rubbing: To dry your car, gently blot the surface with the towel instead of rubbing it. Rubbing your car can create swirl marks which can damage the paint.
- Dry the wheels and tires: Don’t forget to dry your wheels and tires. Use a separate towel for them as they can be quite dirty.
- Check for water spots: After drying, check for any water spots. If you see any, use a detail spray to remove them.
Remember to take your time and dry your car thoroughly. It’s a crucial step in the polishing process that shouldn’t be skipped. Once your car is dry, you’re ready for the next step in polishing your car on a budget!
Masking and Taping
Before you start polishing your car, you need to mask and tape off areas that you do not want to be polished. This includes the headlights, taillights, windows, mirrors, and any plastic or rubber trim.
The reason for masking and taping is to prevent the polish from getting onto these areas as it can create a difficult-to-remove residue. It can also be time-consuming to remove polish from these areas, so it is best to just prevent it from getting there in the first place.
To properly mask and tape your car, you will need:
| Supplies | Instructions |
|---|---|
| Automotive masking tape | Use the masking tape to cover the areas that you do not want polished. Make sure the tape adheres well to the surface and is in a straight line. |
| Plastic sheeting or paper | Cover any large areas or open spaces with plastic sheeting or paper to protect them from polish splatters. |
It is important to remember to remove the masking tape and plastic sheeting as soon as you are done polishing. Leaving it on for too long can cause it to adhere to the surface and become difficult to remove.
By taking the time to properly mask and tape off your car, you can help ensure a clean and professional-looking polish. This step is crucial and should never be skipped.
Now that you have masked and taped your car, it’s time to move on to the next step: polishing your car.
Polish Your Car
Now that your car is clean and prepped, it’s time to give it that shiny finish. This step is all about polishing your car to remove any swirls, scratches or oxidation that may have accumulated on the surface. Selecting the right car polish is crucial for achieving a high-quality finish. There are many different types of car polishes available in the market, so it’s important to choose the one that will work best for your car’s needs. Before diving into the actual polishing, let’s take a closer look at the types of polishes available and the differences between them. For more information on choosing the right car polish, check out our article on car polish ingredients.
Selecting a Polish
When it comes to selecting a polish, it is important to consider a few different factors. First, determine the type of paint on your car. Some polishes are designed specifically for certain types of paint, such as clear coat or single-stage paint. Next, decide on the level of abrasiveness needed. If your car has light swirl marks or minor scratches, a less abrasive polish may work well. For deeper scratches or more significant damage, a heavier abrasive polish may be necessary.
Another consideration is whether to use a hand polish or a machine polish. Hand polishing is typically slower but allows for more control and precision. Machine polishing, on the other hand, can be faster but requires more skill and experience.
Here is a table summarizing some common types of polishes and their recommended uses:
| Polish Type | Recommended Uses |
|---|---|
| All-in-one Polish | For light surface imperfections, provides cleaning, polishing, and waxing in one product |
| Oxidation Remover | For oxidized or weathered paint |
| Swirl Remover | For light swirl marks or surface scratches |
| Heavy Cut Compound | For deep scratches or significant paint damage |
Keep in mind that some polishes require additional steps, such as a separate wax or sealant application, to achieve the desired level of shine and protection. It’s also important to follow the manufacturer’s instructions for best results.
For more information on car polishing dos and don’ts and techniques, check out our other article. If you are unsure about applying car polish yourself, consider seeking out a professional service like Pro Apply Car Polish to ensure the best results.
Hand Polishing
When it comes to polishing your car on a budget, hand polishing is a great option. It’s not only affordable, but it also allows for more control and precision when compared to machine polishing. Here is a list of steps to follow for hand polishing:
- Clean the surface: Before you begin polishing, make sure that the surface is free from any dirt or debris. Use a microfiber cloth and some water to wipe down the area that you want to polish.
- Apply the polish: Apply a small amount of polish to a foam or microfiber applicator pad. Work in small sections, starting from the top of the car and working your way down. Apply the polish in a circular motion, and make sure to cover the entire surface evenly.
- Buff the polish: Once you’ve applied the polish, use a clean microfiber towel to buff the surface. Make sure to use a light touch and buff in a circular motion. This will help to remove any excess polish and reveal a smooth, shiny finish.
- Repeat as needed: Depending on the condition of your car’s paint job, you may need to repeat the polishing process multiple times to achieve the desired level of shine. Just remember to work in small sections and take breaks as needed.
Remember, hand polishing can be a time-consuming process, but the results are worth it. It’s also important to note that if you’re dealing with deep scratches or other more serious issues, you may need to seek professional help. But for basic polishing and maintenance, hand polishing is an effective and budget-friendly option.
Machine Polishing
When it comes to machine polishing, there are a few important things to keep in mind. Here are some tips to help you get the best results possible:
- Choose the Right Machine: There are a lot of different types of polishers out there, including rotary, dual action, and orbital machines. Each has its own strengths and weaknesses, so be sure to choose the one that’s best suited to your needs and skill level.
- Use the Right Pad: Just like with hand polishing, the type of pad you use can make a big difference in the end result. Foam pads are the most common choice, and come in a variety of different levels of aggressiveness, from heavy cutting to fine polishing. Be sure to match the pad to the polish you’re using.
- Start Slowly: When you first begin machine polishing, it’s a good idea to start with the lowest speed setting and work your way up. This will help you get a feel for how the machine handles, and will also reduce the risk of causing damage to your car’s paint.
- Work in Small Sections: To get the best results from your machine polishing, it’s important to work in small sections at a time. This will allow you to focus on getting each area perfect before moving on to the next.
- Keep the Surface Cool: Machine polishing generates a lot of heat, which can damage your car’s paint. To prevent this, be sure to work in a cool, shaded area, and stop frequently to let the surface cool down.
- Use Proper Technique: When using a machine polisher, it’s important to use the proper technique to avoid damaging your car’s paint. This means keeping the pad level, working in straight lines, and moving the machine slowly and steadily. Be sure to watch plenty of instructional videos and practice on a test panel before working on your car.
By following these tips, you can achieve great results with machine polishing without breaking the bank. However, if you’re still unsure about the process or don’t feel confident in your abilities, it may be a good idea to seek out a professional detailer. After all, the last thing you want is to cause damage to your car’s paint!
Finishing Touches
As you near the end of the car polishing process, it’s important not to overlook the finishing touches. These small details can make all the difference in achieving a professional-looking result. From waxing to cleaning your windows, this final step will help ensure that your car looks its best for longer. Let’s take a closer look at the key finishing touches you’ll need to focus on.
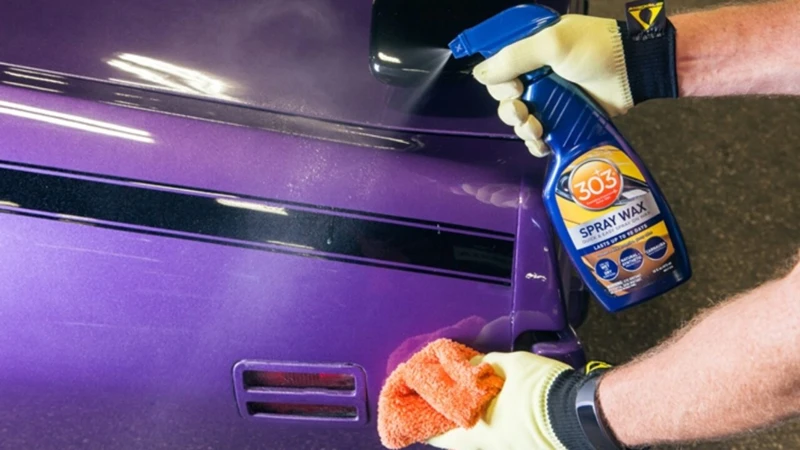
Waxing Your Car
After polishing your car, the next step is to apply a protective layer of wax. This will help to preserve the shine and prevent dirt and debris from sticking to the surface. Follow these DIY tips and tricks for waxing your car on a budget:
1. Selecting a Wax: There are many types of wax available in the market. Choose a wax that suits your car’s paint job and your budget. Carnauba and synthetic waxes are popular options. Synthetic wax is less expensive and easier to apply, but it may not last as long as carnauba wax.
2. Applying the Wax: Apply the wax in a cool, shaded area to prevent it from drying out quickly. Use a soft foam or microfiber applicator pad to apply the wax in circular motions. Avoid applying too much pressure or using a back-and-forth motion, as this can damage the paint. Work on small sections at a time, starting from the top and working your way down. Once applied, allow the wax to dry completely.
3. Buffing the Wax: Once the wax has dried, use a clean, soft microfiber towel to buff the wax off in circular motions. This will reveal a shiny, protected surface. Avoid using too much pressure or buffing for too long, as this can cause swirl marks on the paint.
4. Maintaining the Wax: To keep your car looking shiny and protected, it’s important to maintain the wax layer. Regularly wash your car with a gentle car shampoo and a soft sponge or mitt. Avoid using abrasive cleaners or materials that can scratch the surface. You may also need to reapply wax every few months to keep up the protection.
By following these steps, you can achieve a professional-looking wax job on your car without breaking the bank.
Cleaning Your Windows
When it comes to polishing your car, don’t forget about the windows! Clean windows not only improve the appearance of your car, but they also improve visibility while driving. Here’s how to clean your windows:
1. Gather Your Supplies: For cleaning windows, you will need the following supplies:
- Glass cleaner (either store-bought or homemade)
- Microfiber towels (at least two)
- Glass polish (optional)
- Newspaper or a squeegee
2. Spray and Wipe: Spray the glass cleaner on the inside and outside of each window. Then, use a microfiber towel to wipe the glass clean. It’s important to use a clean towel, or you run the risk of spreading dirt and grime around on the glass.
3. Polish: If you want to take the extra step to achieve a streak-free shine, apply a glass polish to a microfiber towel and buff it onto the glass in circular motions. Then, use a clean microfiber towel to buff away the polish residue.
4. Finish with Newspaper or a Squeegee: To further remove any streaks or smudges, use crumpled-up newspaper or a squeegee to wipe the glass clean. If using newspaper, be sure to wear gloves to avoid getting ink on your hands.
Following these steps will leave your car’s windows looking crystal clear and streak-free.
Conclusion
In conclusion, polishing your car on a budget is a task that can be easily accomplished with the right tools and techniques. By gathering the appropriate supplies, washing and prepping the vehicle properly, and using the appropriate polishing methods, you can achieve a professional-looking finish without breaking the bank.
Remember to invest in high-quality cleaners and polishes that are appropriate for your car’s specific needs, and to use the proper tools and equipment for the job. Take the time to carefully wash and dry your car, and to properly mask and tape any areas that need protection during the polishing process.
When it comes to actually polishing the car, choose the appropriate method based on your skill level and comfort level with the equipment. Hand polishing is a great option for those just starting out, while machine polishing can provide a quicker, more efficient finish.
After polishing your car, consider waxing it for added protection and shine, and don’t forget to clean your windows for a clear, streak-free finish.
Overall, with these helpful tips and tricks, you can achieve a beautiful, polished car without spending a fortune. So go ahead and give it a try – your car will thank you for it!
Frequently Asked Questions
Can I polish my car by hand?
Yes, you can polish your car by hand using a microfiber cloth or foam applicator pad.
What’s the difference between a compound and a polish?
A compound is heavier and more abrasive than a polish, and is used for removing deeper scratches and paint imperfections. A polish is milder and used for enhancing the shine of the car.
Do I need to wash my car before polishing?
Yes, you should wash and dry your car thoroughly before polishing to avoid rubbing dirt into the paint and creating further scratches.
Can I use dish soap to wash my car?
No, dish soap is too harsh for car paint and can strip away protective wax coatings. Use a car-specific wash shampoo instead.
How can I tell if I have swirl marks on my car?
Swirl marks appear as circular scratches in the paint, often caused by improper washing or drying techniques.
Is it okay to use a rotary polisher on my car?
A rotary polisher is a powerful tool that should be used with caution, as improper use can cause damage to the paint. It is recommended for experienced users.
How often should I polish my car?
It is recommended to polish your car 1-2 times per year, depending on the condition of the paint.
What’s the difference between a wax and a sealant?
A wax provides a natural, warm shine to the car and lasts for a shorter period of time. A sealant is synthetic and provides longer-lasting protection, but may not offer the same visual warmth as a wax.
Can I use a hair dryer to dry my car?
No, using a hair dryer can cause damage to the paint and should be avoided. Use a microfiber towel or chamois instead.
How should I store my polishing equipment?
After use, clean and store your polishing equipment in a dry area away from dust and debris to keep it in good condition and ready for your next use.