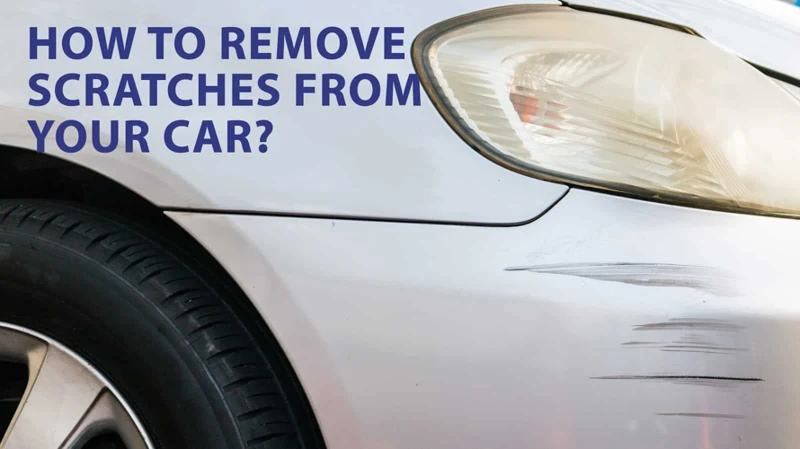
Have you ever looked at your car and noticed unsightly scratches on the paint? It’s a frustrating sight to see, and it’s natural to feel overwhelmed with the thought of removing them. But fear not, with the right tools and technique, removing scratches from painted surfaces is a manageable task. In this article, we’ll guide you through the step-by-step process of removing scratches from your car’s paint using polish. So, let’s get started and bring back the shine to your car’s exterior!
Gather Materials
As you prepare to remove scratches from your painted surface using polish, it is important to gather all the necessary materials. Without the right tools and products, your efforts may be ineffective or even cause further damage. You’ll need to find the right polish for your specific surface and have a few key tools on hand. If you’re unsure about which polish to use, check out this helpful guide on painted surface polishing. From there, let’s gather the materials we need to successfully remove those pesky scratches.
Find the Right Polish
To achieve the best results when removing scratches from a painted surface, it’s essential to select the correct polish. An improper polish may damage the surface and worsen the scratches. So, when choosing the right polish, consider the following factors:
| Factor | Considerations | Options |
| Type of paint | The polish must match the type of paint used for the surface. | Painted surface polish for doors |
| Severity of scratches | If the scratches are light, choose a polish with fine grit. For deeper scratches, a polish with coarser grit is necessary. | DIY painted polishing guide |
| Frequency of use | If the surface will be polished frequently, use a non-abrasive polish to avoid damaging the paint. | Polishing painted surfaces frequency |
| Environmental impact | To avoid harmful chemicals, consider using eco-friendly options. | Eco-friendly paint polish |
| Other considerations | Consider factors like the type of surface, the age of the paint, and the desired finish when selecting a polish. | Painted surface polish vs. wax Best painted surface polish for furniture review |
Once you have considered all the factors and have chosen the right product, you can begin the process of scratch removal from your painted surface.
Tools You’ll Need
To remove scratches from a painted surface using polish, you’ll need the right tools. Here is a list of tools you’ll need:
| Tools | Description |
|---|---|
| Microfiber Cloth | A soft cloth that won’t scratch or damage the painted surface. Essential for cleaning the area and applying the polish. |
| Polish | A product specifically designed for removing scratches from painted surfaces. Different polishes have different abrasiveness, so it’s important to find the right one for the job. |
| Buffer | An electric or manual tool used to buff or polish the surface. If you don’t have a buffer, a soft cloth can be used instead. |
| Tape | Masking tape can be used to cover any areas adjacent to the scratch that you don’t want to accidentally touch with the polish. |
It’s important to note that when using a buffer, you should avoid polished surfaces. Buffers can damage or even remove the clear coat from polished surfaces, leaving unrepairable damage. It’s recommended that you use a soft cloth instead if you’ll be working on a polished surface. If you’re unsure whether the surface is polished or not, it’s best to err on the side of caution and use a soft cloth.
Assess the Damage
Before diving into removing scratches from your painted surfaces, it’s important to assess the damage to avoid any further harm. Understanding the level of damage and severity of the scratch will help determine the best course of action for repair. You may be wondering, how do I assess the damage? Well, have no fear, we’ve got you covered. There are a few simple steps you can take to evaluate the scratch and make an informed decision on how to proceed. But first, let’s take a moment to highlight an important factor to consider during this process: avoid polished surfaces when assessing the damage to prevent any false readings.
Is the Damage Repairable?
Assessing the extent of damage is crucial before proceeding with scratch removal. Here are some pointers to evaluate the repairability of your painted surface:
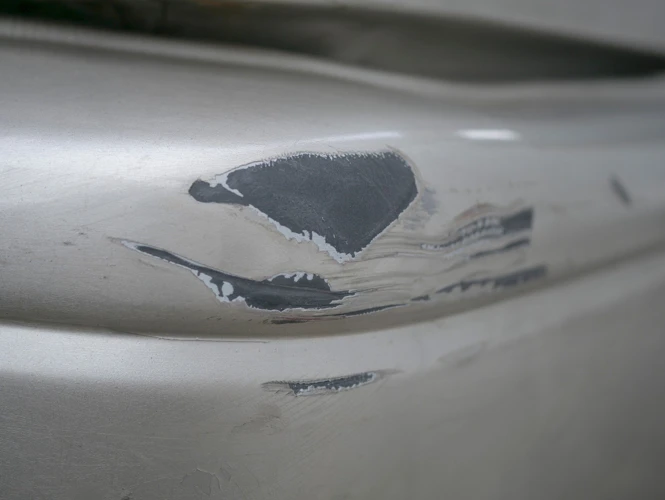
- Depth of Scratch: If the scratch reaches the primer or bare metal, no amount of polish can repair it. A professional repaint may be necessary.
- Location of Scratch: If the scratch is on a curve or edge, it may be difficult to remove as the polish might not reach properly in such a tight space.
- Number of Scratches: Multiple scratches can be time-consuming to remove, especially if they are deep.
- Type of Paint: The durability and resistance of the paint may influence the scratch removal process. Different types of paint such as clear coat, metallic, and matte have different repair methods.
It’s also important to note that attempting scratch removal on an older high-mileage vehicle or a vehicle with fading paint may not yield satisfactory results even if the scratches are minor. In such cases, it’s better to seek professional advice or consider a repaint.
Is the Damage Severe?
Assessing the severity of the damage is critical before attempting to remove scratches from painted surfaces using polish. Here are a few things to look for:
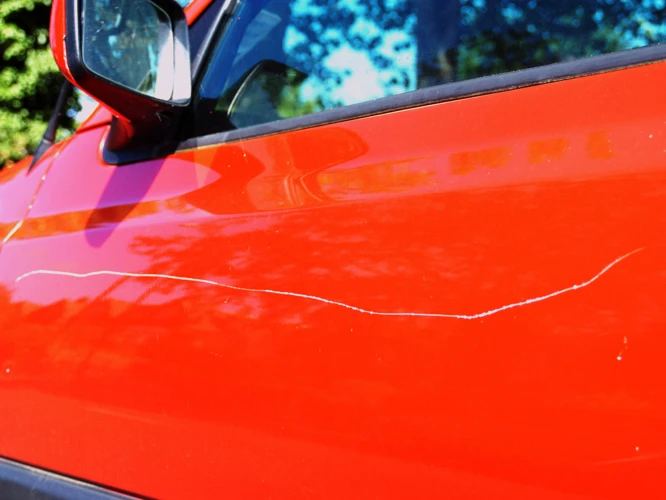
- Depth of Scratches – Determine how deep the scratches are by running your fingernail across them. If you can feel a scratch catching on your nail, it means the scratches are deep, and attempting to remove them with polish alone may not be effective.
- Size of Scratches – Look for large or long scratches that cover a large area of the paint. Deep or wide scratches may require professional repair and should not be attempted to remove at home.
- Number of Scratches – Determine if there are multiple scratches present in the area. If there are many scratches together, it may be difficult to remove them all successfully.
- Location of Scratches – Scratches on hard-to-reach areas like corners of bumpers or along edges of body panels may require the help of a professional to remove.
By assessing the severity of the scratches, you can determine whether the damage can be repaired with polish alone or if it requires the help of a professional. Remember to approach severe damage with caution, as attempting to fix it yourself may cause more harm than good.
Preparing the Surface
Before you begin removing scratches from your painted surface, it’s important to properly prepare the area. This will ensure that the polish is applied to a clean and smooth surface, allowing for the best possible outcome. Follow these next steps carefully to ensure a successful repair.
Clean the Area
Before attempting to remove scratches from a painted surface using polish, it’s crucial to ensure that the area is clean and free from any debris. Clean the area by following these steps:
| Step 1: | Thoroughly wash the area surrounding the scratch using mild soap and water. Be sure to rinse the area well and allow it to dry completely. |
| Step 2: | Once the area is dry, use a lint-free cloth to remove any remaining dirt or debris from the surface. |
| Step 3: | If there are any stubborn marks or contaminants on the surface, use a detailing clay bar to gently lift them away. Be sure to avoid using too much pressure as this can damage the surface. |
| Step 4: | Finally, wipe the area with a clean and dry microfiber cloth to ensure that it’s completely free from dust or particles that may interfere with the polishing process. |
Keep in mind that the cleanliness of the surface is critical when removing scratches, as any dirt or debris left on the surface will be incorporated into the polish and could create additional scratches. Additionally, ensure that the area is completely dry before proceeding to the next step to avoid water spots or streaks on the surface.
Mask Off Surrounding Area If Necessary
Before you begin to eliminate the scratches on your painted surface, it is essential to mask off the surrounding area if necessary. This step will help you avoid any accidental damage to the unaffected surface near the scratches.
Here are the steps you need to take to mask off the area:
- Clean the surrounding area: Start by cleaning the area around the scratches with a mild soap and water solution. This will ensure that there is no dirt, dust or debris around the scratch that can cause further damage.
- Tape off the surrounding area: Once the area is clean and dry, you can use masking tape to cover the areas around the scratches you want to avoid.
- Be precise: Make sure that the masking tape is carefully placed, covering only the areas you don’t want to polish. This will help you focus on the scratches without causing any damage to the surrounding surface.
- Use painter’s tape: It is recommended to use painter’s tape for this step, as it is designed to stick to surfaces without leaving any residue behind. This will prevent any damage to your painted surface.
- Press down gently: Be sure to press the tape down gently to ensure good adhesion and prevent any polish from seeping underneath.
By masking off the surrounding area, you can carefully focus on eliminating the scratches without causing any damage to your painted surface. This step is especially important if you are working on a larger surface or an area with multiple scratches. Make sure to take your time to mask off the surrounding areas before proceeding with the polish application.
Eliminating Scratches on Your Painted Surface

At long last, it’s time to address those unsightly scratches on your painted surface. With a little elbow grease and the right materials, eliminating these imperfections is a straightforward process. That being said, it’s important to take your time and follow each step carefully to ensure the best possible results. So, roll up your sleeves and let’s get to work on this transformative task for your paint job.
Apply the Polish to the Scratch
To apply the polish to the scratch, follow these steps:
- Step 1: Squeeze a small amount of polish onto a microfiber cloth.
- Step 2: Apply the polish directly to the scratch, using small, circular motions.
- Step 3: Work the polish into the scratch until it starts to disappear.
- Step 4: Apply more polish as needed to fill in the scratch completely.
- Step 5: Be careful not to apply too much polish, as excess polish can be difficult to remove and may cause unevenness in the final result.
- Step 6: Allow the polish to dry completely before moving on to the next step.
Remember, it’s important to use a small amount of polish at a time and work it into the scratch gradually, carefully monitoring the progress to avoid overdoing it.
Buff the Area
After applying the polish, it’s time to buff the area. This step requires a soft, clean cloth or buffing pad, which should be wrapped around a polishing machine or buffer. Using the machine, buff the area with light pressure in circular or side-to-side motions. This will help to remove any remaining scratches, as well as polish the surface to a shine.
When buffing, it’s important to be careful not to apply too much pressure or buff for too long in one area, as this can cause the paint to become too thin and potentially damage the surface. Additionally, it’s important to avoid buffing over any edges or corners, as this can cause the paint to peel.
Tip: If you don’t have a polishing machine or buffer, you can also buff by hand using a microfiber cloth. Be sure to use a clean, dry cloth and apply light pressure while buffing in circular motions.
After buffing, you can check the area to see if the scratches have been completely removed. If they are still visible, you may need to repeat the process by applying more polish and buffing again. Remember to be patient and take your time, as removing scratches from painted surfaces can be a delicate process.
When you are satisfied with the results, use a clean, dry cloth to wipe away any remaining polish residue. It’s important to remove all of the polish to avoid any potential damage to the paint in the future.
Note: If you are encountering any issues while buffing or if the scratches are not improving, it’s always best to consult a professional. They can assess the damage and provide guidance on the best course of action.
Repeat as Necessary
Once you have applied the polish and buffed the scratched area, it is important to assess the results. If the scratch is still visible, you may need to repeat the process until the scratch is no longer noticeable.
To do this, you will need to apply more polish to the scratched area and buff it again with a clean cloth. Keep in mind that you should not apply too much pressure when polishing, as this can damage the surrounding paint.
After buffing, assess the results again. If the scratch is still visible, you may need to repeat the process until you are satisfied with the results.
It is important to note that some scratches may be too deep to be completely removed through polishing. In these cases, you may need to seek professional help or consider repainting the affected area.
Refer to the table below for a summary of the steps involved in removing scratches from painted surfaces using polish.
| Step | Description |
|---|---|
| 1 | Apply polish to the scratch |
| 2 | Buff the area with a clean cloth |
| 3 | Assess the results |
| 4 | Repeat the process as necessary |
| 5 | Finish by cleaning the area of polish residue |
Remember to be patient and take your time. With a little effort and persistence, you can effectively remove scratches from your painted surfaces using polish.
Finishing Up
As you approach the end of the scratch removal process, you’re likely feeling a mix of relief and anticipation. With the damage to your painted surface at least partially erased, it’s tempting to call it a day and move on with your life, but there’s still work to be done. The finishing touches are just as important as the rest of the process, and a few extra steps can make all the difference in the final aesthetic result. So, let’s explore the final steps necessary to get your painted surface looking its best once again.
Clean the Area of Polish Residue
Once you have successfully eliminated the scratches from your painted surface using polish, it’s important to clean the area of any remaining polish residue. Failure to do so could result in unsightly smudges or streaks on your surface. Here’s how to clean the area of polish residue effectively:
| Step 1: | Take a clean microfiber cloth and gently wipe the area where you applied the polish. |
| Step 2: | Inspect the area to ensure that all the polish residue has been removed. |
| Step 3: | If there is still residue remaining, dampen another microfiber cloth with water and gently wipe the area again. |
| Step 4: | Dry the area with a clean, dry microfiber cloth. |
By completing these steps, you can be sure that your painted surface is both scratchless and free of any remaining polish residue. Now that you have properly cleaned the area, you can admire your polished workmanship!
Admire Your Work!
Finally, after all your hard work, it’s time to step back and admire your handiwork. Take a step back and see the improvement you’ve made on your painted surface. Here are some steps to follow to ensure that everything looks its best:
- Inspect the surface: Look closely at the surface to make sure all the scratches are gone. If there are any remaining scratches, you may need to repeat the polishing process.
- Check for residue: Make sure to inspect the area for any leftover polish residue. This can come in the form of a haze or cloudy appearance. If you notice any residue, take a clean microfiber cloth and wipe it away.
- Finish with a wax: To further protect your painted surface and give it a glossy finish, consider applying a coat of wax. This will further protect against future scratches and give a finished look to your hard work.
- Enjoy the results: Now that your painted surface looks as good as new, take some time to enjoy the results. Take your car out for a spin or just admire your newly polished object.
Remember, polishing scratches from painted surfaces using polish can be a bit of a tedious process, but the results are worth it. Not only will your object look new again, but you can be proud of the hard work you put into accomplishing this feat. So, take a deep breath, step back, and appreciate the beautiful work you’ve just done!
Conclusion
In conclusion, polishing painted surfaces is a simple and effective way to remove scratches and restore the surface’s original look. However, it is important to choose the right polish and use the proper technique to achieve the best results. Taking the time to assess the damage, properly prepare the surface, and apply the polish correctly will lead to a successful outcome.
Remember to always test a small, inconspicuous area before starting the entire process on your painted surface. This will help ensure that the polish you have chosen is safe for your specific surface and that you are satisfied with the end result.
Additionally, it is important to pay attention to the severity of scratches on your painted surface. While some scratches can easily be removed with a polish, others may require more extensive repair methods. If you are unsure about the severity of the scratches or how to proceed, it may be best to consult a professional.
In the end, with the right materials, technique, and patience, you can successfully remove scratches from your painted surfaces and restore them to their original beauty. So go ahead and give it a try, and enjoy your newly polished surface!
Frequently Asked Questions
Can I use any type of polish to remove scratches from my painted surface?
No, you should choose a polish specifically designed for removing scratches from painted surfaces.
Do I need any special tools to remove scratches from my painted surface?
Not necessarily, but having a microfiber towel and an applicator pad will make the process easier.
What should I do if the scratch on my painted surface is deep?
If the scratch is deep, it may require a professional to repair it or potentially even a touch-up paint job.
Should I clean the area before applying the polish?
Yes, it’s important to clean the area before applying the polish to ensure there’s no debris that could cause further damage.
Can I use this method to remove scratches from other surfaces besides painted surfaces?
No, this method is specifically for painted surfaces only. Scratches on other surfaces may require different methods or products.
How long should I buff the area for?
It depends on the severity of the scratch, but typically you should buff for about 30 seconds and then assess if the scratch is still visible.
What should I do if the polish doesn’t remove the scratch completely?
You can apply the polish again and continue buffing, but if the scratch is still visible you may need to seek professional help.
Can I use any type of cloth to buff the area?
No, it’s recommended to use a microfiber towel to avoid causing any additional damage to the surface.
Do I need to follow any special instructions when masking off the surrounding area?
It’s important to use masking tape designed for automotive use and to apply it carefully to avoid causing damage to the surrounding area.
Is it possible to prevent scratches from occurring on painted surfaces?
Yes, regularly washing and waxing your vehicle can help protect the surface from scratches and other damage.