Introduction: What is Metal Polishing?
Metal polishing is a process that involves making metal surfaces smooth and shiny by removing impurities and imperfections from their surfaces. This process is often used to improve a metal’s appearance, but it can also have other practical purposes.
There are many reasons why someone might want to polish metal. One of the most common reasons is to improve the appearance of an item. When metal surfaces are polished, they can become brighter, shinier, and more reflective. This can be especially important for items that are meant to be decorative, such as jewelry, sculptures, or architectural elements.
In addition to aesthetic benefits, metal polishing can also remove rust, corrosion, and other forms of damage from the surface of the metal. This is critical for items that are vulnerable to environmental damage, such as outdoor furniture or car parts. By removing these impurities, metal surfaces can be restored to their original condition, or even improved upon.
Polishing metal can also help to prevent future damage. When impurities are removed from the surface of the metal, it becomes less likely to be affected by damage from moisture, weather, or other forms of wear and tear. This is especially important for items that are exposed to the elements, such as boat parts or outdoor fixtures.
For individuals interested in preservation and restoration, metal polishing can be an essential technique. By restoring old or damaged metal surfaces, items can be brought back to their original condition or improved upon. This can have practical and financial benefits – items that have been restored can retain their value or even appreciate over time.
In the next sections, we will explore the different types of metal polish, the techniques for metal polishing, and some recommended products and maintenance tips. Whether your goal is to improve an item’s appearance, restore an object to its former glory, or prevent future damage, metal polishing can be a highly effective tool.
Why Polish Metal?
Polishing metal might seem like an unnecessary task, but the benefits it provides cannot be ignored. Improving appearance, removing rust and corrosion, and preventing future damage are some of the main reasons for polishing metals. It also helps in preserving and restoring projects to their former glory. There are different types of metal polish, and the techniques used for metal polishing vary depending on the type of metal and the polish used. In this article, we will discuss everything you need to know about metal polishing, including the different types of polish, the techniques used for polishing, and product recommendations. We will also talk about maintenance and care tips to help maintain the polished finish of your metal objects.
Improving Appearance
Improving the appearance of metal is one of the main reasons why people decide to polish it. With proper polishing techniques, metal can transform into a shiny surface that reflects light beautifully, making it perfect for decorative purposes. Polishing also helps to enhance the value of metal objects, which is especially important for antique items or jewelry.
To achieve the maximum shine, it is essential to start with a thorough cleaning process. This involves removing any dirt, grime, or other residues from the surface of the metal that could interfere with the polishing process. After cleaning, you can start the polishing process using your chosen metal polish product.
Some people prefer metal polishes that contain abrasive ingredients, while others prefer chemical polishes. Regardless of which type of metal polish you choose, there are a few important tips to keep in mind. For example, when polishing metal, it’s always best to work in small sections, using circular or back-and-forth motions. This is particularly important when dealing with delicate or intricate designs, like those found on metal jewelry or antiques.
Another thing to keep in mind when attempting to improve the appearance of metal is to take care when using power tools. While power tools can make the process quicker and more effortless, they can also be relatively aggressive, which can leave undesirable marks on the surface of the metal. It’s always best to practice before you apply the power tool, especially if you’re not familiar with its capabilities.
Lastly, it’s important to use a gentle hand when polishing. Don’t apply too much pressure, or you could end up scratching the metal’s surface. If you notice any scratches, blemishes, or staining on your metal, don’t worry. With proper polish and the right technique, you can restore your metal’s shine to its former glory.
For more information on selecting the right metal polish for your project, check out our article of How to Choose the Right Metal Polish.
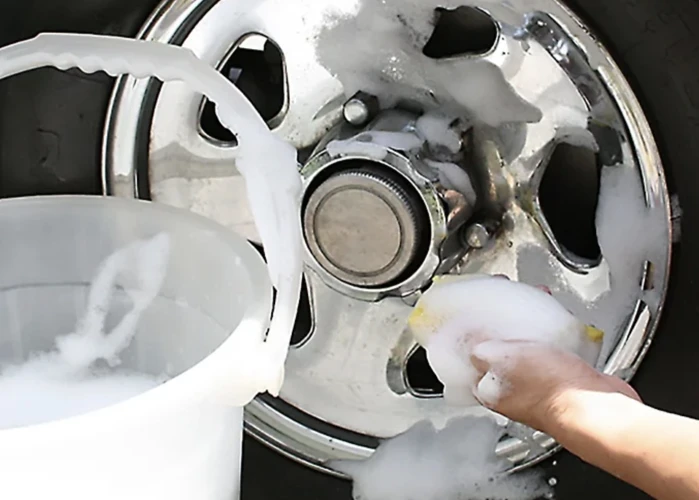
Removing Rust and Corrosion
When metal is exposed to the air and moisture, it can start to develop rust and corrosion. This can be especially frustrating if you have a valuable antique or sentimental item that you want to preserve. Luckily, there are a few steps you can take to remove rust and corrosion from metal using metal polish.
1. Prepare the Metal: Before you begin removing any rust or corrosion, make sure you prepare the metal by cleaning it thoroughly. Use a soft cloth and mild soap to gently scrub away dirt and debris. Rinse the metal with water and dry it completely.
2. Choose the Right Polish: Different types of metal polish are better suited for removing rust and corrosion, so choose a polish that is specifically designed for this purpose. Chemical polishes are often the most effective, as they contain rust inhibitors that can help prevent future damage.
3. Apply the Polish: Apply a small amount of polish to a soft cloth and rub it onto the affected area in a circular motion. Make sure you cover the entire area thoroughly. If the rust or corrosion is particularly stubborn, you may need to apply more pressure.
4. Allow the Polish to Soak In: Once you have applied the polish, allow it to soak in for a few minutes. This will give the chemicals time to work their way into the rust and corrosion and break it down.
5. Wipe Away the Polish and Rust: After the polish has had time to soak in, use a clean cloth to wipe it away. You should see the rust and corrosion coming off with the polish. Keep wiping until all the rust is gone.
6. Rinse and Dry: Once all the rust has been removed, rinse the metal with water and dry it thoroughly with a clean cloth. If you see any remaining spots of rust, repeat the process until the metal is completely clean.
Remember to always wear gloves and follow safety instructions when using metal polish. Additionally, be sure to store your metal items correctly to prevent future rust and corrosion. Using a protective polish can also help to prevent damage and keep your metal looking great.
For more tips on polishing metal surfaces, check out our article on Tips for Polishing Metal Surfaces. Additionally, you can learn how to safely polish antique metals in our article on Safe Ways to Polish Antique Metals.
Preventing Future Damage
When it comes to metal objects, prevention is better than cure. Applying a protective polish to your metal surface can significantly help in preventing future damage. Here are some ways to prevent damage to your metal objects:
- Keep it dry: After polishing your metal objects, make sure to keep them dry. Moisture can lead to oxidation or even rusting, which can ruin your metal’s finish.
- Avoid harsh chemicals: Some chemicals used for cleaning can be harsh on the metal, so it’s best to avoid them. Instead, use mild soaps and water to clean your metal objects.
- Invest in a good metal polish: A good metal polish will help protect your metal surface from future damage. Look for a multi-purpose metal polish that not only polishes your metal but also helps prevent tarnishing and corrosion.
- Avoid metal polish ingredients that are harmful: Some metal polishes contain harmful ingredients such as ammonia or acids, which can be harmful to your metal and your health. Look for metal polish products that are free from such substances.
- Polish your metal objects regularly: It’s essential to maintain your metal objects regularly. Regular polishing can help prevent tarnishing and corrosion. How frequently you polish can depend on the metal and how often it’s in use.
By keeping these tips in mind, you can prevent future damage to your metal objects, which can save you time, money, and effort in the long run. For more specific tips on polishing particular metal objects, such as metal jewelry, refer to our article on metal jewelry polishing tips or check out our article on metal polishing frequency to know how often you should polish your metal objects.
Project Preservation and Restoration
Project Preservation and Restoration
Metal polishing is not just for improving the appearance of a metal item but it is also used for project preservation and restoration. Over time, metals become dull, rusted, and corroded affecting their overall longevity.
There are many items that can be restored through metal polishing including family heirlooms or antiques, car parts, jewelry, boats, and many more. Restoring these items can bring them back to their original beauty and increase their lifespan.
Metal polishing removes scratches, rust, and other imperfections, allowing the item to regain its original luster. Many items can be restored without needing to replace them, which can be expensive.
However, it is important to note that sometimes, especially with antiques, the natural patina of the metal may be desired and should not be removed through polishing. Careful consideration should be taken before beginning any polishing project to ensure the desired outcome is achieved without damaging the item.
Proper care and maintenance of restored items is important to retain the restored finish. Using a protective polish after restoration can help prevent future damage and corrosion. It is also important to clean the item regularly to prevent the buildup of dirt and debris.
For more information on how to avoid metal polish ingredients that may harm the surface of the metal, see our guide on avoiding harmful ingredients. Additionally, check out our guide on the benefits of using a multi-purpose metal polish and the difference between cleaning and polishing in our cleaning vs. polishing guide. And if you are looking to restore tarnished metal, see our guide on restoring tarnished metal.
Types of Metal Polish
When it comes to metal polishing, choosing the right type of polish is essential for achieving the desired results. With so many options available, from abrasive to chemical to protective polishes, it can be overwhelming to determine which one is best for your particular project. In this section, we’ll explore the various types of metal polish and their specific uses, so you can make an informed decision and ensure a successful polishing outcome.
Abrasive Polish
Abrasive polish is a type of metal polish that uses abrasive particles to remove imperfections from the surface of the metal. This type of polish is typically used to remove deep scratches, pits, and other blemishes that cannot be removed with a chemical polish alone.
Here is a list of common abrasive polishes:
- Rouge: This is a fine abrasive that is commonly used on silver and other soft metals. It is available in several different grades, with the finest grade being used for final polishing.
- Pumice: This is a volcanic rock that has been ground up into a fine powder. It is a very mild abrasive that is often used for polishing stones and metals.
- Emery: This is a type of sandpaper that is made from emery particles. It is a very harsh abrasive that is typically used for removing heavy rust and corrosion from metal surfaces.
- Aluminum Oxide: This is a synthetic abrasive that is commonly used for polishing metal surfaces. It is available in several different grades, with the finest grade being used for final polishing.
When using an abrasive polish, it is important to choose the right grade of abrasive for the job at hand. Using a coarser abrasive than necessary can cause damage to the metal, while using too fine of an abrasive may not be effective at removing the imperfections on the surface. Additionally, it is important to use the right polishing tool for the job, such as a felt or cotton buffing wheel for applying the abrasive polish.
Chemical Polish
Chemical polishing is a popular method for removing oxidation and other blemishes from metal surfaces. This approach involves using strong chemicals to dissolve the top layer of the metal, thereby revealing a clean and smooth surface underneath. While it may sound harsh, chemical polishing can be gentler than abrasive polishing and is often preferred for delicate metals or intricate surfaces.
Advantages of Chemical Polishing:
- Allows for more precise control over the amount of metal removed.
- Can be less aggressive than abrasive methods, avoiding the risk of scratching or marring the surface.
- Works well on complex shapes or designs that may be difficult to polish by hand.
- Takes less time than hand polishing and requires less physical effort.
Types of Chemical Polishes:
- Oxidizing Polishes: These use an acid or alkaline solution to dissolve the metal surface and create a slightly porous layer that can absorb and trap dirt and moisture. While they can be effective at removing corrosion, they may not be ideal for long-term protection.
- Electrolytic Polishes: These involve immersing the metal in an electrolytic solution and applying a current to the surface to stimulate a chemical reaction that removes blemishes. While this method is more precise and can produce a mirror-like shine, it requires specialized equipment and can be more dangerous.
- Phosphate Polishes: These use a solution containing phosphoric acid to dissolve the top layer of metal and leave a clean, even finish. They are particularly effective on stainless steel and can help protect against future rust and corrosion.
How to Use Chemical Polishes:
- Always wear protective gloves and goggles when working with chemical polishes.
- Clean the metal surface thoroughly and ensure it is free of any oils, grease, or debris that may interfere with the polishing process.
- Apply the polish to the surface, either by dipping it in a solution or using a soft cloth or abrasive pad.
- Allow the polish to work, typically for several minutes or as directed by the manufacturer.
- Rinse the metal thoroughly with clean water and dry it with a soft cloth or air compressor.
- Optionally, you can apply a protective coating to the metal to help prevent future oxidation or corrosion.
Chemical polishing can produce excellent results with minimal effort or risk of damage to the metal surface. However, it is important to follow safety procedures and choose the right type of polish for the specific metal and application to achieve the desired finish.
Protective Polish
Protective polish is an important step in metal polishing as it helps to protect the surface from future damage and corrosion. Protective polishes work by leaving a protective layer on the surface of the metal, which acts as a barrier against moisture, dirt, and other environmental elements.
There are a variety of protective polishes available on the market, each with their own unique formula and protective properties. Below is a table outlining some of the best protective polishes for common types of metal:
| Metal Type | Protective Polish | Features |
|---|---|---|
| Stainless Steel | Bar Keepers Friend Cookware Cleaner and Polish | Provides a protective barrier and removes tough stains and scratches. |
| Chrome | Turtle Wax Chrome Polish | Provides a barrier to protect against rust and tarnish. |
| Aluminum | Mothers Mag and Aluminum Polish | Protects against oxidation and leaves a high-gloss shine. |
| Copper | Brasso Multipurpose Metal Polish | Leaves a protective coating against tarnish and corrosion. |
When applying a protective polish, make sure the surface is clean and dry before application. Apply the polish evenly using a clean, soft cloth or applicator pad, and allow it to dry completely before buffing with a microfiber cloth to a high shine.
Remember to always follow the manufacturer’s instructions and wear appropriate safety gear when handling any type of metal polish.
Combination Polish
Combination polish, also known as all-in-one polish, is a type of metal polish that has multiple functions. It combines the role of abrasive polish, chemical polish, and protective polish in a single product. This type of polish is ideal for those who want to achieve a polished finish without having to go through the hassle of using multiple products.
Advantages of Combination Polish:
| Advantages | Description |
| Time-Saving | Combination polish saves time by providing a one-step polishing process that achieves multiple results. |
| Simplicity | It is easy to use and eliminates the need for multiple products. |
| Cost-Effective | Combination polish can be more cost-effective than purchasing multiple products separately. |
| Multipurpose | It can be used on a variety of metals including brass, copper, aluminum, and stainless steel. |
Disadvantages of Combination Polish:
| Disadvantages | Description |
| Less Effective Abrasive | Combination polish may not be as effective as dedicated abrasive polishes for removing heavy oxidation or scratches. |
| Less Control | It may be more difficult to control the level of abrasion with combination polish, as it is a multipurpose product. |
| Less Durable Protective Layer | The protective layer provided by combination polish may not be as durable as dedicated protective polishes. |
Combination polish is a versatile option for those who want to achieve a polished finish quickly and easily. However, it may not be the best option for more intensive polishing jobs or for those who want more control over the polishing process. It is important to carefully consider the advantages and disadvantages of combination polish before using it on your metal project.
Metal Polishing Techniques
When it comes to metal polishing, choosing the right technique can make a significant difference in achieving a perfect finish. While there are various methods to choose from, it can be overwhelming to decide which one to use. We will explore some of the best metal polishing techniques, including preparation and safety tips, polishing steps for common metals, and tools to use for the job. Whether you’re polishing for appearance, removing rust and corrosion, or preventing future damage, understanding these techniques will help you achieve your desired results.
Preparation and Safety
Before beginning any metal polishing project, it is important to take the necessary preparation and safety measures to ensure a successful and safe outcome. Here are some key points to keep in mind:
| Preparation | Safety |
|---|---|
| Clean the Surface: Before polishing, it is important to thoroughly clean the surface to remove any dirt, grease or oil. This helps ensure a smooth and even finish. | Eye Protection: Metal particles and debris can fly off during the polishing process. It is essential to protect your eyes with safety goggles or glasses. |
| Remove Rust: If there is any rust or corrosion on the metal, it should be removed before polishing. Use sandpaper or a rust remover to treat the affected areas. | Hand Protection: Gloves should be worn to protect your hands from sharp edges and hot surfaces. Leather gloves are recommended for added protection. |
| Cover Surfaces: Metal polishing can be messy, so it is important to cover nearby surfaces with plastic or a drop cloth to prevent damage or staining. | Respiratory Protection: Metal particles and dust can also be hazardous when inhaled. A face mask or respirator should be worn to protect your lungs. |
| Gather Tools: Make sure you have all necessary tools and materials before beginning your project. This includes polishing compounds, cloths, and the appropriate polishing tool. | Work Area: Your work area should be well ventilated and well lit. Make sure there are no flammable materials nearby and avoid working in damp areas. |
By taking these preparation and safety measures, you can help ensure that your metal polishing project is successful and that you protect yourself from potential hazards.
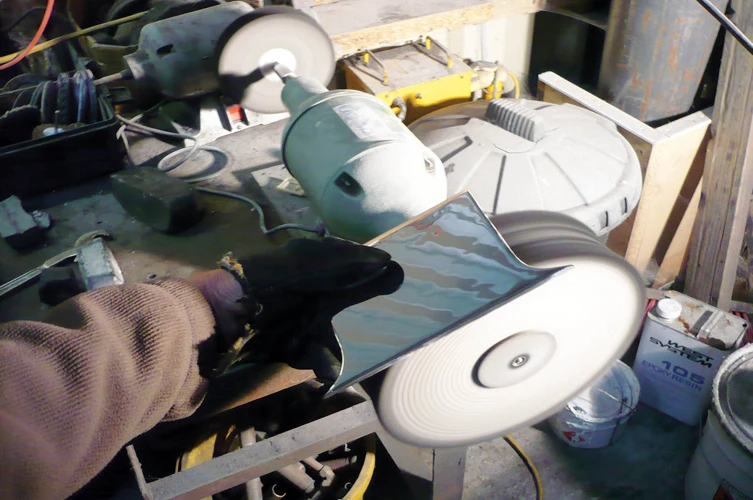
Hand Polishing vs. Power Tools
When it comes to metal polishing, one of the biggest questions is whether to use hand polishing or power tools. Both techniques have their advantages and disadvantages depending on the project.
Hand Polishing is the traditional method of metal polishing, which has been used for centuries. Hand polishing involves using polishing compounds, cloths, and elbow grease to polish the metal to a high shine. It is a slower process, but it allows for more control and precision.
On the other hand, Power Tools can speed up the process by using mechanical force to polish the metal. Power tools include angle grinders, sanders, and polishing machines. These tools can remove scratches and blemishes quickly and efficiently, making them ideal for larger projects or when time is of the essence.
However, using power tools requires more caution and safety measures compared to hand polishing. Inexperienced users can damage the metal by applying too much pressure or using the wrong tool for the job. Additionally, power tools generate heat, which can warp or damage the metal if not used correctly.
The choice between hand polishing and power tools depends on the project at hand and the user’s experience level. For delicate or intricate projects, hand polishing may be the better choice due to its precision and control. Meanwhile, power tools are useful for larger-scale or time-sensitive projects, but caution and proper safety measures must be taken to ensure the metal is not damaged.
To summarize, here is a table outlining the advantages and disadvantages of each technique:
| Advantages | Disadvantages | |
|---|---|---|
| Hand Polishing | Precision and control | Slower process |
| Power Tools | Efficient and quick | Requires caution and safety measures, risk of damage |
Choosing the Right Tool for the Job
When it comes to metal polishing, it’s important to choose the right tool for the job. Different polishing techniques require different tools in order to achieve the desired result. Here are some common tools used for metal polishing and what they’re best used for:
| Tool | Best Used For |
|---|---|
| Buffing Wheels | Used with abrasive polish to buff out scratches and blemishes |
| Polishing Compounds | Used with buffing wheels or by hand to remove scratches and create a smooth, polished surface |
| Polishing Pads | Used with power tools to apply abrasive, chemical, or protective polish to large surfaces |
| Microfiber Cloths | Used for hand polishing to create a shine on small or intricate areas |
| Sanding Discs | Used with power tools to remove deep scratches and prepare metal surfaces for polishing |
| Steel Wool | Used to remove rust and stains from metal surfaces |
| Wire Brushes | Used to remove rust and corrosion from metal surfaces, but may leave scratches |
It’s important to keep in mind that different tools may have varying levels of abrasiveness and can affect the appearance of the metal surface differently. Always test out the tool on a small, inconspicuous area before committing to polishing the entire surface. Consider the type of metal you are working with as well, as some metals may require gentler polishing techniques or specialized tools. Investing in high-quality tools and products can also make a significant difference in the final result of your metal polishing project.
Polishing Steps for Common Metals
When it comes to polishing different metals, there are specific steps that you should follow to ensure a high-quality and long-lasting shine. Here’s a guide to polishing common metals:
| Metal | Steps |
|---|---|
| Aluminum |
|
| Brass |
|
| Copper |
|
| Chrome |
|
| Stainless Steel |
|
Remember, when polishing any metal, it’s important to use the correct tools and technique to avoid damaging the surface. Take your time and be patient – the end result will be worth the effort!
Polishing Corners and Tight Spaces
When it comes to metal polishing, one of the most challenging tasks is polishing corners and tight spaces. Getting into those hard-to-reach areas requires some extra effort and innovative techniques. Here are some tips on how to polish corners and tight spaces effectively:
- Use the right tools: When it comes to polishing corners and tight spaces, using the right tool is crucial. Flexible abrasive pads, small polishing discs and wheels, and miniature buffing wheels are excellent choices for getting into tight areas. Some tools come in smaller sizes, which allow you to reach hard-to-reach nooks and crannies.
- Create specialized tools: In some cases, you may need to make a specialized tool to reach the spot that needs polishing. Take a small piece of felt or cloth and wrap it around a tool such as a screwdriver or a pencil. Secure it with a rubber band or string, dip it into the polishing compound, and use it to polish the corner or tight space.
- Work slowly and carefully: Polishing corners and tight spaces requires patience and care. Take your time and work slowly to ensure that you don’t damage the surrounding area. Be extra cautious when working next to sensitive parts, such as electronic components or fragile materials.
- Experiment with different angles: Depending on the shape of the area that needs polishing, you may need to adjust the angle of your tool. Try different angles to get the best results. If you’re polishing a corner, try using a crisscross pattern to ensure that you cover all angles.
- Use a smaller amount of polishing compound: When working in corners or tight spaces, using too much polishing compound can be counterproductive. Apply a small amount of compound to your tool and work with it gradually. This will prevent excessive compound from getting into hard-to-reach areas where it can be challenging to remove.
- Be mindful of heat build-up: When using power tools to polish corners and tight spaces, heat can build up quickly, which can be damaging to the surrounding area. Take frequent breaks and let your tool cool down to avoid overheating. Additionally, use light pressure when polishing to prevent unnecessary heat generation.
Polishing corners and tight spaces can be a time-consuming and challenging task, but with the right tools and techniques, you can achieve excellent results. Remember to work carefully and slowly, use the right amount of polishing compound, and take breaks to avoid overheating. By following these tips, you’ll be able to polish corners and tight spaces with precision and confidence.
Removing Scratches and Blemishes
When it comes to metal polishing, getting rid of scratches and blemishes is an important step in achieving a flawless finish. Here are some tips for effectively removing scratches and blemishes from your polished metal surface:
- Identify the depth of the scratch: Not all scratches are equal. Minor surface scratches can be removed with a gentle polishing compound, while deeper scratches may require more aggressive techniques.
- Choose the right abrasive: Depending on the depth of the scratch, you may need to use a more aggressive abrasive to remove it. Begin with a less aggressive polishing compound and gradually increase the intensity until the scratch is completely gone.
- Use a microfiber cloth: When polishing the scratch, use a clean, soft microfiber cloth to avoid further damage to the surface.
- Apply pressure evenly: When using a polishing tool or polishing by hand, be sure to apply pressure evenly across the surface to avoid creating more scratches.
- Polish in a circular motion: To effectively blend the scratch with the surrounding metal, polish in a circular motion.
- Check your progress frequently: As you work on removing the scratch, check your progress frequently to avoid over-polishing and creating an uneven surface.
- Finish with a protective polish: Once the scratch has been removed, finish with a protective polish to prevent future damage and maintain the polished finish.
By following these tips, you can effectively remove scratches and blemishes from your polished metal surface and achieve a flawless finish. Remember to take your time and work on the surface gradually to avoid making things worse.
Product Recommendations
Now that we have covered the various types of metal polish and techniques for polishing, it’s time to get into the nitty-gritty of product recommendations. Finding the right type of polish and tools can be daunting, but fear not! We’ve compiled a list of the best products on the market to help achieve a professional shine. From abrasive polishes to protective coatings, we’ve tested and compiled the top picks for each category. Whether you’re a seasoned pro or a beginner, these product recommendations will help you achieve a flawless finish.
Best Abrasive Polishes
Abrasive polishes are the most common type of polish used for metal. They contain fine particles of grit or abrasive materials that remove a thin layer of the metal surface, revealing a smoother and shinier layer underneath. There are various types of abrasive polishes available in the market, but not all of them are suitable for every metal.
Here are some of the best abrasive polishes for different types of metal:
| Polish Type | Metal Type | Product Recommendation |
|---|---|---|
| Chrome Polishes | Chrome Metal | Meguiar’s Hot Rims Chrome Wheel Cleaner |
| Stainless Steel Polishes | Stainless Steel | Mother’s Mag & Aluminum Polish |
| Aluminum Polishes | Aluminum | 3M Marine Aluminum Restorer and Polish |
| Copper and Brass Polishes | Copper and Brass | Wright’s Copper and Brass Cleaner and Polish |
| Iron and Steel Polishes | Iron and Steel | Flitz Metal Polish and Fiberglass Cleaner |
It’s important to note that different grades of abrasive materials are used in the polishes for different purposes. For instance, coarse abrasives are used for removing deep scratches and tough stains, while finer abrasives are used for final finishing and polishing.
When using abrasive polishes, it’s important to follow safety guidelines, protective gears such as goggles and gloves should be worn. Also, it’s important to work in a well-ventilated area and to avoid inhaling the polish dust.
Finding the right abrasive polish for your metal project can make a huge difference in achieving a polished and shiny finish.
Best Chemical Polishes
Chemical polishes are an excellent choice for metal polishing because they can clean and restore surfaces without damaging the metal. The best chemical polishes on the market range in strength from gentle to aggressive, so it’s important to choose the right one for the job. Here are some of the best options available:
| Product Name | Main Features | Price (approx.) |
|---|---|---|
| Metal Wax | A gentle, all-purpose polish that removes light oxidation and gives a protective finish. | $10 |
| Flitz | A high-performance polish that removes heavy oxidation, rust, and stains from metal. | $20 |
| Brasso | A classic polish that is perfect for brass, copper, chrome, and stainless steel. | $5 |
| Blue Magic | An easy-to-use polish that removes light scratches, scuffs, and oxidation from metals. | $7 |
| CLR Metal Cleaner | A heavy-duty cleaner that removes tough stains, oxidation, and rust from metal surfaces. | $15 |
Metal Wax is a great option for those who want a gentle and affordable polish that can be used on a variety of metal surfaces. It is perfect for removing light oxidation and providing a protective finish. Flitz, on the other hand, is a more high-performance chemical polish that can tackle heavy oxidation, rust, and stains. It is perfect for situations where you have neglected metal that needs a lot of attention.
Brasso is a classic polishing product that has been around for over a century. It is ideal for polishing brass, copper, chrome, and stainless steel, making it an excellent choice for household or restoration projects. Blue Magic is another gentle polish that can be used to remove light scratches and oxidation from metals. It is easy to use and doesn’t require any specific tools or techniques.
The last product we recommend is CLR Metal Cleaner, a heavy-duty cleaner that is perfect for tackling tough stains, oxidation, and rust on metal surfaces. It is a powerful product, and as such, should be used with caution. However, it is highly effective, and in some cases, it may be the only product that can restore heavily damaged metal surfaces.
When choosing a chemical polish, it’s important to follow the manufacturer’s instructions carefully and to use appropriate safety equipment such as gloves and eye protection. Chemical polishes can be highly effective, but they can also be hazardous if not used properly.
Best Protective Polishes
When it comes to metal polishing, using a protective polish is essential to maintain the shine and prevent future damage. Protective polishes provide a layer of protection against the elements, preventing rust and corrosion from forming on your metal surfaces. Here are some of the best protective polishes available on the market:
| Product | Description |
|---|---|
| Flitz Polish and Protectant | This protective polish provides long-lasting protection to metal surfaces against tarnishing, rust, and corrosion. It is also a water repellent, making it ideal for outdoor use. |
| Mother’s California Gold Carnauba Wax | Containing high-quality Carnauba wax, this polish provides a protective coating on metal surfaces, shielding them against harmful UV rays and oxidation. |
| Turtle Wax Chrome Polish and Rust Remover | This multi-purpose polish not only removes rust, but also leaves behind a protective coating that helps prevent rust and corrosion from forming on your metal surfaces in the future. |
| 3M Marine Liquid Wax | Designed specifically for use on boats, this wax provides excellent protection against the harsh marine environment. It can also be used on other metal surfaces such as stainless steel, chrome, and aluminum. |
| Autoglym Extra Gloss Protection | This protective polish not only provides your metal surfaces with a high-gloss shine, but it also protects against UV radiation and environmental pollutants. It is also ideal for use on painted metal surfaces. |
When choosing a protective polish, it’s essential to consider the type of metal you’re working with and the environment it will be exposed to. For example, if you’re polishing metal that will be used outside, you may need a protective polish that is specially formulated to withstand the elements. Additionally, if you’re polishing painted metal surfaces, it’s important to choose a protective polish that won’t damage the paint. With so many options available, you’re sure to find a protective polish that meets your specific needs.
Best Polishing Tools
When it comes to DIY metal polishing, having the right tools is essential for achieving desired results. Here are some of the best polishing tools suitable for different types of polishing jobs:
| Polishing Tool | Description | Best for |
|---|---|---|
| Electric Polisher | An electrically powered polishing tool that uses abrasive pads to smooth and shine metal surfaces. | Large surface areas like car exteriors, boat hulls, and metal furniture. |
| Bench Grinder | A stationary grinder tool that uses abrasive wheels to quickly polish metal surfaces. | Removing rust and corrosion from metals like steel and iron. |
| Handheld Rotary Tool | A small, handheld tool that operates at high speed and comes with a variety of attachments to polish different types of metal. | Polishing small, intricate details on metal surfaces. |
| Sanding Discs and Belts | Abrasive discs and belts that attach to power tools for smoothing and polishing metal surfaces. | Removing scratches, blemishes, and rust from metal surfaces. |
| Buffing Wheel | A wheel made from soft material like cotton or flannel that attaches to a polisher tool to give a mirror-like finish to metal surfaces. | Producing a high shine on metals like stainless steel, brass, and aluminum. |
While some polishing tools are suitable for large-scale projects, others are better suited for smaller details. It is important to choose the right tool for the specific job in order to achieve optimal results. Investing in the right tools can make all the difference when it comes to achieving a polished and professional-looking finish on your metal projects.
Maintenance and Care Tips
Now that you’ve put in the effort to polish your metal to a gleaming shine, it’s important to take proper care of it to maintain that polished finish. Without proper maintenance, your metal could quickly lose its luster and become tarnished or corroded. Fortunately, with a little regular TLC, you can extend the life of your metal and keep it looking like new. In this section, we’ll cover some valuable maintenance and care tips to help you protect and preserve your cherished metal projects.
How to Maintain a Polished Finish
Maintaining a polished metal finish requires regular upkeep and care to ensure it stays shining and looking its best over time. Here are some tips to keep your polished metal looking great:
1. Keep it clean: Regularly clean the polished metal with a soft cloth or microfiber towel to remove any dust, dirt, or fingerprints that can dull the finish.
2. Avoid harsh chemicals: Do not use harsh chemicals, abrasive cleaners or steel wool that can scratch or damage the polished finish. Instead, opt for mild soap and water or specialized metal cleaning products.
3. Apply a protective coating: Consider applying a protective coating to the polished metal surface to help prevent scratches and preserve the shine of the finish. Products such as clear-coats or waxes designed specifically for metal can be used to provide an extra layer of protection.
4. Avoid exposure to moisture: Avoid exposing the polished metal to moisture or excessive humidity as it can lead to corrosion or oxidation. If the metal is exposed to moisture, make sure to dry it thoroughly to avoid any water spots.
5. Store in a dry place: Store polished metal items in a dry place when not in use to avoid exposure to moisture or humidity.
By following these tips, you can maintain a polished metal finish that looks great and lasts for years to come.
Cleaning and Protecting Metal
Properly cleaning and protecting metal after polishing is crucial in maintaining a polished finish. Here are some tips on how to do it:
- Use a microfiber cloth: After polishing, use a clean, soft, and non-abrasive microfiber cloth to remove any excess polish or residue. This will ensure that your metal is not scratched or damaged in the process.
- Apply a protectant: The next step is to apply a protectant to the polished surface. This will help prevent future damage and maintain the polished finish. There are protectants specially designed for metals that form a long-lasting protective barrier against rust, corrosion, and oxidation. They also add a gloss and shine to the metal surface.
- Avoid abrasive cleaners: When cleaning your metal, avoid using abrasive cleaners or scouring pads. These can easily scratch or damage the polished surface. Instead, use a non-abrasive cleaner and a soft cloth to gently clean the surface.
- Use a metal-specific cleaner: When choosing a cleaner, make sure to select one that is designed specifically for your type of metal. Using the wrong cleaner can lead to tarnishing or discoloration.
- Store your metal properly: When not in use, properly store your metal to avoid exposure to moisture or other damaging elements. Wrap it in a soft cloth or store it in a protective case.
By following these cleaning and protecting tips, you can ensure that your metal retains its polished finish for a long time. Not only will it look great, but it will also be protected from damage and corrosion.
Conclusion
In conclusion, mastering the art of metal polishing requires patience, practice, and proper technique. Whether you’re looking to improve the appearance of your metal objects or restore them to their former glory, the right polishing techniques and products can make a significant difference.
It’s essential to start with the right polish for your project, whether you’re using an abrasive, chemical, protective, or combination polish. Using the right tools, such as a handheld polisher or bench grinder, will also save time and effort.
Before diving into polishing, safety should always be a top priority. Taking precautions such as wearing safety goggles, gloves, and a breathing mask can protect you from dust, debris, and chemicals.
Once you’ve finished polishing, it’s crucial to maintain your newly polished finish to prevent tarnishing, rust, or other damage. Regular cleaning and protection using high-quality metal cleaner and wax can keep your metal objects looking their best.
In summary, metal polishing is a rewarding DIY project that can bring new life to old or rusted metal objects. With the right tools, techniques, and products, you can achieve a professional-grade finish that will withstand the test of time. Remember to always prioritize safety and proper maintenance for long-lasting results.
Frequently Asked Questions
What safety precautions should I take when polishing metal?
Always wear protective gloves and eyewear, and work in a well-ventilated area. Be cautious when using power tools, and read the instructions carefully.
Can I use household cleaners on metal surfaces?
No, household cleaners can damage metal surfaces. Use cleaners specifically designed for metal, and always test a small area first.
What is the difference between abrasive and chemical polishes?
Abrasive polishes physically wear away at the surface of the metal, while chemical polishes dissolve and remove oxidation and stains.
What type of polish should I use for cleaning rust and corrosion?
An abrasive polish is best for removing rust and corrosion on metal surfaces.
Do I need different polishes for different types of metal?
Yes, some metals require specific polishes. Refer to the manufacturer’s recommendations or consult a professional.
Can I use an angle grinder to polish metal?
Yes, an angle grinder can be used to polish metal, but it requires skill and practice to avoid damaging the surface.
How do I polish tight spaces or corners?
Use a small polishing attachment or a soft cloth wrapped around a thin tool to reach tight spaces and corners.
What is the best way to remove scratches and blemishes from metal surfaces?
Use an abrasive polish and a buffing wheel or soft cloth to gently buff away scratches and blemishes.
How often should I clean and maintain polished metal surfaces?
Maintain polished metal surfaces regularly with a microfiber cloth and a designated metal cleaner. How often depends on the frequency of use and the environment.
Can I use a protective polish on bare metal?
Some protective polishes can be used on bare metal to prevent future oxidation and discoloration. Refer to the manufacturer’s recommendations or consult a professional.