Using a glue gun with fabric is a great way to craft and repair items. To ensure a successful and safe experience, here are some tips on how to use a glue gun with fabric:
- Make sure you’re using fabric glue that is specifically designed for use with fabric.
- Pre-wash the fabric if it is new, as it may shrink after being glued.
- Lay down a piece of cardboard or a scrap piece of wood to protect your work surface.
- Cut the fabric into the desired shapes, patterns and sizes for your project.
- Place the fabric onto your work surface and use the glue gun to apply a line of glue to the back side of the fabric.
- Press the fabric onto the object you are attaching it to and hold for a few seconds until the glue has cooled.
- Allow the glue to cool and cure completely before handling the fabric.
- Once the glue is completely dry, your project is ready to use or display.
How well does hot glue work on fabric
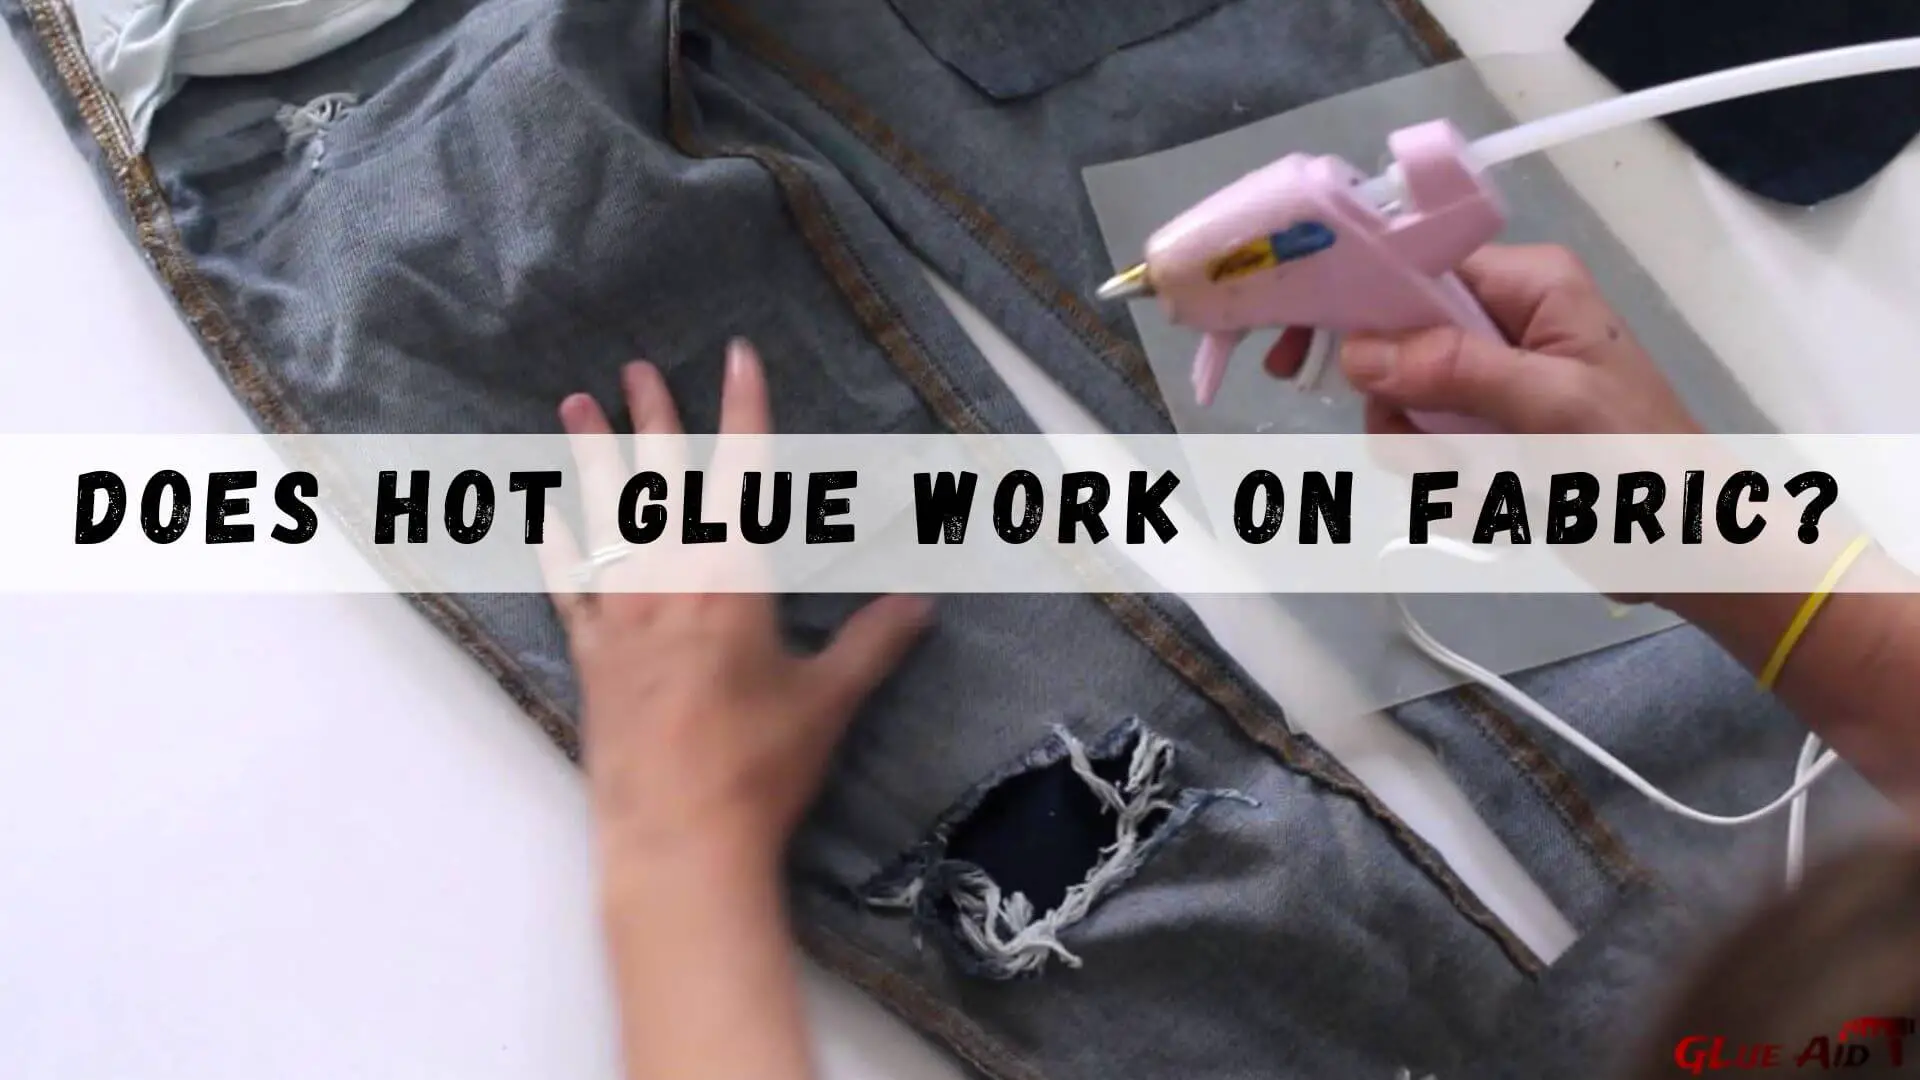
To use glue on fabric, you first need to make sure that the surfaces to be glued are clean, dry and free of any grease or dirt. Then, heat up the glue gun and apply a small amount of glue to the fabric and press the two surfaces together. The fabric should be held in place for a few seconds to allow the glue to set. Once the hot glue has cooled and hardened, it will create a strong bond between the two pieces of fabric. However, it is important to note that hot glue is not suitable for use on delicate fabrics such as silk, as it can melt and damage the fabric. In conclusion, hot glue is an effective way to bond two pieces of fabric together, as long as it is not being used on delicate fabrics. When used correctly, hot glue will provide a strong bond and make sure the surfaces remain connected.
How long does it take for hot glue to dry on fabric?
To make sure your fabric project holds together properly, you should know how long it takes for hot glue to dry. Hot glue typically takes between five and twenty minutes to dry completely on fabric. You should start timing from the moment you apply the glue and wait until it is no longer tacky. If you want to speed up the drying process, you can use a hairdryer on a low setting to heat the glue. When using a hairdryer, make sure you keep the hairdryer a few inches away from the fabric.
Too much heat can cause the fabric to become scorched, so use the hairdryer sparingly. Additionally, you should keep it moving while it is turned on to avoid focussing the heat on one area. When the hot glue is completely dry, it should result in a strong bond between the two pieces of fabric. You should test the strength of the bond by gently tugging the fabric on both sides to ensure that it is held together securely. To ensure that your fabric project is successful, make sure you let the hot glue dry for the appropriate amount of time before moving on to the next step. With the right tools and a bit of patience, you can successfully use hot glue on fabric.
Does hot glue peel off fabric?
Hot glue can easily be applied to most fabrics and its adhesive properties will ensure it won’t peel off. However, it’s important to make sure you use the right type of glue to avoid any damage to the fabric. Hot glue is generally the best option for fabrics, as it provides a strong bond but is gentle on the material. When using hot glue, it’s important to make sure you have enough heat to melt the glue. You should also be careful not to apply too much glue, as this can cause it to seep through the fabric.
Once the glue has been applied, you should leave it to cool down for a few minutes before attempting to peel it off. If done correctly, the glue should have a strong grip on the fabric, and it will be difficult to peel it off. Overall, hot glue is a great option for gluing fabric, as it is strong and won’t peel off if applied correctly. Keep in mind that if you don’t use the right type of glue, it can damage the fabric, so always be sure to follow the instructions carefully.
Does hot glue hold up in the wash?
When using glue, it is important to consider how well it will hold up after it is applied. Does hot glue hold up in the wash? In most cases, hot glue will not hold up in the washing machine and should not be used when creating items that will need to be laundered. However, it can be used to attach patches or other decorative items to clothing that will not be machine washed. It also works well when attaching fabric or other materials to non-laundered items, such as crafting projects or costumes. If you are trying to create something that will need to be laundered, a better choice of glue would be a fabric adhesive that is machine washable.
These glues are specifically designed to withstand washes and will not dissolve in water like hot glue does. When using any kind of glue, it is important to follow the instructions and safety precautions on the package. This will help ensure that you get the best results and that your project will last for as long as possible. Finally, it is also important to read the fabric care instructions for the items that you are attaching. Some fabrics may not be compatible with certain adhesives, so it is important to be sure that the glue you use will not ruin the fabrics. Always test a small patch before using an adhesive on a large item.
Can you use a hot glue gun safely on fabric?
When it comes to using glue for crafts and projects, hot glue guns are a popular choice. While hot glue guns are typically used for bonding hard surfaces together, they can also be used on fabric. However, it’s important to be aware of safety precautions and proper usage when using a hot glue gun on fabric. First and foremost, make sure you are in a well-ventilated area. Hot glue guns release fumes that can be dangerous if inhaled for an extended period of time.
Additionally, always wear protective gear such as safety glasses, gloves and a dust mask when using a hot glue gun. When using a hot glue gun on fabric, use the low temperature setting. High temperatures can cause the fabric to burn or melt. Additionally, use thin layers of glue and press them on firmly while they are still cooling. This will help ensure that the glue adheres to the fabric properly. In order to avoid leaving a messy residue on the fabric, it’s important to use the right type of glue stick. Make sure you use a glue stick that is formulated specifically for fabric. This will help ensure that the glue does not leave a residue on the fabric. Overall, it is safe to use a hot glue gun on fabric as long as you take the necessary safety precautions and use the correct type of glue stick. Just remember to use the low temperature setting and press the glue firmly into the fabric while it is still cooling. By following these steps, you can successfully use a hot glue gun on fabric.
Is tacky glue better than hot glue?
When it comes to gluing materials together, tacky glue and hot glue are two common options. While each has their own pros and cons, the best choice will depend on the type of surfaces you are trying to glue and what is most convenient for you. Tacky glue is typically a water-based adhesive, which makes it ideal for use on porous surfaces like paper, cardboard, and fabric. Tacky glue is typically sold in a bottle, which allows for precision application, and it typically takes several minutes to form a secure bond. It is also non-toxic, making it safe for use with children.
Hot glue, on the other hand, is a type of adhesive that comes in the form of sticks that are melted with an electric glue gun. Hot glue forms a more permanent bond than tacky glue and has a shorter drying time, so it is often the preferred adhesive for wood, plastic, and metal materials. However, it is not suitable for use with fabrics, as it can be difficult to remove and may damage the material. Ultimately, whether tacky glue or hot glue is better depends on the materials you are trying to glue. Tacky glue is easier to use and is suitable for use with a wide variety of materials, but it is not as strong as hot glue. Hot glue is best for tougher materials such as wood, plastic, and metal, but it is not suitable for use with fabrics. Considering these factors, you should be able to make an informed decision on which type of glue is better for your needs.
What can be used instead of hot glue?
When it comes to using glue, hot glue isn’t the only option. There are a few other types of glue that you can use as an alternative. One option is craft glue. Craft glue is a type of glue that is ideal for use on a variety of materials, including wood, metal, plastic, and fabric. It is generally available in liquid or gel form and dries clear.
Another option is epoxy glue. Epoxy is a two-part adhesive that is ideal for use on a variety of surfaces, including metal, ceramic, glass, and plastic. It sets quickly and can be used to bond materials together securely. White glue is also a great option. It is a water-based adhesive that is easy to use and provides a strong bond. It is generally used on porous materials, such as paper and fabric, but can also be used on non-porous materials, such as glass and metal. Finally, there is contact cement. It is a quick-drying adhesive that is great for use on a variety of materials, including plastic, metal, and rubber. It is generally used for sealing and bonding large surfaces. These are just a few of the alternatives to hot glue that you can use when it comes to gluing. Depending on the materials you are working with and the type of bond you need, you may want to choose one of these options instead.
What crafts can you do with a hot glue gun?
With a hot glue gun, you can easily attach pieces of fabric, wood, and even metal together to create decorative items. You can also use it to add embellishments and trimmings to clothing and accessories. One popular craft to do with a hot glue gun is to make jewelry. You can use it to attach beads, sequins, and other decorative pieces to create beautiful and unique necklaces, earrings, and bracelets. You can also use it to attach decorative elements to boxes, such as ribbon and glitter.
Another craft you can do with a hot glue gun is paper crafting. You can use it to attach paper pieces together to create scrapbooks, collages, and cards. You can also use it to add accents to paper projects, such as attaching buttons, ribbon, or fabric. With a hot glue gun, you can also make home decorations. For example, you can create frames and wall hangings out of fabric or wood. You can also make decorative signs and centerpieces with it. Overall, a hot glue gun is a great tool to have when it comes to crafting. It is easy to use and can be used to create a variety of items. With it, you can make beautiful and unique pieces and add decorative touches to your projects.
How strong is hot glue on fabric
Hot glue is very strong when used correctly, and can provide a secure bond for fabric items. To use hot glue effectively, it is important to make sure that the fabric is clean and free of lint or dirt. The area to be glued should also be dry and free of any moisture. When using hot glue on fabric, make sure to use a low temperature glue gun. This is important because high temperatures may melt or damage the fabric.
For a strong bond, apply the glue in a zig-zag pattern, while pressing the fabric firmly together. Allow the glue to set for a few seconds before releasing the pressure. Once the glue has cooled and is set, it should be very strong and hold the fabric together securely. However, if the fabric needs to be washed regularly, it is best to use a more permanent adhesive. Hot glue may not be strong enough to survive frequent washing. To summarize, when used correctly, hot glue can provide a strong and secure bond on fabric. It is important to use a low temperature glue gun and to apply the glue in a zig-zag pattern. Although hot glue is strong, it may not be suitable for fabric that needs regular washing.
Does hot glue work on fabric?
It’s great for crafting projects and repairs, as it sets quickly and dries clear. To use hot glue on fabric, you need to ensure both surfaces are clean and dry. Apply the glue to one surface and wait for a few seconds for the glue to start to set. Then press the fabric onto the other surface and hold it in place for a few seconds. This will ensure a strong bond.
When the glue cools, it will set completely and form a strong hold. To be sure it is secure, you can also use clothespins to hold the two surfaces together while the glue cools and sets. To avoid any mess, you can use a piece of parchment paper between the fabrics so that the glue doesn’t stick to anything else. You should also make sure to keep the glue away from any heat as it can melt and not work as well. If used correctly, hot glue can be an effective and reliable adhesive for fabric. It sets quickly and provides a strong hold, making it an ideal choice for all sorts of craft and repair projects.
Is hot glue or super glue better for fabric?
When it comes to using glue for fabric, hot glue and super glue are the most commonly used. But which one is better for fabric? Hot glue is better for heavier fabrics like denim or canvas, as it provides a stronger bond. It is also able to firmly hold items in place. Hot glue is best applied with a gun, and should be used when the fabric and items being attached are not sensitive to heat. Super glue is better for thinner fabrics, like silk or linen, as it provides a more flexible bond that can move with the fabric.
It is also better for more delicate items, as it is not as harsh as hot glue and won’t damage the material. Super glue should be applied sparingly and directly to the item being attached. Ultimately, it depends on the type of fabric and the items being glued. Hot glue is best for heavier fabrics, while super glue is better for thinner fabrics and delicate items. Choose the right kind of glue, and you’ll have a secure bond that will last.
Does hot glue come off in wash?
Hot glue is a popular choice for many craft projects, but one question many people have is: does hot glue come off in the wash? The answer is that it depends. Hot glue is designed to hold materials together and can be difficult to remove from fabrics. Some glues may come off in the wash, but this is not guaranteed. If you are using hot glue on fabric items, you may want to test a small piece first to make sure the glue will not come off in the wash. In general, it is best to use hot glue for items that will not be washed such as paper, cardboard, wood and other non-washable items.
This will ensure that your project is long-lasting and that the glue will not come off. For fabrics, you may want to choose a fabric glue instead of hot glue. Fabric glue is made specifically for fabrics and is designed to stay in place, while hot glue may come off in the wash. When using hot glue, make sure to follow the directions carefully and use in a well-ventilated area. Also, make sure the glue is completely dry before washing the project. It is best to err on the side of caution and choose a glue that is designed to stay in place when washing.
Can hot glue be used on fabric?
Using glue on fabric can be a tricky endeavor. Hot glue is a popular choice for fabric projects, as it dries quickly and can be used on a variety of materials. To use hot glue on fabric, it is important to ensure that the fabric is clean and free from dirt or dust. It is also important to use a low temperature setting on the hot glue gun, as high temperature can cause damage to the fabric. If a low temperature setting isn’t available, it is best to use a fabric glue instead.
Once the fabric is clean and the temperature setting is correct, apply the hot glue with a steady hand. It is important to use small amounts of glue rather than large globs. If there are any mistakes, an ice cube can be used to help remove the glue without damaging the fabric. Once the glue is applied, allow it to dry completely before using the fabric. If the fabric is going to be washed, it is important to check that the glue is heat-resistant first. Overall, hot glue can be used on fabric for most craft projects, as long as the correct temperature setting is used and the glue is applied in small amounts. With the proper technique, it can be an effective way to hold fabric pieces together.
What is the best permanent glue for fabric?
For a successful result, you need to choose the right glue for the job. When it comes to fabric, the best permanent glue is fabric glue. It is specially designed to bond fabrics and provide a secure and lasting bond. Fabric glue adheres to a variety of fabrics, including leather, satin, and cotton. To use fabric glue, apply a thin layer onto the back of one fabric and press the other fabric on top.
Be sure to press down the fabric firmly to ensure a secure bond. It is also important to let the fabric glue dry completely before wearing, washing or using the fabric. If you are looking for a temporary bond, fabric glue is not recommended. Instead, use a temporary fabric adhesive such as fusible webbing or spray adhesive. These types of adhesives are designed to be used for temporary hems, but may not provide a permanent bond. To ensure the best result when using fabric glue, always follow the manufacturer’s instructions for proper application and drying time. With the right fabric glue, you can easily mend fabrics or create new designs with a secure and lasting bond.
How to remove hot glue from fabric in different ways?
Using glue can help you create strong bonds between materials that are difficult to join. However, if you have accidentally used hot glue on fabric, you may be wondering how to remove it. Fortunately, there are a few simple methods that you can use to get rid of hot glue from fabric. The first way to remove hot glue from fabric is to use a blow dryer. Simply turn the blow dryer on high heat and hold it close to the glue.
After a few minutes, the glue should start to soften. You should then be able to peel it off the fabric. Another method is to use a hot glue gun removing tool. These tools are designed specifically to remove hot glue from fabric. Simply insert the tool’s blade under the glue and press down. This should help loosen the glue, making it easier to peel off. If you don’t have a blow dryer or hot glue gun removing tool, you can also use a flat-head screwdriver. Gently insert the screwdriver under the glue and then twist it to loosen the glue. After a few twists, the glue should come off. Lastly, you can use a solvent such as acetone to remove the glue. Simply apply a small amount of the solvent onto a cloth and dab it onto the glue. Continue dabbing until the glue starts to dissolve. Then, use a damp cloth to remove any residual glue. By following these steps, you should be able to successfully remove hot glue from fabric. Remember to take proper safety precautions when using solvents and heat, as these can be dangerous if used incorrectly.
How do you remove hot glue from clothing?
When using glue, it is important to take care to ensure that it does not spill onto clothing. However, if you have accidentally spilled hot glue onto your clothing, there are a few steps you can take to remove it. The first step is to try to scrape off the excess glue while it is still warm and pliable. Then, you should use the Cool Shot setting on a hairdryer to try to gently soften the glue. Next, use a dull knife or spoon to carefully scrape off the softened glue.
If there is still a residue, wet a cloth with rubbing alcohol and dab the cloth onto the area to try to remove the remaining glue. If any glue remains, you can try using a solvent such as acetone or paint thinner to dissolve the glue. Take care when using solvents, and make sure you are in a well-ventilated area. Finally, launder the clothing as you normally would to wash away any residue and make sure the glue is completely removed. By following these steps, you should be able to remove hot glue from your clothing.
How to use a hot glue gun on fabric
First, make sure the glue gun is plugged in and the glue has been heated up. Next, choose a spot on the fabric where you want to attach the other item. Put glue onto the fabric at this spot by pressing the trigger on the glue gun. Make sure the glue is spread evenly over the spot. Then, press the other item onto the fabric so that it is securely attached. Wait for the glue to dry before moving the fabric. Finally, you have successfully glued your fabric together with a hot glue gun!
Which glue gun is best for fabric?
Glue guns are a great tool to use when it comes to adhering fabric. They are easy to use and create a strong bond with the fabric. When choosing a glue gun to use with fabric, it is important to consider the type of glue gun that will be best suited to the task. For general fabric use, a high-temperature glue gun is the best choice. It uses an adhesive that has a high melting point and forms a strong bond with the fabric.
It is also important to consider the size of the glue gun. A larger gun is preferable, as it can hold more glue, making the job quicker and easier. When using a glue gun for fabric, it is important to ensure that the fabric does not get too hot. It is best to test the heat of the gun on a scrap piece of fabric before applying it to the project. This will also help to prevent any damage to the fabric. For lighter fabrics or delicate materials, a low-temperature gun is the best choice. It uses a different type of adhesive, which is softer and less likely to damage the fabric. A low-temperature gun can also be used on heavier fabrics, as it is less likely to cause warping or shrinkage. For best results, it is important to use the correct type of glue gun for the fabric being used. By taking the time to select the correct glue gun, you can ensure that the project will have a strong, durable bond.
What works better fabric glue or hot glue?
Fabric glue is ideal for attaching lightweight fabric and materials like lace, cotton, and felt. It won’t leave marks on the fabric and is washable. Hot glue is better suited for heavier fabrics like thick wool and upholstery-weight fabrics. It’s strong and fast-drying, so it’s a great choice for a quick fix. However, it’s not as durable as fabric glue, and it can leave visible residue on the fabric.
Overall, fabric glue is the preferred option when it comes to working with fabric. It’s designed specifically for the job and is more gentle on the fabric. It provides a secure bond that won’t degrade over time and is flexible enough to withstand some stretching. However, hot glue can be useful in certain situations. It’s a great choice for those who need a quick and strong bond that doesn’t have to be permanent. If you need to repair a rip or hole in your fabric, hot glue can be a great temporary solution. When considering fabric glue vs. hot glue, it really depends on the type of fabric and the job you need to do. If you’re working with lightweight fabrics, fabric glue is the way to go. If you’re working with thicker fabrics or need a quick fix, hot glue is a better choice.
Can you use a glue gun on fabric?
Using a glue gun on fabric can be a great way to make clothing and fabric items more durable and secure. Glue guns are easy to use and can be used to affix patches, accessories, and other fabric items securely to clothing and fabric items. To use a glue gun on fabric, make sure that the fabric is clean and dry. Place the fabric item onto a clean, flat surface and preheat the glue gun. Once the glue gun is hot, apply a small amount of glue to the fabric in a thin and even layer.
Gently press the fabric item onto the fabric and hold it in place for a few seconds to allow the glue to set. If you’re looking for a more secure hold, you can also use multiple layers of glue. Simply repeat the process of applying a thin layer of glue and then pressing the fabric item into place. Allow each layer of glue to cool before adding the next layer. When you’re done, allow the glue to cool completely before handling the fabric item. You should also test the glue’s hold on the fabric item before using it in a project. Using a glue gun on fabric is a great way to make your fabric items more secure and durable. Just make sure to follow the instructions carefully to ensure a secure hold.
Do hot glue sticks work on fabric?
Hot glue sticks are the most common type of glue used for fabric and are available in a variety of sizes and strengths. To get the best results when using hot glue on fabric, it’s important to take the proper steps. First, begin by cleaning the fabric with a damp cloth, removing any dirt or debris that could interfere with the glue’s adhesion. Then, select the right glue stick for the job based on the type of fabric you’re working with. For example, a low-temperature glue stick is more suitable for materials such as lace, while a high-temperature glue stick is better for heavier fabrics such as denim.
Next, take the glue stick and apply a thin layer of glue to the back of the fabric. Allow the glue to dry for a few seconds before pressing the fabric onto the surface you wish to adhere it to. Use a damp cloth or press cloth to apply a light pressure for a few seconds to ensure a good bond. Once the fabric is adhered, it’s important to allow the glue to fully cure before subjecting it to any hard wear or washing. Depending on the type of fabric and glue used, this can take anywhere from a few minutes to several hours. Overall, hot glue sticks are an effective way to adhere fabric and other materials together. With the proper steps and precautions, you can get great results when using a hot glue gun on fabric.
Can you put hot glued fabric in the washing machine?
If you want to ensure that your fabric stays intact, there are some steps you should take. One important question to ask is: can you put hot glued fabric in the washing machine? The answer is not always straightforward. Generally, if the glue is water-resistant, you can put the fabric in the washing machine. However, you should use a gentle cycle with cold water. If the glue is not water-resistant, the fabric should not be put in the washing machine.
This is because the vibration of the machine and the heat of the water can cause the glue to break down. If the fabric needs to be cleaned, it is best to do so by hand. When working with hot glue and fabric, it is important to be aware of its limitations. Washing machines can be too rough for fabrics glued together with hot glue, so it is important to understand the qualities of the glue before attempting to wash the fabric in a machine.
What is a hot glue gun used for?
It works by melting a type of thermoplastic glue that quickly cools and hardens, making it great for a variety of tasks. To use a glue gun, you will need to plug it in and wait for it to heat up. Once the glue gun is hot enough, you can then insert a glue stick into the tube. After a few moments, the glue will be heated up and ready to use. When using a hot glue gun, you should be careful not to press the trigger too hard, as this can cause the glue to squirt out more quickly than expected.
When applying the glue, make sure to apply it in a steady stream and press the glue gun against the project as you go. Once the glue has cooled, it should be firmly attached. Using a hot glue gun can be a great way to quickly get tasks done. It can be used for many tasks, such as gluing paper, fabric, and even plastic materials. This type of glue is also great for making repairs around the house. However, be sure to take precautions when using a hot glue gun, as it can be dangerous if used incorrectly.
Can you use hot glue gun on fabric?
To use a hot glue gun on fabric, first make sure you are working in a well-ventilated area. Hot glue guns work with a heated adhesive, so it is important to be aware of this additional heat. Next, prepare the fabric and the surface that the fabric will be glued to. Make sure both surfaces are clean and free of any dust or residue. To apply the glue, press down the glue gun trigger to start the flow of glue.
Move the glue gun in a smooth and steady motion, making sure to cover the entire surface you are working with. Finally, press the two surfaces together and hold in place for a few seconds to ensure that the glue sets. Once the glue has dried, you will have an effective bond between the two surfaces.
Does hot glue stay on fabric in the wash?
It’s important to know just how durable hot glue is when it comes to being washed. The short answer is that hot glue will not stay on fabric in the wash. Even if the glue is of a high quality, it will simply dissolve when it comes in contact with water during the washing process. To ensure that your fabric project stands up to wear and tear, you’ll need to use a stronger adhesive. Options such as stitching, or using an iron-on adhesive, are better than hot glue for fabric items that need to withstand washing.
When it comes to using glue on fabric, hot glue can still be a useful tool, but it won’t hold up to the washing machine. For more permanent attachment of fabric, consider one of the alternatives suggested above. It’s important to understand the limitations of any adhesive before you use it. That way, you can choose the right adhesive type and application method for your project, and you won’t be disappointed in the end result.
What is the best adhesive for fabric?
When it comes to adhering fabric, the best adhesive to use is fabric glue. It is specifically designed to be used on fabrics, making it an ideal choice for craft projects and clothing repairs. Before using glue on fabric, you should test it on a scrap piece of fabric to make sure it won’t damage the material. To use fabric glue, apply a thin layer of adhesive to each piece of fabric that needs to be joined. Be sure to spread it evenly so that the fabric pieces will stick together more securely.
Once the glue is applied and the pieces of fabric are lined up, press the pieces together firmly. If needed, you can use clips or weights to hold the fabric together until the glue is dry. Allow the fabric glue to dry for 24 hours before putting the project to use. After this time, it should be securely bonded and ready to use. It’s important to note that fabric glue is meant for temporary adhesion, and it may not hold up to washing or other activities. For a stronger bond, consider using a fabric fusing product. Fabric fusing products are sprayed onto both pieces of fabric and then ironed together. This type of adhesive is permanent and can withstand washing and other activities. No matter which adhesive you choose, it’s important to make sure you use the right one for the job. Fabric glue is best for temporary projects, while fabric fusing products are better for permanent adhesion. By choosing the right adhesive, you can ensure that your fabric project stays in place for years to come.
What is the best professional glue gun?
Using a glue gun is one of the best ways to bond together a wide variety of materials. A professional glue gun is the best option to ensure a strong, secure bond. When choosing a professional glue gun, look for one that is easy to use and has a wide range of temperature settings. This way, you can get the perfect temperature for the material you are bonding together. A higher temperature setting is better for thicker materials such as wood, while lower temperatures are better for delicate materials.
Make sure to buy a quality glue gun that is rated for the materials you are working with. Most glue guns have an adjustable temperature control and an ergonomic trigger for easy operation. They also tend to have a long cord for added convenience. In order to use a glue gun, fill it with the appropriate adhesive and plug it into an electrical outlet. Then, adjust the temperature setting and wait for the glue gun to heat up. When the gun is ready to use, press the trigger and start gluing. Make sure to apply the glue in an even, thin layer to ensure a strong bond. Finally, let the glue cool for a few minutes before handling the material. Properly used, a professional glue gun can help you make strong, secure bonds on a wide variety of materials.
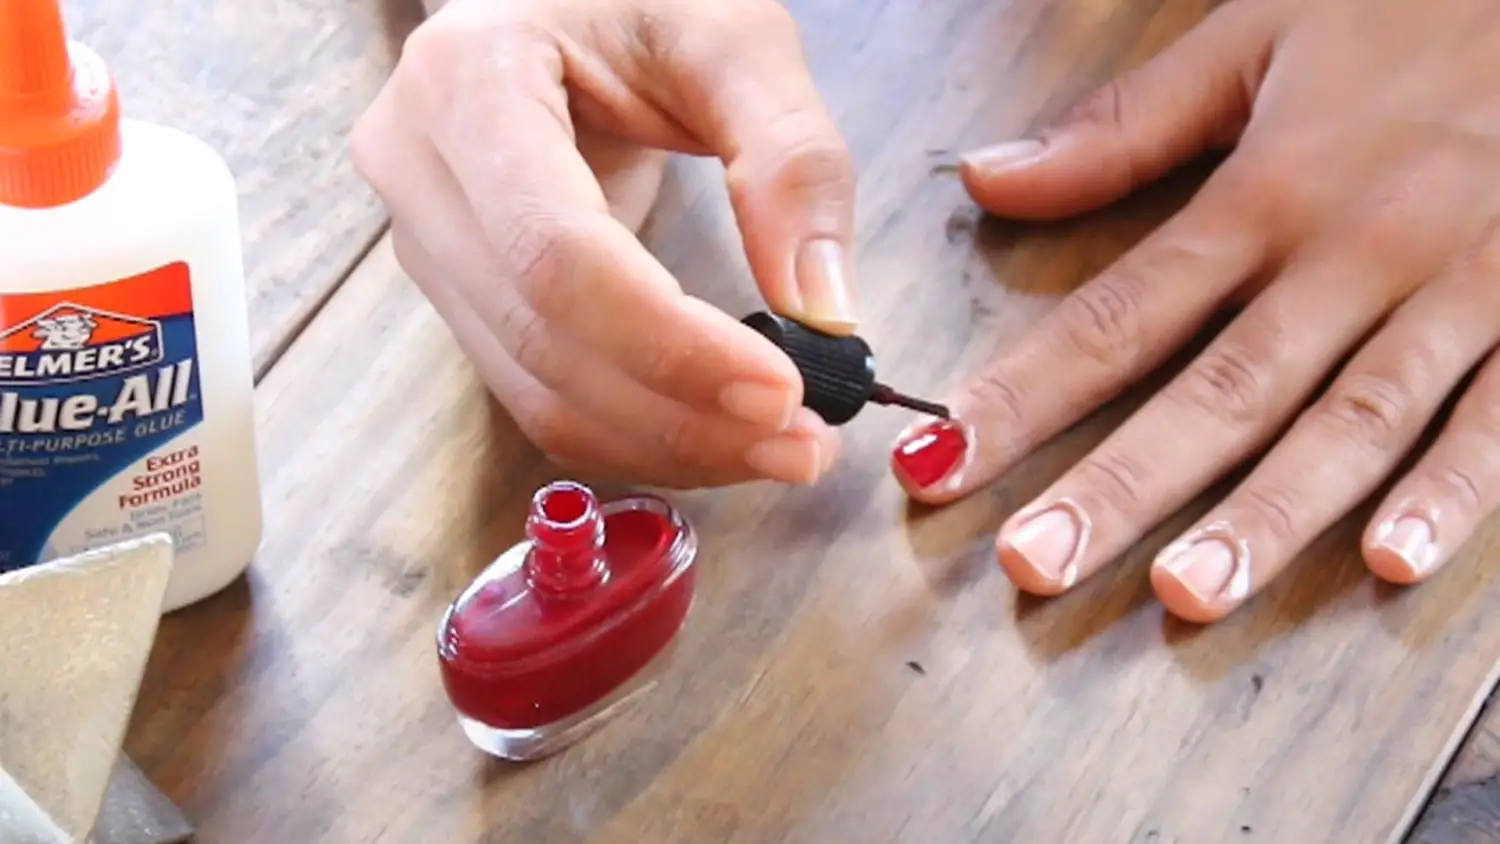
How to use glue on nails
When using glue on nails, it is important to choose the right type of glue. A strong adhesive such as super glue or epoxy is best suited for nails. When applying the glue, it is important to apply a thin coat of glue to the nail. Make sure the glue is evenly spread so that it adheres properly. Make sure to use the glue sparingly as too much will create a mess.
Once the glue is applied, press the item onto the nail firmly for several seconds. This will ensure that the glue adheres properly and that the item stays on the nail. Allow the glue to dry and set before using the item. When removing the item from the nail, carefully pry the item off the nail. If the item does not come off easily, use a chisel or other tool to carefully chip away the glue. You can also use a solvent to dissolve the glue. By using the right kind of glue and applying it properly, you can securely attach items to nails. Remember to allow the glue to dry and set before using the item, and to be careful when removing the item from the nail.
What can i use besides nail glue
But there are other techniques that can be used besides using nail glue. Tape is a great alternative. It comes in many different forms, including double-sided, clear, and masking tape. You can use tape to cover holes and cracks, seal edges, and hold materials together. Hot glue is another popular adhesive.
It’s great for items that need to be held together quickly. Hot glue dries quickly and is great for attaching all sorts of materials, including plastic and fabric. For a strong and permanent bond, use epoxy. It comes in a two-part mix that forms a strong bond when hardened. Epoxy works well for a variety of applications, including wood, plastic, and metal. For a more permanent solution, consider welding. This is a process in which two pieces of metal are joined together by melting them together. Welding is a good option for items that need to be more durable, like tools and furniture.
What is the difference between nail glue and super glue?
Glue is very useful and helps to stick things together. There are several types of glue available, which are used for different purposes. Knowing the difference between nail glue and super glue is important when using glue. Nail glue is specifically designed to adhere fake nails. It is also suitable for attaching rhinestones and decorations to nails.
Nail glue is made from cyanoacrylate, which is a type of strong adhesive, and is usually sold in small tubes. Super glue, on the other hand, is made with a different type of adhesive called epoxy acrylate. It is suitable for use on a variety of surfaces, including wood, metal, rubber, and plastic. Super glue is more versatile than nail glue and is sold in small containers of a thick, gel-like substance. When using glue, it is important to remember that nail glue is designed to adhere to nails, while super glue is meant for a wider range of uses. Nail glue is usually stronger than super glue and is best suited for attaching fake nails and decorations. Super glue is better suited for a variety of materials, but is not as strong as nail glue.
What is a substitute for nail glue?
One alternative to nail glue is a strong adhesive like super glue. Super glue can be applied to the artificial nail and your natural nail to provide a tight bond. However, you should be careful when using super glue as it can be messy and can damage your nails if not used correctly. Another option is a nail wrap adhesive, which is a special type of glue designed for holding artificial nails in place. This adhesive is less messy than super glue and usually sets faster.
If you don’t have access to nail glue or any other type of adhesive, you can also use tape. Masking tape, medical tape and double-sided foam tape can all be used to secure artificial nails. Finally, if you’re looking for a more permanent solution, you can use an acrylic nail set. This involves using acrylic powder and a liquid to form a hard coating around the artificial nail, which will give it a stronger hold. No matter what option you choose, it’s important to make sure you’re using the right type of glue or adhesive for the job. The wrong type of glue could damage your nails and won’t provide a secure hold.
Can I use nail glue to strengthen my nails?
When applying the glue, make sure you are using a product specifically designed for nails. This will create a stronger bond that can last longer and provide more protection. Before applying the glue, you should clean your nails and make sure they are completely dry. This helps the glue to adhere better and last longer. To apply the glue, use a thin bead along the base of the nail, starting closest to the cuticle and moving outward.
Use a toothpick or other small tool to spread the glue evenly along the nail. Allow the glue to dry completely before using your nails. Once the glue is dry, it will be stronger and should keep your nails from breaking or chipping.
What is the best glue to use?
When glue is used, it is essential to select the right type to ensure the best results. The best glue to use will depend on the materials being joined and the type of bond that is desired. For light and medium-duty projects such as paper, cardboard, fabric, and wood, white craft glue is a good option. It provides a strong bond and dries quickly. It is also non-toxic and easy to clean up.
For plastics, a cyanoacrylate adhesive is recommended. These types of glue form a strong bond that is resistant to most chemicals, heat, and water. For metal, a two-part epoxy glue is recommended. This type of glue is tough and can withstand extreme temperatures. It cures quickly and forms a strong bond. For glass, a silicone adhesive is the best choice. It creates a water-tight seal and is less prone to cracking. No matter which type of glue is used, it is important to read the instructions on the label and use it as directed. It is also important to wear protective gloves and a face mask when using glue.
How to glue on nails without nail glue
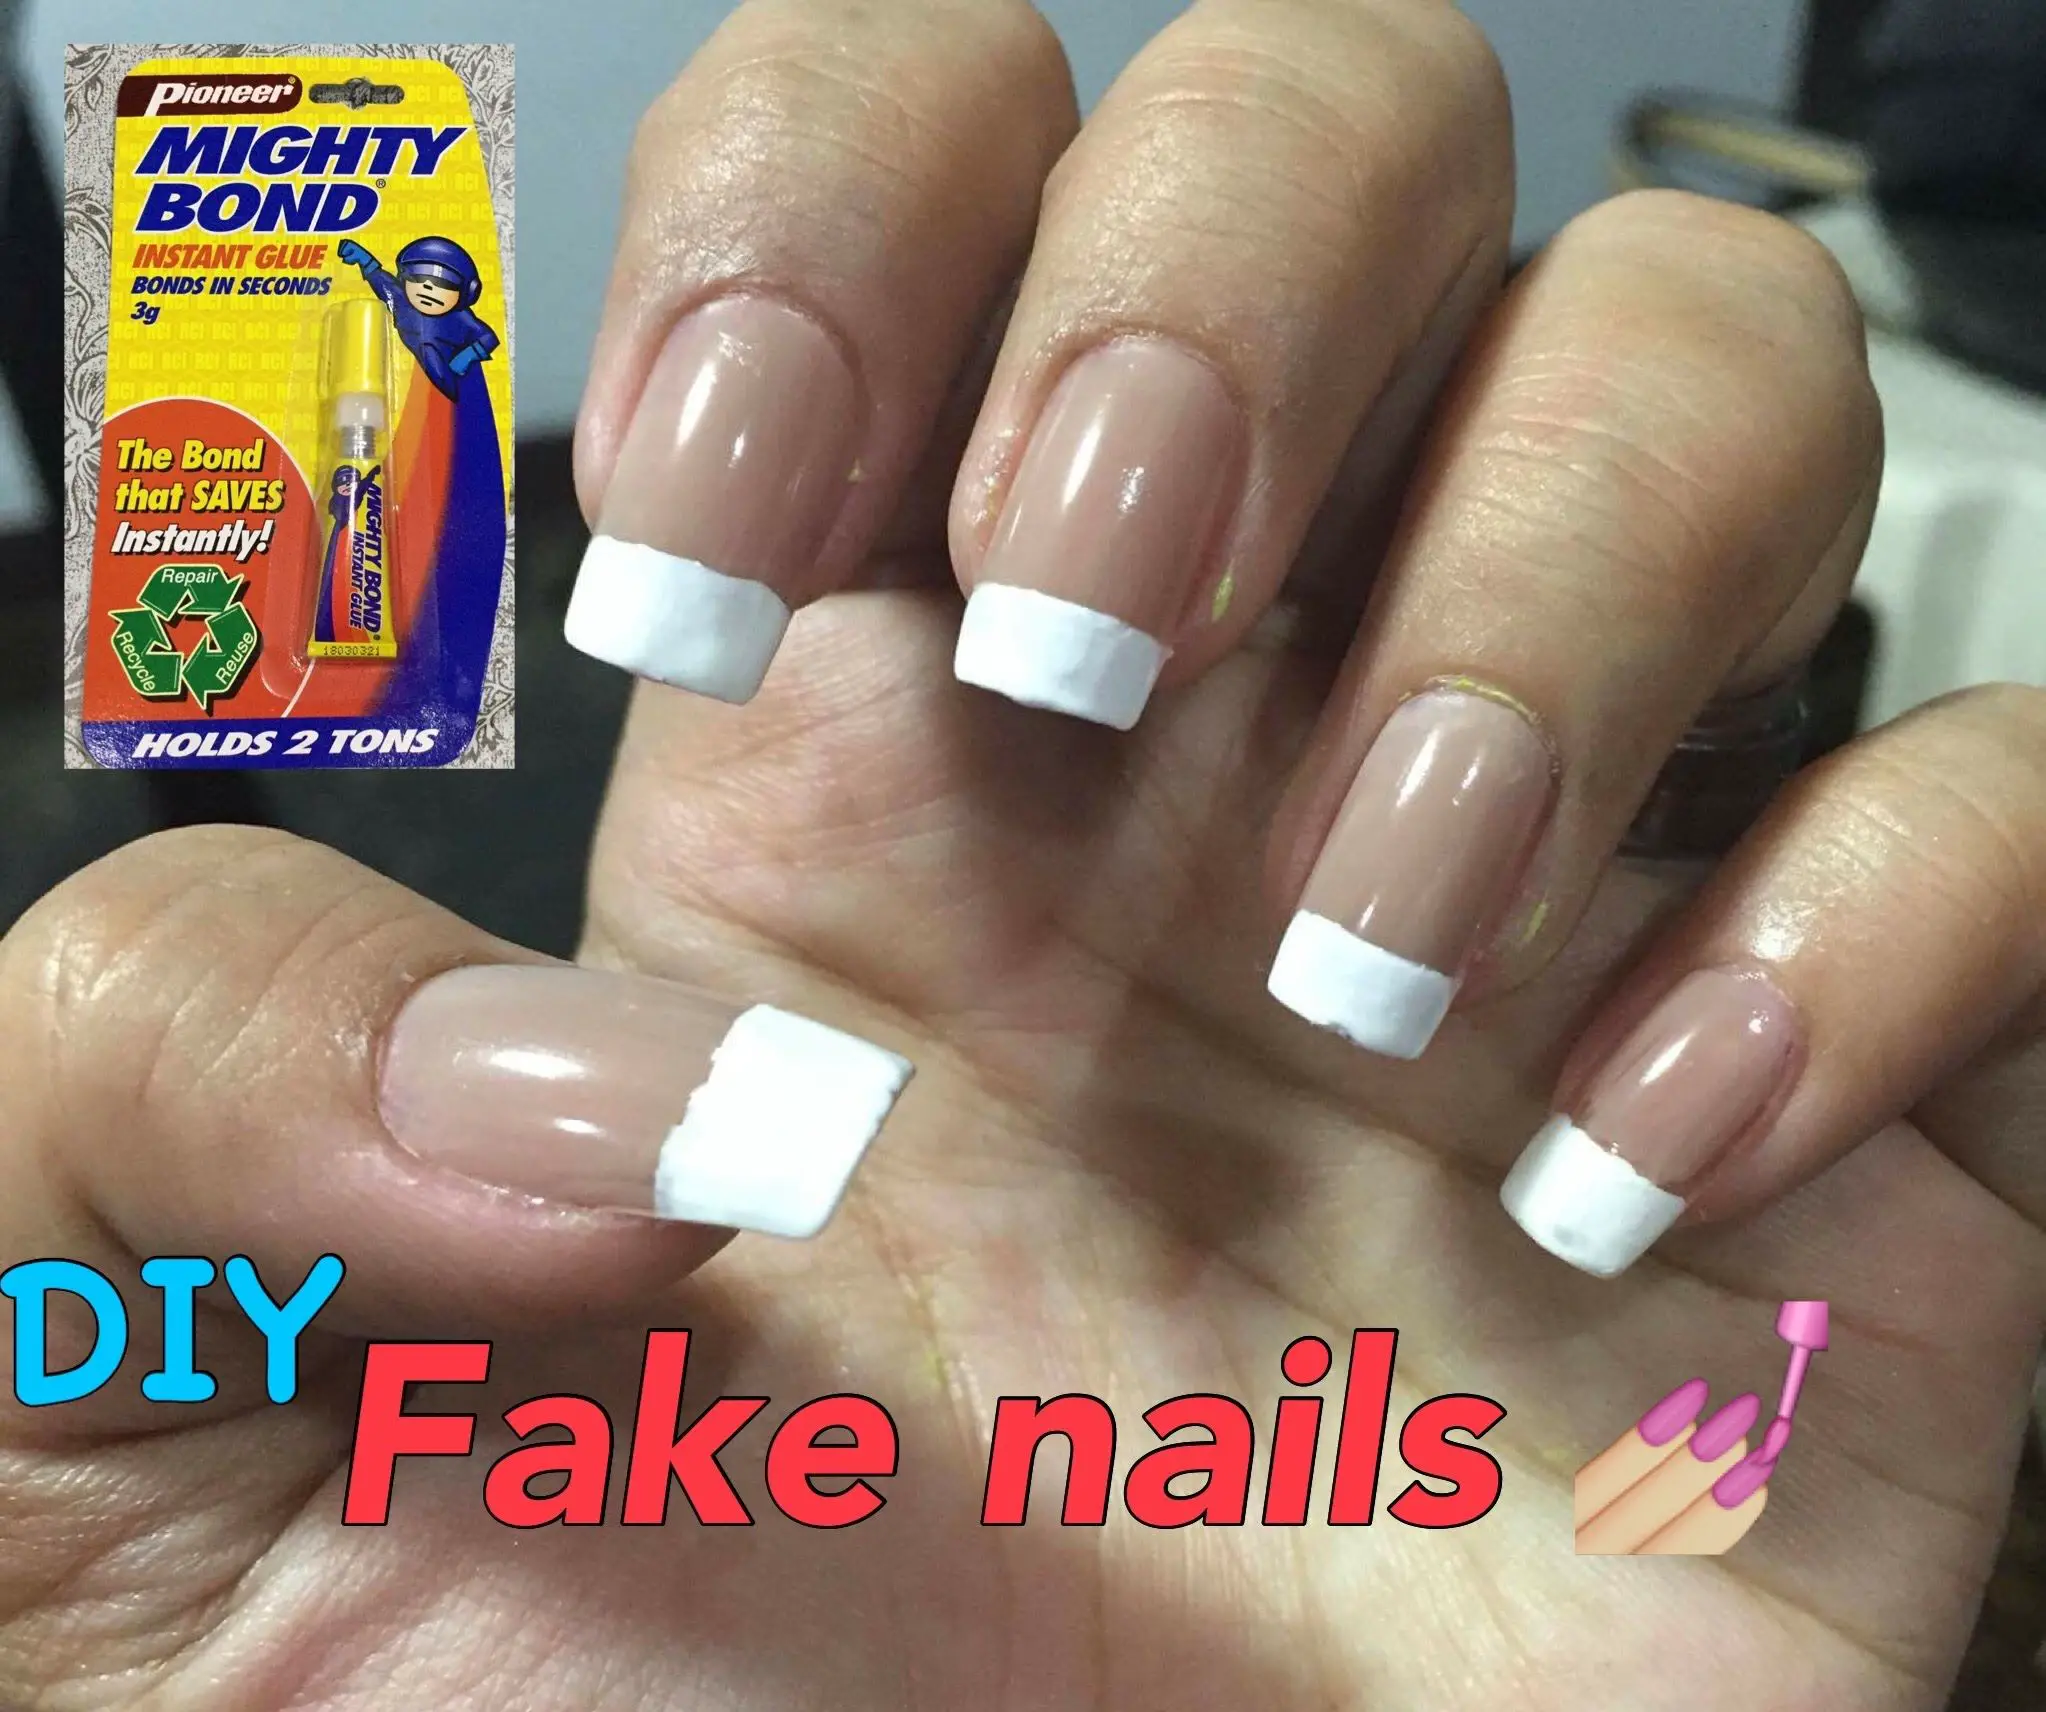
First, you’ll need to gather a few supplies. You’ll need some type of glue, such as super glue, epoxy, or hot glue, as well as some wax paper, a flat surface, and some small clamps. Once you have all the supplies, you’ll want to start by laying out wax paper on a flat surface. Then, put the nail on the wax paper and apply the glue to the head of the nail. Next, gently press the nail into the material you are attaching it to.
Make sure to press evenly, so that the glue is distributed evenly. You may need to use the clamps to hold the nail in place while the glue sets. Once the glue has set, you can remove the clamps and enjoy the result of your work. With the right materials, you can easily glue on nails without nail glue.
How do you put on fake nails without glue?
Using glue to attach fake nails may seem like an easy task, but it can be difficult and time consuming. Fortunately, there is an alternative way to put on fake nails without having to use any glue. The easiest way is to use stick-on nails. These are fake nails that are pre-glued to a special adhesive tab. All you have to do is peel off the tab and stick the nail onto your natural nail.
Once applied, they will stay firmly in place and can be removed easily when needed. Another way to put on fake nails without any glue is to use nail wraps. These are pre-painted strips of nail material that you can wrap around your natural nail and then seal them with a special sealant. They offer a secure fit and can be worn for several days without any issues. A third way to put on fake nails without glue is to use nail glue tabs. These are small tabs that contain nail glue for quick and easy application. You simply have to press the tab onto your natural nail and the glue will hold the fake nail securely in place. No matter which method you choose, it’s important to make sure you clean your nails thoroughly before applying any fake nails. This will help ensure a secure fit and prevent any damage to your natural nails.
How do you stick something without glue?
Using glue can be a great way to fasten two items together securely, but sometimes you may not have any glue on hand. If you need to stick something together without using glue, there are a few alternatives you can try. One method is to use a paper clip to hold the two items together. Simply open the paper clip and wrap it around the edges of the items you want to join. This method is great for joining lightweight items, and the paper clip can be easily removed when you need to take the items apart.
Another option is to use double-sided tape. This type of tape is strong enough to keep two items together, but it can be easily pulled apart when necessary. You can find double-sided tape at most home improvement stores or online. You can also use pins or thumbtacks to adhere two pieces of material together. This method is great for joining materials like fabric and paper. When you’re done, simply remove the pins or tacks for easy removal. Finally, you can use Velcro strips to stick two items together without any glue. Velcro is a great option for joining heavier items and it can provide a more secure bond than paper clips or pins. You can also find Velcro at most home improvement stores or online. No matter which method you choose, you can stick two items together without using glue. Experiment with different materials and methods until you find the one that works best for your needs.
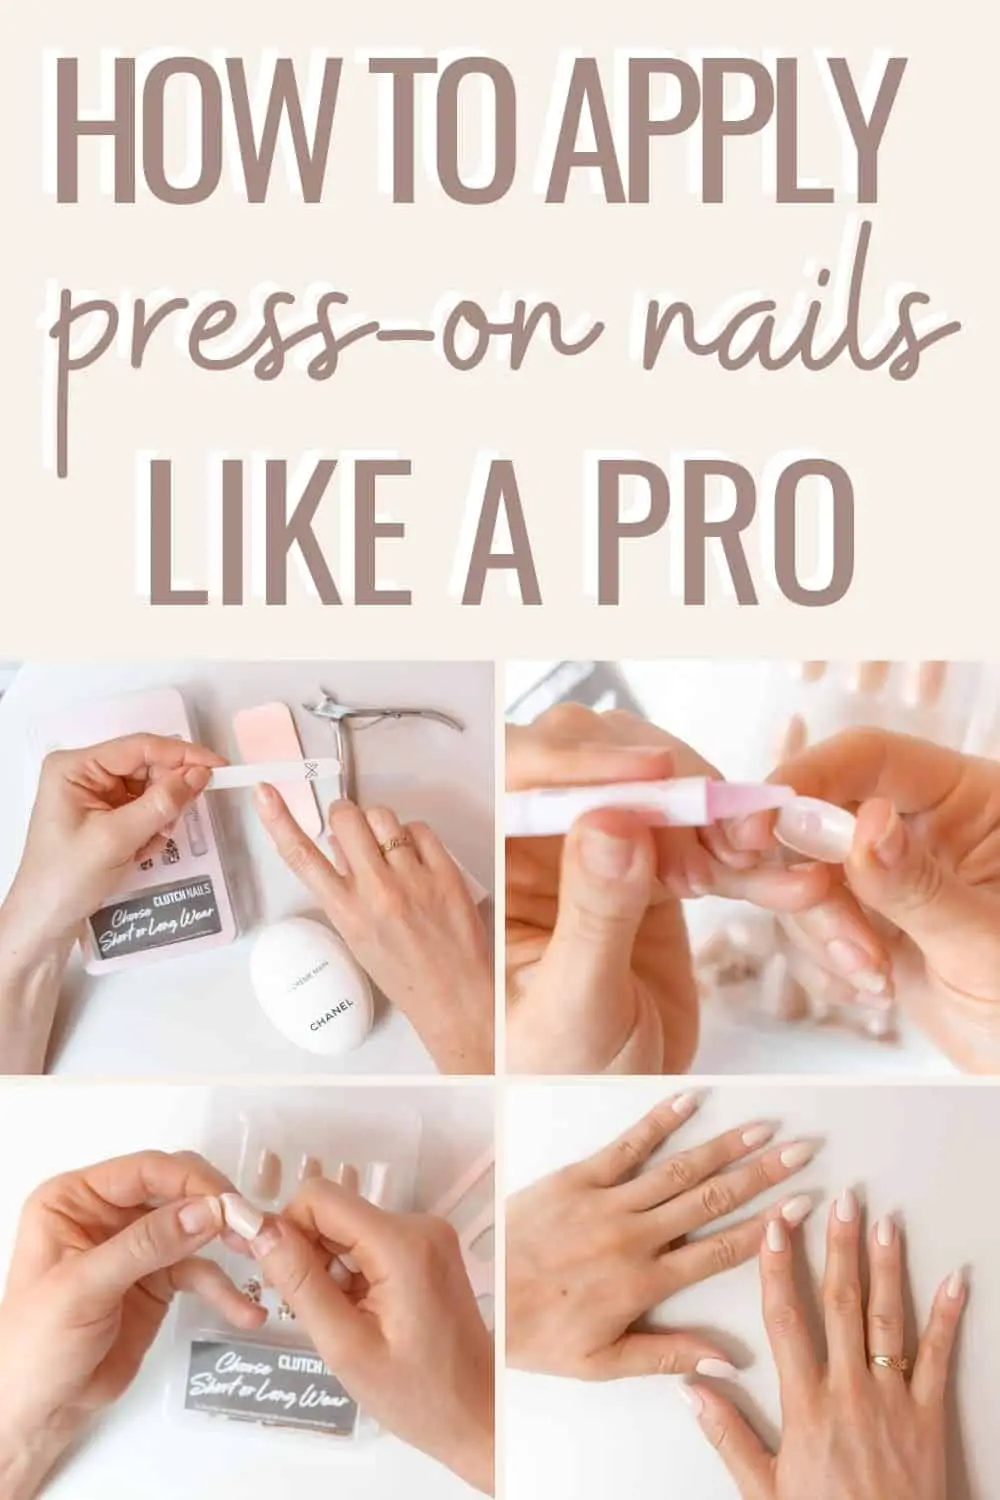
What is the best press on nails?
Press on nails are a great way to add a bit of glamour to your look without the need to commit to a long-term style. To use them, you’ll need to have a bit of nail glue on hand. Start by making sure that your nails are clean and free of any oils. This will help the press on nails to adhere better. Once you’ve done that, apply a thin layer of nail glue to the back of the press on nail and allow it to become tacky.
Once the glue is tacky, press the nail firmly onto your nail for a few seconds to make sure that it’s attached securely. You can use a nail file to shape the nails further if you wish. The best press on nails are ones that are made from high-quality material and come with strong adhesive glue. Also, look for options that are flexible enough to fit the shape of your nails without being too tight. This will ensure that your press on nails stay on for longer and look natural. To help your press on nails stay in place, avoid using your nails to pick or peel anything. Also, be sure to keep your nails clean and free of dirt and oils. If you do this, you can enjoy your press on nails for longer.
How do you make clear nail glue?
Here’s how to make clear nail glue:
- Start by combining equal parts of white glue, cornstarch, and water in a bowl.
- Stir the mixture until it’s smooth and free of lumps.
- Add a few drops of food coloring to the solution and mix it until you get your desired color.
- Place the bowl over low heat and stir the mixture constantly until it reaches a thick, glue-like consistency.
- Allow the glue to cool for a few minutes before using it for your project. Clear nail glue is easy to make and can be used for a variety of projects. It provides a strong bond and won’t yellow over time, making it the perfect choice for any project that requires a long-lasting bond.
How to use glue
Here are a few tips on how to use glue correctly and safely. First, make sure you read the instructions for the type of glue you are using. Different types of glue require different application techniques. Next, make sure you prepare the surfaces you are going to glue. Clean both surfaces of dirt or dust before applying the glue.
Third, spread the glue evenly on one of the surfaces. Be careful not to apply too much or too little. Fourth, press the two surfaces together. Hold them together firmly for a few seconds. Finally, leave the surface to sit for a few minutes. This will allow the glue to dry and bond the surfaces together. Remember to always use glue safely and carefully. Wear gloves and safety glasses and make sure you are working in a well-ventilated area.
How to load glue gun
Here are the steps to loading a glue gun:
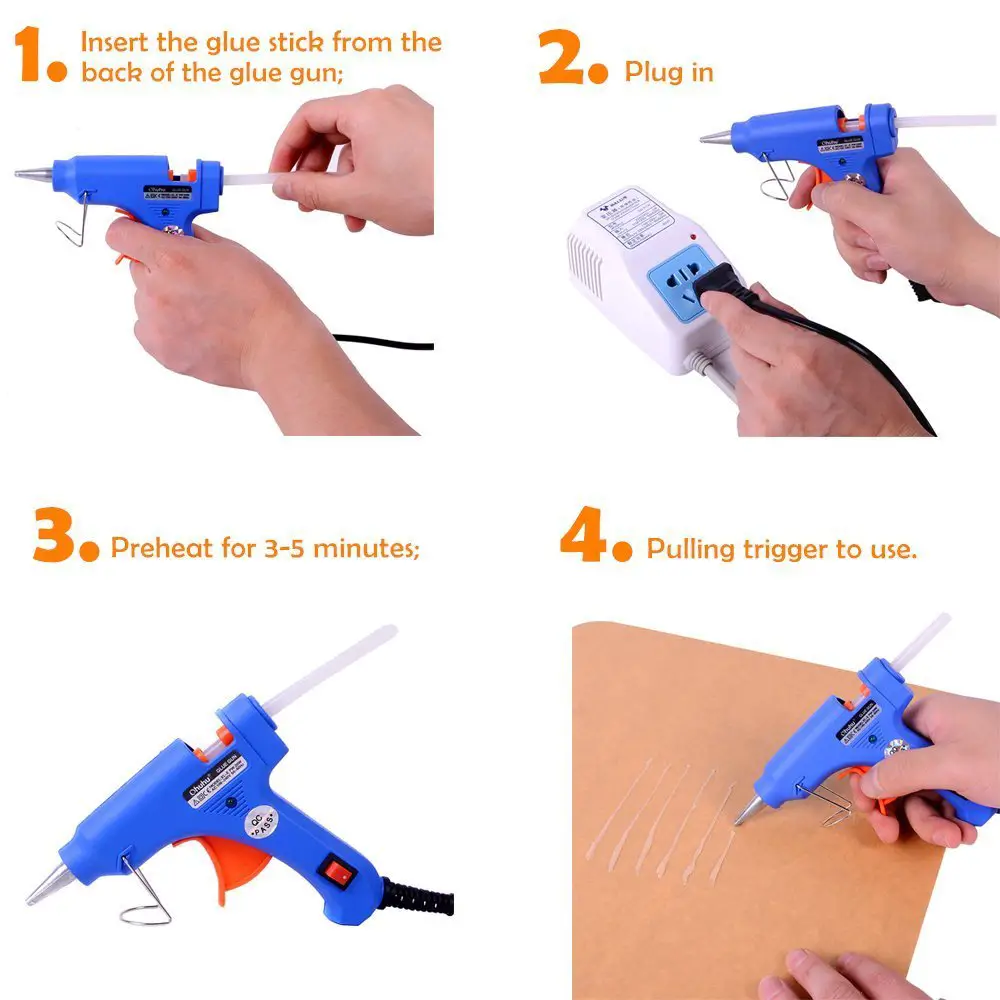
- Start by inserting a glue stick into the back of the glue gun. Make sure the glue stick is facing the right way (with the pointed end inserted first).
- Once the glue stick is inserted, plug in the glue gun and wait for it to heat up. Depending on the model of glue gun, this may take up to a few minutes.
- After the glue gun is heated, the glue stick should automatically begin to feed through the nozzle. If this doesn’t happen, you may need to manually push the glue stick through the front of the gun.
- When the glue starts to come out of the nozzle, use a clean cloth to wipe away any excess glue that has built up.
- Once the glue gun is loaded and ready, you can start using it to glue your objects together. Just keep in mind that the glue is hot and can cause burns, so you should be careful when using it.
How to load a stapler gun?
The first step is to make sure that the gun is loaded properly with the right type of staples. To do this, insert a strip of staples into the stapler gun’s magazine. Make sure that the staples face the same direction as the arrow on the gun’s body. Once the staples are loaded, you’re ready to use your stapler gun. Place the glue along the edges of the material you want to secure.
Then, align the gun’s head with the area where the glue is placed, and press the trigger until the desired number of staples are secured. If you’re using a heavy-duty stapler gun, you may need to press down harder on the trigger. This will ensure that the staples are driven deeper into the material and that the glue will be held securely in place. Finally, once the stapler gun has been used, it’s important to unload the magazine and remove any staples that may remain. This will help to prevent any accidental stapling. Follow these steps and you’ll be able to easily secure your glue in place with a stapler gun.
What kind of glue can you use on a gun?
How to use glue on a gun can depend on the project you are working on. Generally, you should avoid using a water-based glue like Elmer’s® Glue-All, as this can damage the gun. Instead, you should use a specialized gun-bonding adhesive, such as Loctite®. This will ensure that the glue bonds securely with the gun, creating a strong and lasting connection. When using adhesive on a gun, make sure to use a minimal amount and spread it evenly.
If too much glue is used, it can damage the gun’s finish. Additionally, it’s important to make sure that the surfaces you are gluing are clean and free of debris. This will help ensure the bond is strong and secure. Once the glue has been applied, it’s important to wait for it to dry completely before using the gun. Depending on the adhesive, this can take up to 24 hours. To further strengthen the bond, you can also use a light clamping pressure to hold the two surfaces together while the glue dries. In conclusion, when gluing a gun, use a specialized gun-bonding adhesive and make sure to use a minimal amount and spread it evenly. Clean the surfaces and use a light clamping pressure when the glue is drying. This will help ensure a strong and secure bond.
How to use a glue stick without a glue gun?
All you need is a stick of glue and the items you want to join. Begin by peeling off the top layer of the glue stick. This will reveal a portion of the adhesive that you can use. Next, rub the glue stick onto the surface of the item you want to join. Make sure the surface is clean and dry for the best results.
After the glue has been applied to each item, press them together firmly and hold for a few seconds. The adhesive will bond together and hold the items firmly. Finally, keep the items in place until the glue has time to dry. This usually takes a few minutes, depending on the type of glue you are using. Using a glue stick is an easy way to adhere items together without the need for a glue gun. With a few simple steps and a little bit of patience, you can get great results.
How to use the glue gun
To begin, plug in the glue gun and make sure it is ready to use. Then, insert the glue stick into the back end of the glue gun. When the glue is melted, press the trigger and apply the glue around the edges of the items you wish to bond. Apply a thin, even layer of glue for best results. When the glue is dry, you can remove any excess glue with a damp cloth. Glue guns are great for crafts, repairs, and general DIY projects. With a little practice, you can become an expert at using a glue gun to get the job done.
How do we use a glue gun?
Glue guns are easy to use with a simple trigger action to dispense the glue. Before using a glue gun, you should make sure you have the right type of glue stick for the materials you are bonding. Some glue guns are designed for low temperature glue sticks, while others are designed for high temperature sticks. Glue guns come with two settings; high and low. The high setting dispenses the glue more quickly, while the low setting is used for more delicate materials.
Before you begin, make sure that your glue gun is plugged in and turned on. Be sure to place the glue gun on a flat, heat-resistant surface. When you’re ready, insert a glue stick into the back of the gun until it clicks in place. Squeeze the trigger to dispense the glue. Once you’ve applied the glue, press the materials together for a few seconds or longer for stronger bond. It’s important to remember to unplug and turn off the glue gun when you’re done. You will also want to store it safely away from small children. With a few simple steps, you can use a glue gun to bond materials together with ease.
Is hot glue permanent?
When it comes to glue and how to use it, many people are familiar with hot glue. Hot glue is a thermoplastic adhesive that is heated and applied in liquid form. It cools and solidifies quickly, making it a great choice for quick repairs and crafts. But, is hot glue permanent? The answer is, it depends. Hot glue is generally considered to be a good choice for items that won’t be subject to heavy wear and tear—and it’s not recommended for outdoor use.
For items that you want to be more durable and secure, you should consider using other types of glue. If you’re using hot glue, you should also be aware of the fact that it may not be waterproof. Hot glue may become brittle or break down after prolonged exposure to water or moisture. Additionally, the bond formed by hot glue can be weakened if it’s exposed to extreme temperatures. So, if your project will be exposed to hot or cold temperatures, you should consider using a more appropriate adhesive. Overall, hot glue is a great choice for temporary projects, but for more permanent solutions, you should use other types of glue. If you’re unsure which adhesive to use, it’s best to consult with a professional before starting your project.
Why does my glue gun not work?
Using a glue gun can be a great way to craft a variety of items. However, if your glue gun is not working properly, your project may not turn out as planned. There are a few common reasons why a glue gun may not work. First, check to make sure that the glue stick is properly inserted into the gun. If the glue stick has moved out of place, try reinserting it and check that it is fully inserted.
It is also important to ensure that there is enough glue in the stick. If the glue gun is not heating up properly, it may be because the glue stick is empty. Replace the glue stick with a new one and try again. Another potential cause of a glue gun not working properly is that the heating element may need to be replaced. If the glue gun was used very frequently, it is possible that the heating element is worn out and needs to be replaced. Finally, it is important to make sure that the glue gun is plugged into a secure power source. If it is plugged into a faulty power source, it may not be able to heat up properly. Check the power source and replace it if necessary. By troubleshooting the common causes of a glue gun not working, it should be possible to get it functioning properly and craft the projects you have in mind.
Do I leave the glue stick in the glue gun after use?
Using a glue gun can be a great way to attach objects quickly and securely. However, it is important to understand how to use a glue gun properly in order to avoid making a mess or damaging the glue gun. One of the key things to remember when using a glue gun is to remove the glue stick after use. Do not leave the glue stick inside the glue gun. Doing so can cause the glue to harden and clog the gun, making it difficult to properly use it.
To avoid this issue, make sure to unplug the glue gun and allow it to cool down before attempting to remove the glue stick. After the glue stick has cooled down, you can carefully pull it out of the gun. Disposing of the glue stick is also important. The best way to do this is to wrap the used glue stick in a paper towel, and then place it in the garbage. In conclusion, it is important to remember to remove the glue stick from the glue gun after use, and dispose of it properly. Doing so will help ensure the glue gun will remain in good condition and can be used again in the future.
How long does it take a glue gun to heat up?
Before using a glue gun, it is important to know how long it takes to heat up. Generally, when plugged in and switched on, a glue gun takes 5-7 minutes to heat up. This can vary depending on the type of glue gun being used. Some models have an LED light that indicates when the gun is ready to use. Other models may require you to test the glue on a test surface before use.
Always ensure that you use the glue gun with adult supervision and in a well-ventilated area. Ensure that the glue gun is not left plugged in when not in use and that the nozzle is clean before and after use. When the glue gun is heated up and ready to use, hold it at a 45-degree angle and apply a small amount of glue to the surface. Press the two items together and hold for up to 30 seconds, or until the glue is secure. Always be careful when using a glue gun, as it can cause serious burns or fires if not used properly.
Does glue dry faster in cold or hot?
Using glue can be a great way to keep things together and make sure they stay secure. But depending on the circumstances, you may want to consider the temperature when using glue. When it comes to glue drying, it is generally accepted that hot temperatures will dry glue faster. That being said, drying times can still vary depending on the type of glue being used. For example, some glues dry faster in colder temperatures.
If you’re working with a glue that dries faster in cold temperatures, make sure you use it in a cool area. This is especially important if you’re working in an environment where the temperature can’t be controlled. When it comes to general use, most glue will dry faster in hot temperatures. To speed up the process even more, you can apply heat directly to the glued area. This is most effective with glues that dry faster in hot temperatures. Overall, the temperature of the environment plays a significant role in how quickly glue will dry. To get the best results, make sure to use the right type of glue in the ideal temperature.
How do I know when my glue gun is ready?
To ensure that the glue gun is working at its optimal level, it is important to know when the glue is ready to be used. Before using a glue gun, it should be plugged in and heated up. As the gun is heating up, the glue stick should also be put inside the glue gun. The length of the time it takes for the glue gun to heat up depends on the type and size of the glue gun. When the glue gun is ready, the LED light will turn from red to green.
Additionally, the glue should be melted and flowing out of the tip of the glue gun. If the glue is not flowing, it is likely that the glue gun is not hot enough. It is important not to apply the glue on the materials until the glue gun is ready. If the glue gun is not hot enough, the adhesive will not bond the materials securely. Additionally, if the glue gun is too hot, the glue can be too runny and not provide a strong bond. To ensure the best results when using a glue gun, make sure the glue gun is heated up completely and the glue is melted and flowing before use. This will ensure that the materials are securely bonded together.
How many minutes does glue dry?
Knowing how long it will take for the glue to dry is important for your project. Generally, it can take between five to thirty minutes for the glue to dry. The drying time will depend on the type of glue and the quantity used. If you are using a large amount of glue, it is best to give it more time to dry. It is also important to keep in mind that the temperature and humidity of the environment can affect the drying time of glue.
If the temperature is too low, or the humidity is too high, the drying time can be longer. Before you start your project, it’s best to check the directions on the label of the glue to find out the exact drying time. This will help to make sure that your project is done correctly and without any issues. Overall, the amount of time it takes for glue to dry can vary, so it’s important to know how much time you need before you start using it. Give the glue enough time to dry properly and you’ll get the perfect bond between two pieces of materials.
How to choose a glue gun?
Choosing the right glue gun for your project is essential to make sure your works stay intact and secure. Here’s how to select the best glue gun for your needs:
- Consider the type of glue you are using. Different glue guns are designed for different types of glue, so make sure you get one that will work with the glue you are using.
- Think about how large or small of a job you are doing. If you are doing a small project, then a smaller glue gun may be able to get the job done. If you are doing a larger job, then you will likely need a larger glue gun.
- Think about how much heat you need. Some glue guns can reach higher temperatures than others, so make sure you get one that can reach the temperature you need for your project.
- Consider the size of the glue sticks you will be using. Some glue guns are designed to handle larger glue sticks while others are designed to handle smaller sticks.
- Look at the features of the glue gun you are considering. Some glue guns may have features like temperature control or an adjustable nozzle that can make your job easier. Take your time when selecting the right glue gun for your project and you will be sure to have a successful outcome.
How to use glue gun properly?
First, make sure that the glue gun is plugged in and heated up. You want to wait until the glue is melted and ready to use. Second, you should apply the glue along the edges of the materials you are trying to bond. Make sure not to apply too much glue, as this could lead to an uneven bond. Third, once you have applied the glue, use a piece of scrap material to firmly press the two materials together.
This will help the glue adhere properly and create a strong bond. Fourth, you should let the glue cool before you use or handle the material. This will help reduce the chance that the glue will come apart at a later time. Finally, you should always make sure that the glue gun is unplugged and properly stored in a safe place when not in use. This will help prevent any accidents from occurring.
What is the best glue gun?
The best glue guns have a wide range of features, such as adjustable temperature, adjustable speed, and quick cycle time. Additionally, they should have a comfortable grip and trigger, as well as a long power cord. When using a glue gun, be sure to protect your work surface and wear protective gloves. It is also important to be sure that the surfaces you will be bonding are clean, dry, and free of dirt or dust. It is important to follow the instructions of your specific glue gun model and make sure to always keep the tip of the glue gun clean.
To apply glue with a glue gun, start by plugging the power cord into an outlet and wait for the gun to heat up. Once the gun is ready, you can adjust the temperature and speed settings as needed for your particular project. Squeeze the trigger and hold the gun at a 45-degree angle. Move the gun in a steady and even motion, pressing the trigger continuously to apply glue. Using a glue gun is a great way to quickly and securely bond two surfaces. With the right glue gun, you can make sure your DIY projects stay together and last a long time.
What is glue gun used for?
It uses hot glue, which melts at a much higher temperature than regular craft glue, allowing it to create strong bonds between materials. To use a glue gun, you first need to insert a glue stick into the back of the gun. Then plug it into an electrical outlet and turn on the power. When the gun is heated, the glue will start to melt and come out of the nozzle. To use the glue gun, you simply have to press the trigger and the hot glue will come out of the nozzle.
You can then direct the glue onto the surfaces or materials that you want to join together. Apply pressure to the surfaces while the glue is still warm so that it will create a strong bond. When you are done using the glue gun, be sure to turn it off and unplug it from the power outlet. You can then leave the glue gun to cool down and store it away for future use. Glue guns are a great way to create strong bonds between materials, and are particularly helpful for projects that require a lot of precision, as the glue can be applied precisely and quickly. They are also great for quickly bonding materials when time is of the essence.
How do hot glue guns work?
To use it, you will need to insert a hot glue stick into the back of the gun. The gun will then heat up the glue stick, which will then allow you to dispense the melted glue onto whatever material you would like to join together. When applying the glue, it is important to use the right amount. Too much glue can make a mess, while too little glue will not provide a secure bond. You should also work quickly when gluing items together, as the glue cools and hardens very fast.
Your glue gun should not be left unattended while it is plugged in, as it can overheat and cause a fire. If you are done using the glue gun, make sure to unplug it and allow it to cool down before placing it away. In conclusion, using a hot glue gun is a great way to secure materials together. When using it, make sure to follow safety precautions and use the right amount of glue to get the best results.
How long should a glue gun take to heat up?
Before you use the glue gun, you should know how long it should take to heat up. Most glue guns take around 3-5 minutes to heat up. That usually gives the gun enough time to reach the optimal temperature to melt the glue. If your glue gun has an indicator light, this will usually turn on when the gun is ready to use. It’s important to only use the glue gun when it has reached the correct temperature.
If it’s not hot enough, the glue won’t stick properly and your project won’t be a success. You should also pay attention to the type of glue you are using, as different glues require different temperatures. Always follow the manufacturer’s instructions to ensure that your glue gun is set to the recommended temperature before use. Finally, keep in mind that you should never leave a glue gun unattended while it’s heating up, as it can pose a safety hazard. With the right information and safety precautions, you can use your glue gun effectively and create great projects.
What does hot glue not stick to?
When using glue, it is important to know what hot glue will not stick to. Hot glue will not stick to some plastics, rubber, and fabrics such as nylon, polyester, and rayon. It also does not bond well to wood with a glossy finish, metal, or glass. For best results, it is important to make sure surfaces are clean and free of grease or dust before applying hot glue. When gluing to plastic or rubber, it also helps to roughen the surface a bit with sandpaper or a wire brush.
It is also important to note that hot glue should not be used outdoors in cold weather as the cold can cause the glue to not stick properly. Additionally, heat, moisture, and direct sunlight can also reduce the bond of the hot glue. If you are not sure whether or not hot glue will stick to something, it is best to test it out on a scrap piece of material before applying it to the actual item. Additionally, it is best to use a glue gun with a high temperature setting for the best results when gluing to plastic and rubber. Overall, hot glue can be a great way to bond materials together, but it is important to know what it will not stick to and how to properly use it.
What are the disadvantages of hot glue?
Using hot glue can be a great way to join different materials together, but it also has some drawbacks. One of the key disadvantages of hot glue is that it does not always provide a strong bond between materials. Unless you use a large amount of hot glue, the bond may not be strong enough to hold the materials together in the long-term. Hot glue also has a short working time, which means that you have a limited time to work with it. This can make it difficult to position the materials in the exact spot where you need them, making it difficult to achieve a neat and accurate finish.
Another downside of hot glue is that it can be messy and difficult to work with. If the glue gets on your hands or clothes, it can be hard to remove and may leave a mark. In addition, if you make a mistake while using hot glue, it can be hard to correct it as the glue can harden quickly. Finally, hot glue is not suitable for use with certain materials, such as plastic, which can melt when exposed to heat. If you are working with plastic or similar materials, you should use a different type of glue. Overall, hot glue can be a convenient and cost-effective way of joining different materials together, but it does have some drawbacks that you should be aware of before using it.
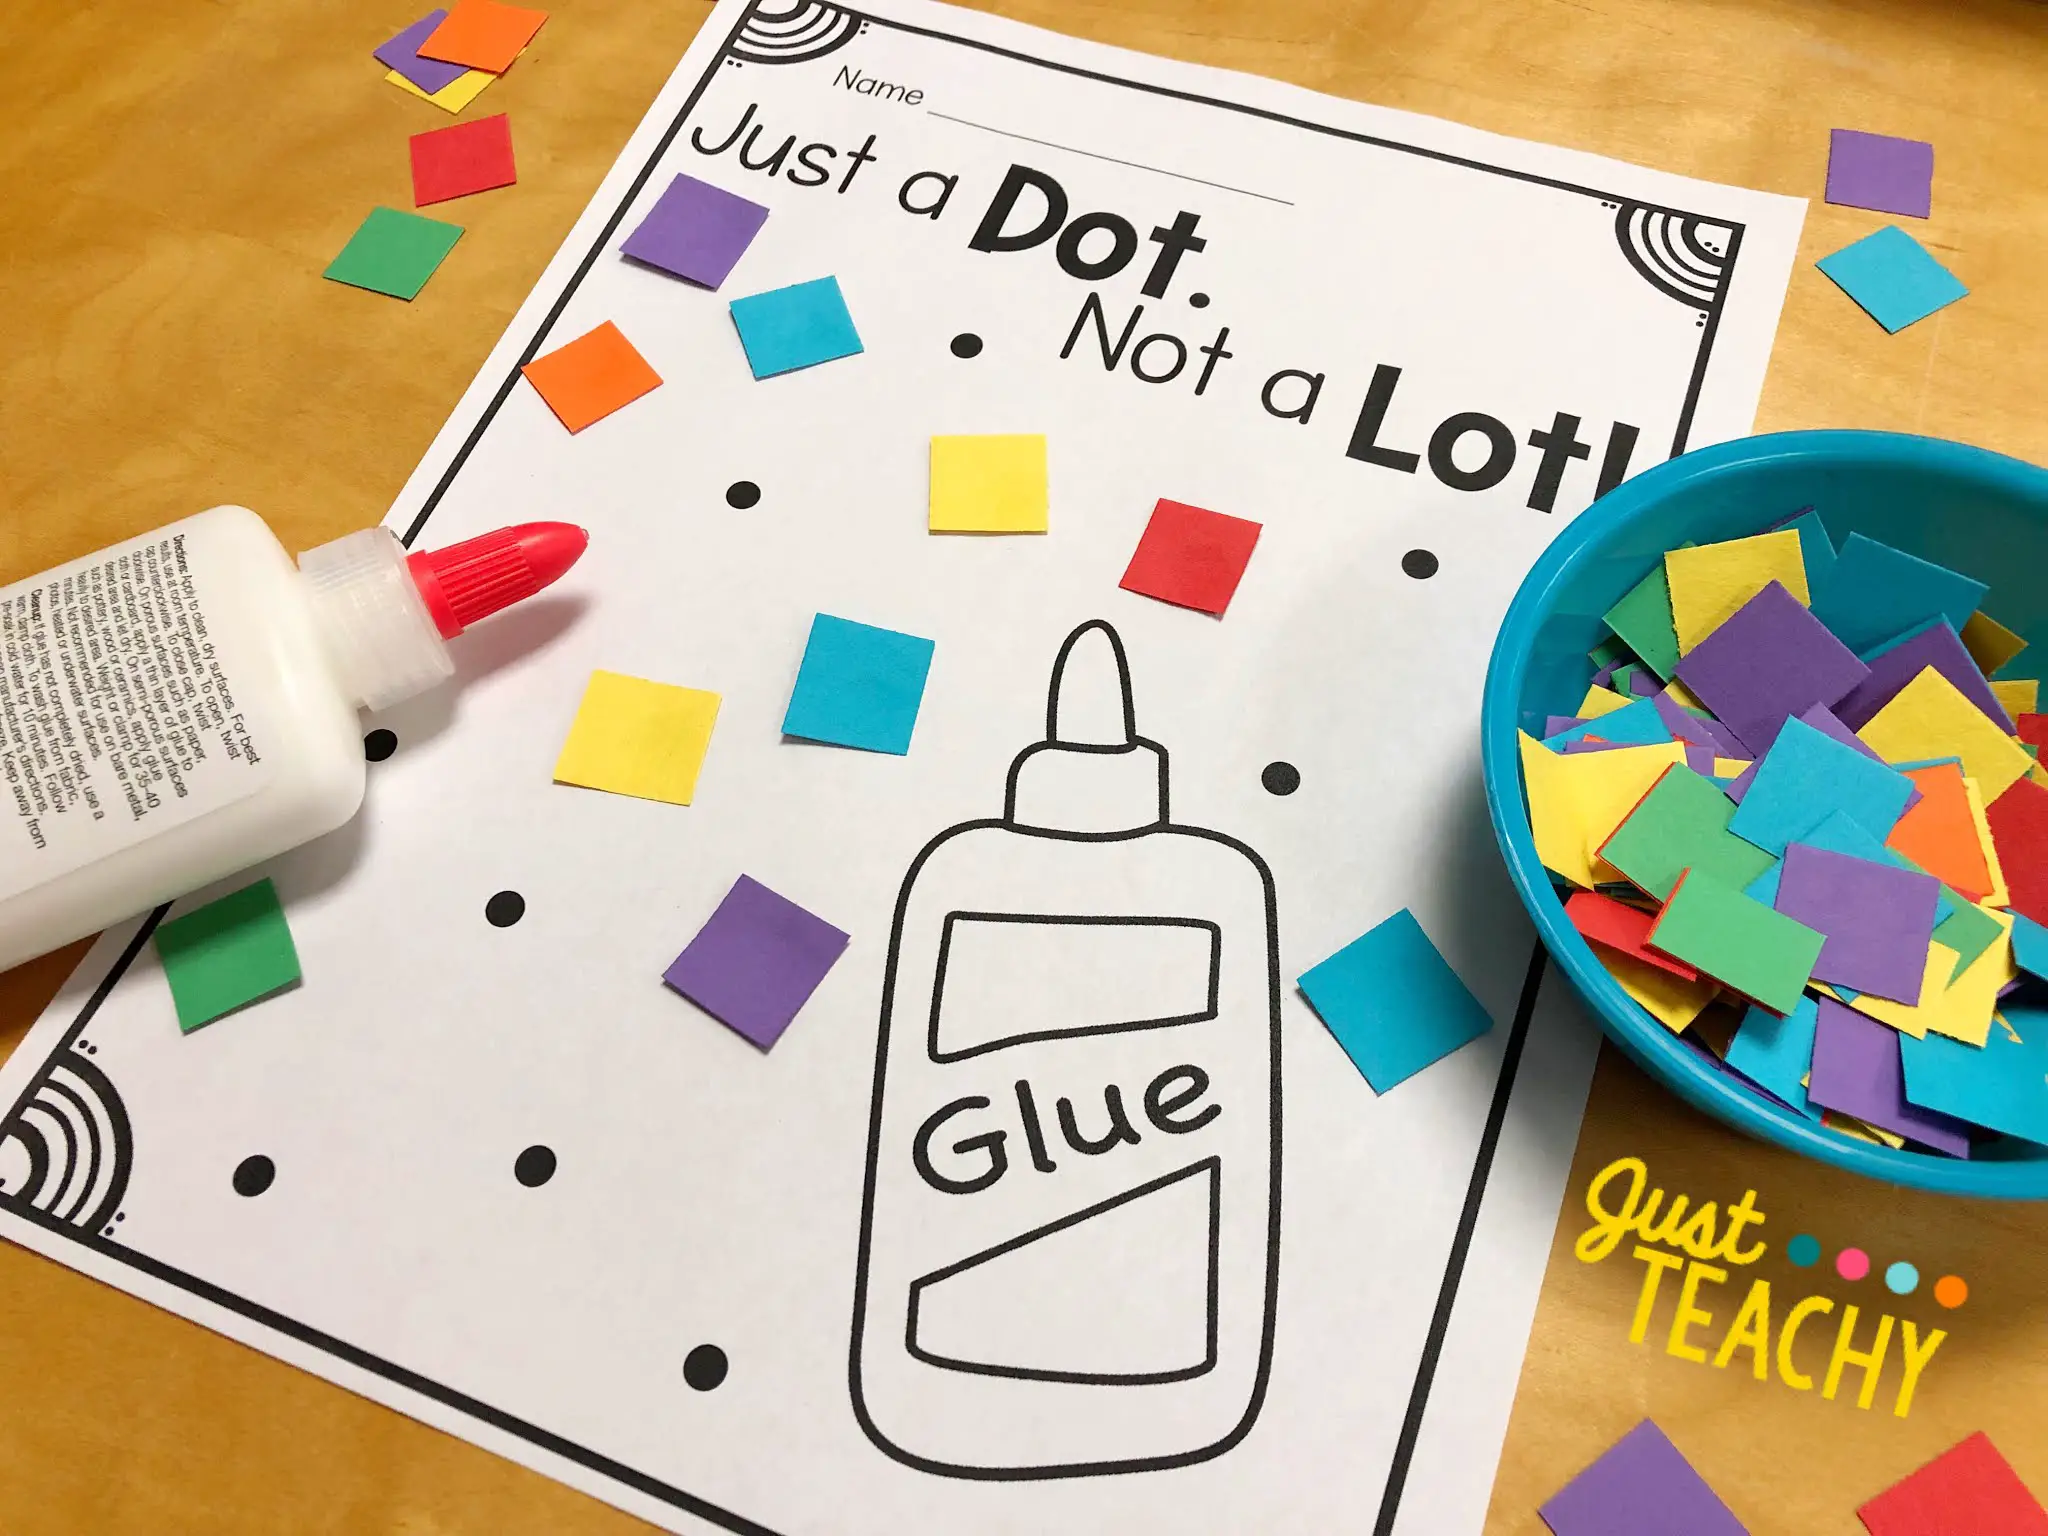
How to use glue dots
To use them, start by lightly pressing the glue dot against the surface of the item you want to attach. Next, press the other item onto the top of the glue dot. To make sure the items stick together, press down firmly for a few seconds. If you’re using multiple glue dots, make sure to use a similar number of dots on each item. You can also use multiple dots in a line to create a stronger bond.
When you’re finished using the dots, you can easily clean off any residue with a damp cloth. Make sure to store the dots in an air-tight container to keep them from drying out. Using glue dots is an easy and efficient way to attach items together. Just make sure to press the items firmly against each other and store the dots in a container when you’re finished.
How to apply glue dots
To use glue dots, you will need to start by cleaning the surfaces you are attaching. You then need to peel the backing from the glue dot and press it firmly onto the surface. The glue dot will then hold the two surfaces together. For added protection, you can use a piece of tape or a piece of paper over the glue dot to keep it securely in place. Glue dots are perfect for attaching thin papers together or for lightweight craft projects. With a few simple steps, you can use glue dots to attach materials together quickly and easily.
Can you make slime with glue dots?
Glue dots are small, round adhesive dots that are used to stick paper and other materials together. To make slime with glue dots, you will need to combine some glue dots with a few ingredients like water and Borax. Start by allowing the glue dots to dissolve in a cup of warm water. Once the glue dots have dissolved, mix in some Borax until the mixture thickens. You may also want to add some food coloring or glitter to your slime for extra color and sparkle. Finally, knead the slime until it is stretchy and you are ready to play with it. With glue dots, you can make slime in any shape or color, and it’s a great way to use your glue.
How to make adhesive dots?
Using glue can be a great way to craft, build, and repair objects. However, sometimes it can be difficult to manage the glue when it comes to very small and precise areas. Adhesive dots can help solve this problem. Adhesive dots are similar to glue, but they’re in the form of small dots or circles. They come in different sizes and can be applied easily to small areas.
To use adhesive dots, all you need to do is pick the right size for the specific area you are working on and press the dot to the surface. Adhesive dots are a great alternative to glue because they come in very small sizes, and they can be applied with more precision than glue. Furthermore, they can be used to create a neat and clean bond, without any mess. If you want to make your own adhesive dots, it’s quite simple. All you need is some double-sided tape, scissors, and an X-Acto knife. To start, cut the double-sided tape into small circles using the scissors. Then use the X-Acto knife to cut each circle into two equal parts. Lastly, separate the two parts and you’ll have your own homemade adhesive dots. Adhesive dots are a great way to get a precise, clean bond when adding glue to small areas. Making your own adhesive dots is an easy and inexpensive way to make sure you have the right size of dots for the job.
What are glue dots used for
Glue dots are a type of adhesive commonly used in many craft, scrapbooking, and other projects. They are small, round, and already sticky, so they don’t require any additional glue or adhesive. They are great for attaching lightweight items, such as photos, paper, or fabric, without the mess of traditional glues. To use glue dots, simply pull away the backing paper and press the object onto the exposed adhesive. The adhesive on glue dots is very strong and can hold up to a variety of materials.
Glue dots are also great for projects that require 3-D effects. You can stack multiple glue dots on top of each other to add dimension and texture to a project. Glue dots are an economical solution for many crafting projects. They come in various sizes and some are removable, so they can be used for temporary or non-permanent projects. Overall, glue dots are a great way to stick lightweight materials quickly and easily. They can be used in a variety of projects to create interesting designs and effects.
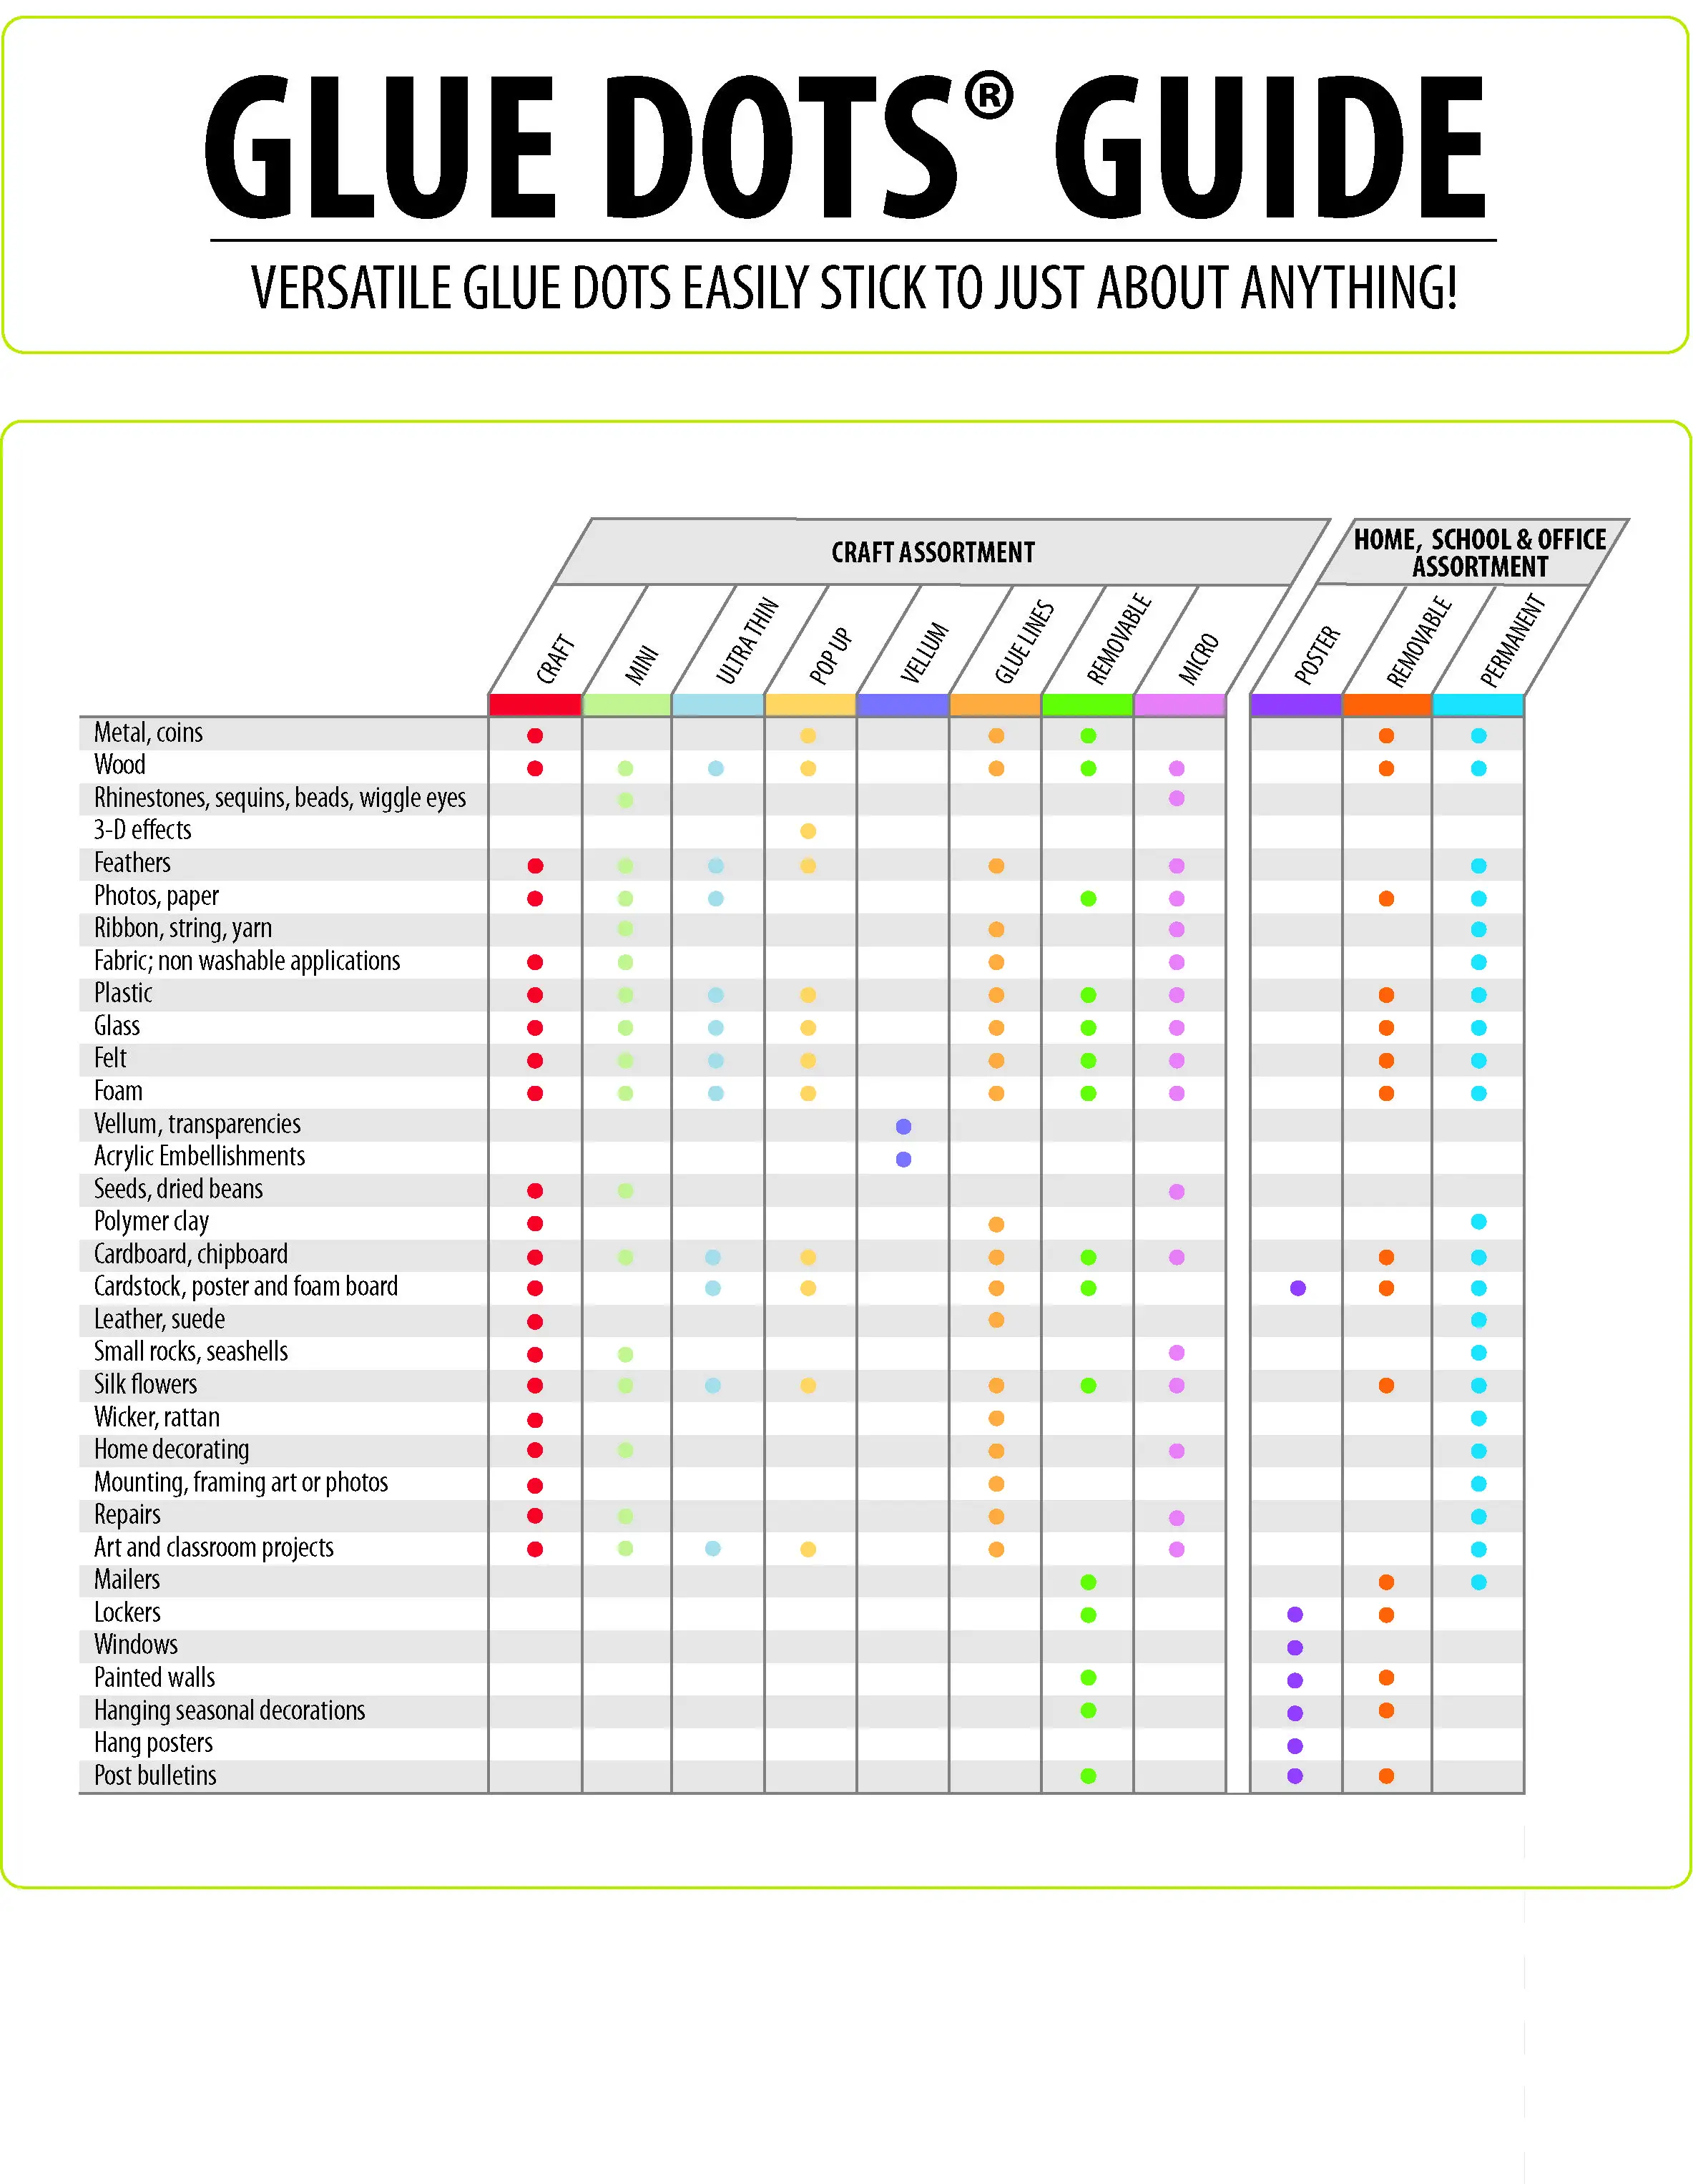
What will Glue Dots stick to?
Glue dots are an incredibly useful tool when it comes to adhering materials together. They are a great alternative to traditional glues and are easy to use. Glue dots can be used to stick a variety of materials to a wide range of surfaces. They can be used on paper, cardboard, plastic, fabric, wood, metal, glass, and even tile. Glue dots are incredibly versatile and can be used to adhere items of varying shapes, sizes, and textures.
They offer a secure bond that is strong and long-lasting. To use glue dots, simply remove the adhesive liner and press the glue dot firmly onto the object or surface. You can use the glue dots to attach items together in many different ways. Glue dots are an excellent choice for easy and quick adhesion of materials. They are inexpensive, easy to use, and available in a variety of sizes and thicknesses.
Are permanent Glue Dots permanent?
Using glue dots can be an effective way to attach items together. They can be used to securely hold two surfaces together, and unlike conventional adhesives, they won’t create a mess when applied. The question then arises – are permanent glue dots really permanent? The answer is yes, permanent glue dots are designed to adhere powerfully and hold items together for a long time. If you need a strong bond, then permanent glue dots are the way to go. In order to use permanent glue dots, you will need to place them on the items you are attaching.
Make sure that the surfaces are clean and dry. Apply pressure to the surfaces so that the glue dots will make more secure contact with the surfaces. In order to keep the bond strong, try to avoid changing the items’ positions often. Also, try to avoid exposing the items to extreme temperatures or moisture. Overall, permanent glue dots are an effective way to make sure that the items you are attaching stay connected for a long time. When used correctly, it can make sure that your items will remain secure for a long time.
How long do Glue Dots last?
Glue dots are small pieces of adhesive material that can be used for a variety of purposes, such as crafts, scrapbooking, and more. When using glue dots, it is important to know how long they will last. Generally speaking, glue dots are designed to provide a secure bond between two surfaces and can last for up to one year. However, depending on the type of glue, the age of the glue dot, and the environment, glue dots can last for a shorter or longer amount of time. To make sure your glue dots are in good condition and are still effective, it is important to store them in a cool and dry environment.
Additionally, glue dots come with a best before or expiration date on them, so it is important to pay attention to this to ensure the glue dots are still effective. Overall, glue dots are a great way to adhere items together and can last for up to one year. However, it is important to store glue dots correctly and pay attention to the best before or expiration date to ensure the glue dots are still effective.
What are balloon Glue Dots used for?
Glue Dots are a great tool for using glue in a quick and easy way. They are a type of adhesive that come in the form of small, round dots on sheets or rolls. Balloon Glue Dots are specifically designed for use with balloons for attaching decorations and accessories. To use Balloon Glue Dots, simply peel off the dots from the sheet or roll. Stick the dot onto the balloon, then attach the desired decoration or accessory to the glue dot.
The glue dot will hold it in place. These dots are perfect for use with any type of balloon, including latex and mylar balloons. They are also great for craft projects and decorations. Balloon Glue Dots are a great and easy alternative to regular glue. They are fast and efficient to use, and can be used on all types of surfaces. Plus, they don’t leave behind any residue or mess. Overall, Balloon Glue Dots are an excellent way to attach decorations and other objects to balloons. They are easy to use and provide a strong, lasting bond.
How long do glue dots last?
When using glue dots, it is important to understand how long they last. Generally speaking, glue dots can last for a few weeks to a few months, depending on the surface, materials, and elements they are exposed to. For example, if glue dots are used outdoors, they may not last as long as if they are used indoors. It’s also important to note that some surfaces, such as wood, glass, metal, and plastic, can help glue dots last longer than other surfaces, like fabric and paper. If possible, try to use a smooth, non-porous surface for the best results.
The amount of time that the glue dot remains bonded also depends on the application. If a heavier item is attached to the glue dot, it may not be able to hold the weight and will likely come off sooner. In conclusion, glue dots are a great way to temporarily adhere items together, but it is important to understand how long they will last. Depending on the surface and material used, glue dots can last up to a few months. If the application is heavier or the surface is porous, the glue dots may not last as long.
How long do Glue Dots take to dry?
When it comes to using glue, one of the most common questions is “How long do Glue Dots take to dry?” Generally, the time it takes for a Glue Dot to dry depends on the type of adhesive used. If you use a water-based glue dot, it should take no longer than 30 minutes to dry. However, if you use a solvent-based glue dot, it can take up to an hour or two to fully dry. It is also important to note that Glue Dots tend to be thicker than other types of glues, which can slow down the drying process. To ensure that your Glue Dots are dried quickly, you should use a lighter coating of glue and use a fan or hairdryer to help speed up the drying process.
Once the Glue Dot is fully dried, it should be able to hold firmly and provide a strong bond between the surfaces. If you find that the Glue Dot is not as strong as expected, you can use a few more dots to ensure a stronger hold. It is important to note that even after the Glue Dots have been fully dried, you should avoid exposing them to moisture and direct sunlight for prolonged periods of time. This will help prevent the adhesive from weakening and becoming less effective over time. Overall, Glue Dots are a great option for quickly bonding surfaces together. With proper application and care, Glue Dots can provide a strong bond between surfaces in around 30 minutes to an hour.
Are Glue Dots easy to use?
Glue dots are a great option for easy gluing! They are readily available and very simple to use. All you need to do is peel off the backing, then press the dot onto your project. The dots have a strong adhesive bond and can be used on a variety of surfaces. Glue dots are a great way to add embellishments or decorations to any project without the mess or hassle of traditional glue. They are quick and easy to apply and can be used on paper, fabric, wood, and other materials.
Glue dots can be used for a variety of projects, from scrapbooking to crafting to home decor. They are a great way to add a unique touch to any project. Plus, they are easily removed and won’t damage the surface. Glue dots are also great for kids! They are easy to use and won’t make a mess. Plus, they can help children learn how to use glue and create different projects. Overall, glue dots are a great choice for any project. They are easy to use, versatile, and can help you create beautiful and unique projects quickly and easily.
How permanent are permanent Glue Dots?
Glue Dots are one of the most permanent glues available. These are perfect for any project that requires a strong yet flexible bond. These dots come in various sizes and forms, allowing you to use them in a variety of projects. To use Glue Dots, simply peel off the backing and press the dot onto the project material. The adhesive will create a strong, long-lasting bond that won’t break easily.
These dots can be removed, but only if the bond is broken with a tool. Glue Dots are known for their strength and durability. Once applied, the bond created by the Glue Dots is permanent and won’t break down over time. They can withstand pressure, temperature changes and other environmental factors, making them ideal for both indoor and outdoor projects. Overall, Glue Dots are one of the most durable and permanent glues available. They are relatively easy to use and provide a strong, long-lasting bond that won’t break down over time. If you’re looking for a secure and reliable bond, Glue Dots are a great option.
Do Glue Dots Peel off paint?
Using glue to stick items to surfaces can be a great way to secure items in place. But if you’re looking to attach something to a painted surface, glue dots are an excellent choice. Glue dots are an easy-to-use adhesive solution which can be used to adhere a wide range of materials to painted surfaces. They’re also great for fastening items together, making them perfect for a variety of craft and home improvement projects. When applied to a painted surface, glue dots do not peel off and hold securely.
They are safe to use on any type of paint, such as acrylic, latex, oil, or alkyd paints. Plus, they’re easy to remove if you need to reposition or remove the item that has been glued. To use glue dots, simply peel the protective backing off of the adhesive and press it firmly onto the item you’re wanting to stick. You can then place the item onto the painted surface. The adhesive will hold it firmly in place and should not peel off. In conclusion, glue dots are a great choice for sticking items to painted surfaces. They are easy to use, hold securely, and are easy to remove if needed. So, if you’re looking to attach something to a painted surface, glue dots are definitely the way to go.
Are Glue Dots strong?
Glue dots provide a strong, permanent bond that can last long-term. They provide an excellent alternative to using traditional liquid glue. Glue dots are usually made up of a type of adhesive applied to a thin double-sided tape. The adhesive can be applied in various ways, depending on the project. Glue dots are available in various sizes and are often used for a variety of craft and art projects.
Are glue dots strong? Yes, in general, glue dots provide a strong and permanent bond. They are especially useful when you need to quickly and easily attach two materials without having to use a lot of liquid glue. They are an excellent option when you need an adhesive that will last. When using glue dots, it is important to make sure that the surfaces you are attaching are clean and dry before applying the glue. Additionally, make sure to press the materials firmly together for a few seconds to ensure that the glue adheres properly. This will ensure that the bond is strong and long-lasting. Overall, glue dots are an excellent adhesive option when you need a strong, lasting bond. They are easy to use, and the adhesive provides a secure and permanent bond. With a few simple precautions, glue dots can make your projects look professional and attractive.
What type of glue is best?
When it comes to using glue, the type of glue you use is important. Different glues are suited to different jobs. For example, wood glue is best used when you need to join wood together, while superglue is best used for small items or materials that won’t be exposed to much movement. For other materials, such as fabrics or leather, a fabric glue is the best choice, as it is water resistant and will bond securely to both materials. If you are looking for a more general purpose glue, a polyvinyl acetate, or PVA glue, is a good choice.
It too is water resistant and will work for a variety of projects. When gluing difficult materials, an epoxy resin glue may be best. Epoxy resin glue creates a strong bond, and is resistant to heat and moisture. For glass, metal, or ceramic surfaces, a silicone glue is recommended, as it creates a strong, long lasting bond. In general, the best choice of glue depends on the materials you are using and the task you need to complete. Make sure you choose a glue that is suited to the project you are undertaking, and you will have the best results.
Are glue dots removable?
Glue dots are adhesive discs that are easy to apply and can be used on both porous and non-porous surfaces. But one of the most common questions about glue dots is if they are removable. The answer is yes, glue dots are removable. They are designed to stick to surfaces yet still be removable without leaving residue. To remove glue dots, you should start by gently peeling them away from the surface.
If the dot does not come off easily, you can use a cotton swab lightly saturated with rubbing alcohol to loosen the adhesive. After the glue dot is removed, the surface should be wiped down with a damp cloth to remove any remaining residue. Using glue dots is a great way to adhere items temporarily, yet still be able to remove them when needed. They are easy to use and are a great option for crafting projects and decorative items. Overall, glue dots are a great option to use when you need a secure hold but still want something that will be removable. Just remember to use rubbing alcohol to remove any glue dots that may remain after peeling them away.
What is the balloon glue for?
Using glue on balloons can be a great way to decorate for parties and other celebrations. Balloon glue is specifically designed to give a strong and secure bond between the balloon and whatever surface you’re using. When using balloon glue, it’s important to choose the right one for the job. For example, some may be specially designed for latex balloons, while others may work better for foil balloons. Before using, make sure all surfaces are clean, dry and free of dust.
Then, apply a small amount of the glue to the surface and press the balloon against it. Hold for a few seconds to ensure a secure bond. It’s important to note that balloon glue is not a permanent adhesive, so it won’t be suitable for applications that require a strong, long-lasting bond. For those, you’ll need to use a different type of glue. In general, balloon glue is a great choice for temporary decorations that need to stay put, such as parties and celebrations. When used correctly, it will provide a secure bond between balloon and surface.
Do glue dots work on foil balloons?
Glue dots are an effective way to use glue on foil balloons. They provide a secure and reliable bond between the foil and the surface you are attaching it to. To use glue dots, you will need to select ones that are made for the surface you intend to attach the balloon to. Once you have your glue dot, you will need to peel off the backing and press the glue dot firmly onto the foil balloon. Make sure that the glue dot is firmly attached and that it covers the entire area of the balloon.
After the glue dot is attached, you can press the balloon into place. Make sure that the surface you are attaching it to is clean and dry. This will ensure that the bond is strong and long lasting. Once you have the balloon attached, you can check to make sure that it is secure by gently pulling on it. If it is secure, the glue dot will stay in place and the balloon will not move. To remove the balloon, you can simply peel off the glue dot and the balloon will come off easily. Glue dots are an effective way to secure foil balloons and are a great option when attaching balloons to surfaces.
What is the best balloon glue?
To use it, simply apply a small amount of the glue to the surface. Then, hold the balloon firmly against the surface and press down until it sticks. You can use a brush or roller to apply the glue more evenly. Make sure to keep the glue away from children and pets, as it can be dangerous if ingested. It is also important to store the glue away from heat and direct sunlight, as it can become less effective if it gets too hot.
When using balloon glue, it is important to use it in a well-ventilated area. This is because balloon glue contains certain chemicals that can be harmful if inhaled. Overall, the best balloon glue is one that is strong, easy to use and safe. Look for a product that is specially formulated for balloons and use it in a well-ventilated area for the best results.
Do balloon glue dots leave marks on walls?
You may be worried about whether the glue dots will leave a mark on the wall. The good news is, the answer is usually no. Most balloon glue dots are designed to be removable and leave no residue or marks on the wall. This is because the adhesive used is designed to adhere to the surface, but not to penetrate it. However, there are some exceptions.
Some adhesive dots may contain a stronger adhesive, which can potentially leave a mark or residue on the wall. To avoid this, be sure to check the label and look for a glue dot that promises to be residue-free. When using the glue dots, remember to press firmly onto the wall and make sure the surface is clean and dry. This will ensure that the glue dots will hold firmly and will not come off easily. To ensure that the glue dots are completely removed without leaving a mark, it is best to carefully remove them from the wall. Pull them away from the wall slowly and gently, making sure not to pull too hard. In general, balloon glue dots are a great way to decorate without worrying about marks on the wall. They are easy to use and are designed to be completely removable. Just make sure to read the label, press firmly, and remove them gently to ensure that they don’t leave any marks when removed.
Do Glue Dots rip off paint?
Using glue can be a great way to bond items together, but there are different types of glue to use depending on the surface. Do glue dots rip off paint? Generally, glue dots are designed to be a no mess, no fuss adhesive and they won’t usually rip off paint when used. This makes them a great option for quickly securing light-weight items to surfaces, like photos to walls. However, if you’re looking to attach heavier items, you should consider using a stronger adhesive. Glue dots may not be strong enough to hold heavier objects and won’t provide a long-lasting bond.
Plus, if you use too many glue dots, you risk damaging the paint in the area you’re trying to adhere the object to. The best solution is to use a high-quality adhesive that will be strong enough to hold the object securely, but also won’t damage the paint. There are many great options available that are specifically formulated for use on surfaces with paint, so make sure to read the instructions carefully to get the best results. Glue dots can be a great option for quickly attaching lighter weight items, but if you’re looking to adhere heavier items, you should take the time to find an adhesive that won’t damage the paint. With a bit of research and care, you should be able to find the best glue for the job and keep your surfaces looking great.
Do Glue Dots take off paint?
Using glue dots for removal of paint is not recommended. Glue dots can be used for many purposes, such as sticking two pieces of paper or fabric together, but paint removal isn’t one of them. When using glue, it’s important to choose the type that is most appropriate for the task at hand. Glue dots may work for some instances, but for heavy-duty jobs, like paint removal, other types of glue may be more suitable. For paint removal, a product designed specifically for that purpose is the best way to go.
These products are designed to loosen and dissolve the paint, making it easier to remove. When using glue, safety is also an important consideration. Glue dots can be difficult to clean up and often require harsh chemicals for complete removal. This could cause damage to the surface or leave behind a residue. In conclusion, when it comes to how to use glue, it is important to choose the right type for the job. For paint removal, glue dots are not recommended, as other types of glue are more suitable.
How to use glue dots for balloons
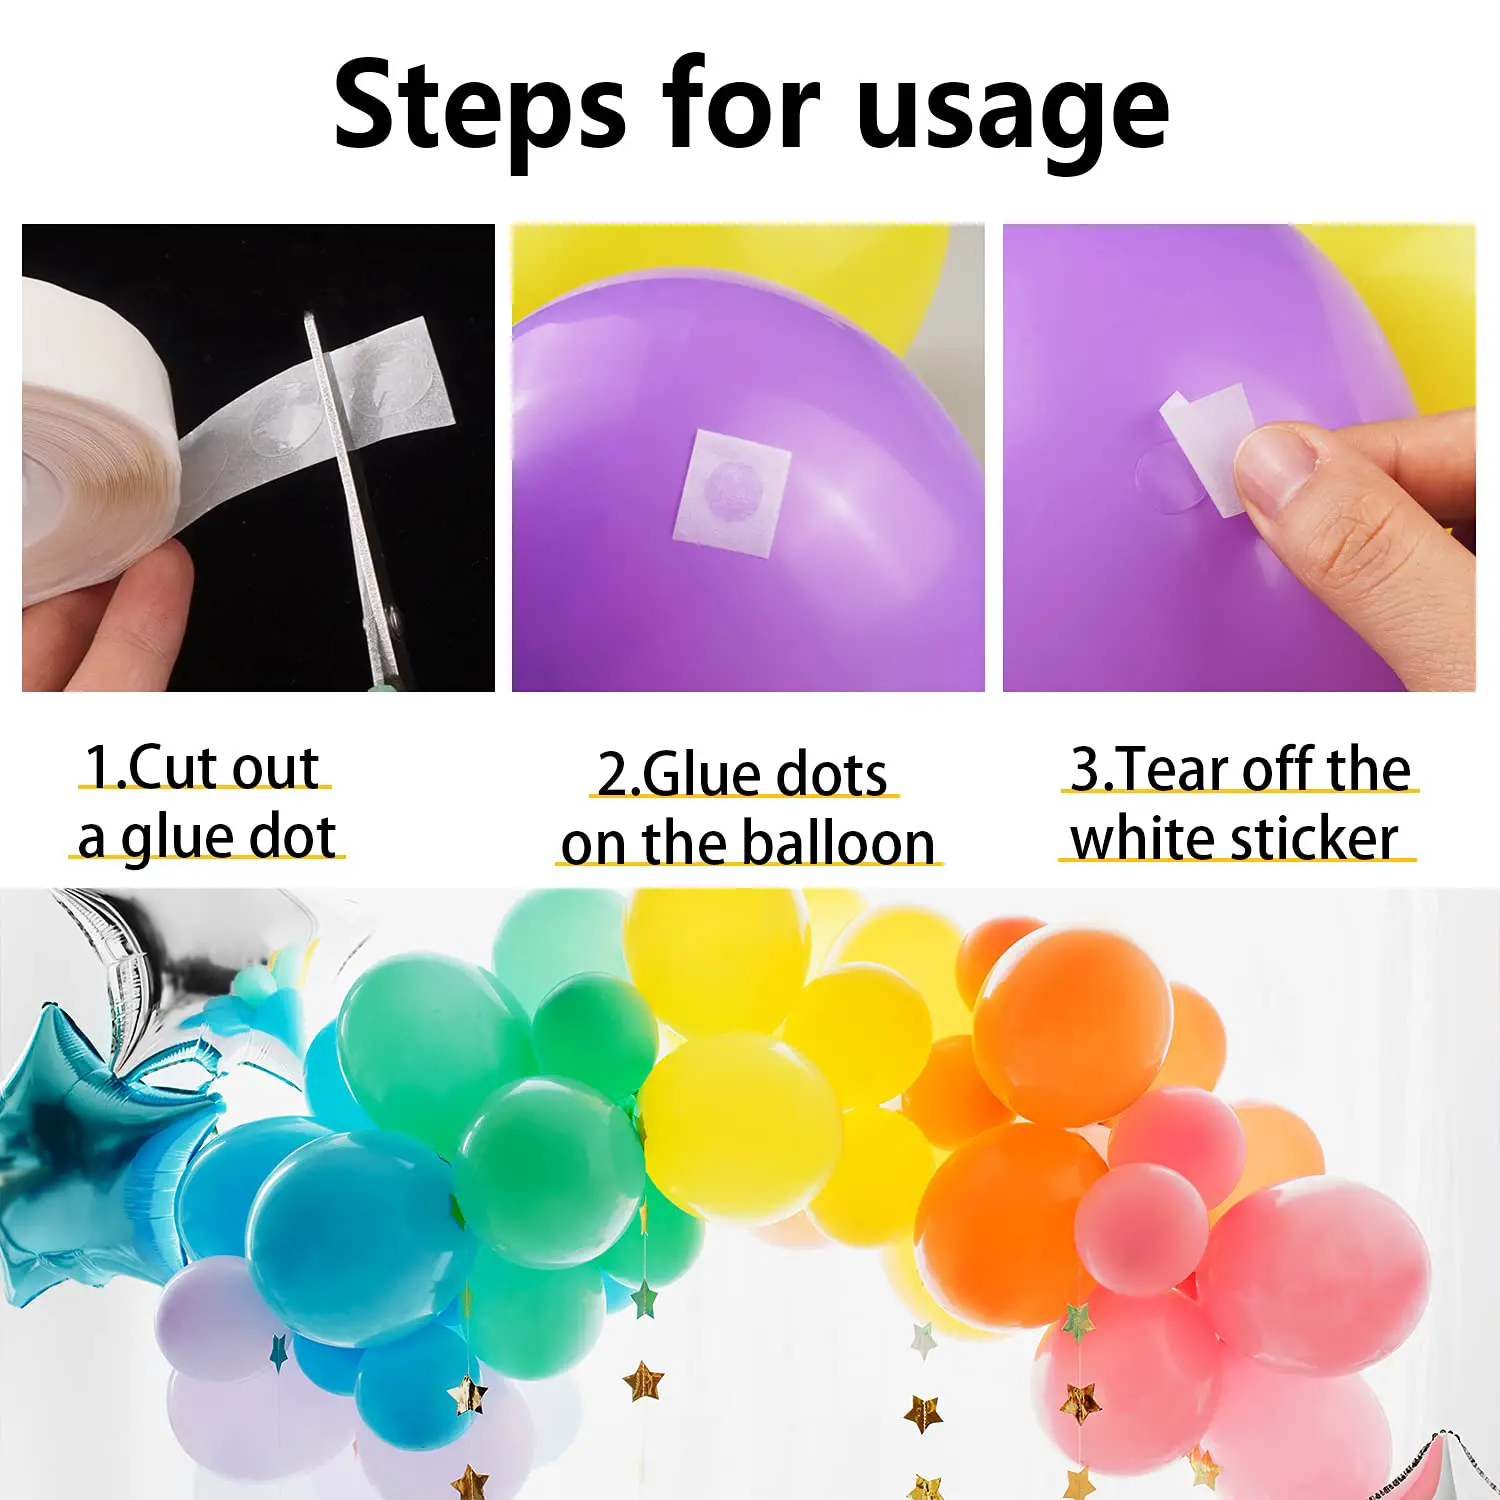
Glue dots can be used to secure balloons in a variety of ways. To use glue dots, start by removing the backing paper from the glue dots and placing the adhesive side onto the balloon. Make sure the glue dot is firmly secured to the balloon. Then, gently press the balloon onto a clean, dry surface. This will ensure the glue dot is firmly attached to the surface.
When attaching a balloon to a wall or other non-porous surface, you can use glue dots as well. Simply press the glue dot onto the wall, then press the balloon firmly onto the glue dot. This will ensure a strong bond. When creating sculptures or other forms with balloons, you can use glue dots to secure them in place. Place glue dots onto the balloons and press them gently against the object you are using. This will hold the balloons in place and help them maintain their shape. If you need to attach multiple balloons to each other, you can also use glue dots. Place a glue dot on each balloon and press them lightly together. This will ensure a secure connection between the two balloons. Overall, glue dots are an effective and easy way to quickly secure balloons in place. With a few simple steps, you can use glue dots to create impressive sculptures and decorations with balloons.
What Glue Dots are best for balloons?
Glue dots are an easy and efficient way to attach balloons to a variety of surfaces. They are often preferred over traditional glue because they don’t require drying time and provide a strong bond that won’t come undone. They are ideal for use on helium-filled balloons and can be used on any type of material. Glue dots are double-sided adhesive dots which can be used to secure balloons to walls, ceilings, backdrops and more. The best glue dots for balloons are repositionable and clear, so that they don’t detract from the overall look of the balloons.
They are also acid-free and non-toxic, so they won’t harm the balloons. To use glue dots on balloons, start by removing the backing from the glue dots. Next, press the exposed adhesive side of the glue dot onto the surface of the balloon and hold for a few seconds until it sticks. Repeat this process with a second glue dot, ensuring that the two glue dots stay securely on the balloon. When glue dots are used on balloons, it is important to make sure the material is clean and dry. It is also important to check the balloon periodically to make sure the glue dots are still secure. If they are starting to become loose, they can be replaced with new dots. Overall, glue dots are an effective and easy way to attach balloons to surfaces. They provide a strong bond and don’t require drying time. By using the right type of glue dots, you can ensure that your balloons will stay in place for a long time.
Will glue dots hold balloons to the wall?
Glue dots are a great choice for this task. They are easy to use and can be used to hold most types of balloons to the wall. To use glue dots, simply apply one to the center of the balloon and press it firmly against the wall. The glue dots will hold the balloon in place, so you don’t need to worry about it slipping and falling off. When using glue dots for this purpose, make sure to check the weight of the balloons to ensure that the glue dots can support them.
If the balloons are too heavy, they may be too much for the glue dots to hold. You can also use glue dots to connect balloons together, such as when making a garland or arch. Just apply glue dots to the ends of the balloons and they will stick together, allowing you to create a beautiful decoration. Glue dots are a great choice for holding balloons to the wall, and they can be used in a variety of ways to make your decorations look even more impressive. With a little bit of planning, you can create a truly unique look for any room.
How much weight will glue dots hold?
When it comes to using glue for various applications, glue dots are a great option. They are small adhesive circles that can be applied to virtually any type of material and can be easily removed without leaving any residue behind. Glue dots are strong and versatile and can hold a surprisingly large amount of weight. Depending on the size and type of glue dots used, they can hold between 1 and 10 pounds of weight. For heavier items, using multiple glue dots or a higher grade adhesive is recommended.
Applying glue dots is a relatively quick and easy process. First, peel the backing off the adhesive, then press the dot onto the material you are working with. Make sure to press firmly so that the adhesive bond is strong and secure. Glue dots are great for a variety of applications, including craft projects, scrapbooking, and other creative endeavors. For heavier items, like pictures, use multiple glue dots in order to ensure that the item is securely in place. In conclusion, glue dots are an excellent choice for many applications, as they can hold a surprisingly large amount of weight. By following these simple steps, you can rest assured that your items will remain securely in place.