Transforming a dull and dirty floor into a clean and shiny one is one of the quickest and most cost-effective ways to uplift the look of a room. Floor polish offers a protective coating that not only enhances the appearance of the surface but also helps to extend its lifespan. However, applying floor polish is not as simple as it seems. In many cases, people end up making mistakes that can damage the flooring or result in unsightly streaks and unevenness. That’s why it’s important to know the common mistakes to avoid when applying floor polish to achieve perfect, gleaming floors every time.
Choosing the Right Polish
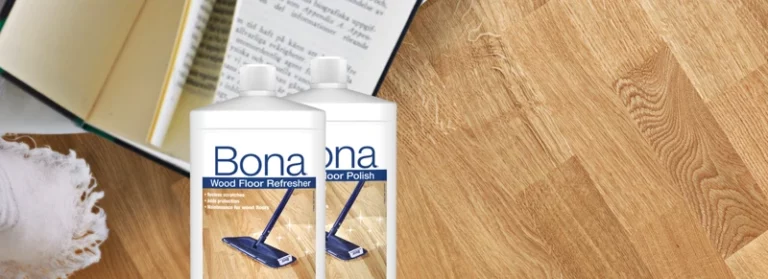
When it comes to applying floor polish, choosing the right type of polish is crucial to achieving the desired results. With a variety of floor polishes available on the market, it can be perplexing to determine which type is best suited for your specific needs. Using the wrong type of floor polish or failing to test the product beforehand can result in unsatisfactory results or even permanent damage to your floors. To ensure that you select the appropriate polish for your flooring needs and avoid mistakes, it is important to take time and research the various floor polish types available. Check out this floor polish types guide to learn more about which type is best for your specific flooring material.
Using the Wrong Type of Polish
When applying floor polish, it is crucial to choose the right type of polish for the type of flooring you have. Using the wrong polish can not only produce unsatisfactory results, but it can also cause damage to your floors. For example, using a polish designed for vinyl flooring on hardwood floors can cause damage to the wood.
To avoid this mistake, it is important to research and understand the type of polish that is suitable for your specific type of flooring. Do not make assumptions or guess when selecting a polish. There are various types of floor polishes available in the market, such as oil-based, water-based, or wax-based.
Oil-based polishes are known for their durability and provide a long-lasting shine. Water-based polishes are more environmentally friendly and dry faster than oil-based polishes. Wax-based polishes are recommended for floors that have already been waxed and sealed. Using the wrong type of polish can lead to unintended results such as a sticky, hazy or even scratched surface.
Before making a final decision, do your research, and consult the manufacturer’s recommendations. Ensure to read the label and usage instructions carefully to avoid any confusion or mistakes. Proper selection of polish can save you a lot of time, energy, and cost of repairing floors.
If you have any queries or doubts, you can check out resources that provide complete guidance on floor polish selection, benefits, protection, and cleaning. You can find more information on the subject by clicking on Floor Polish Guide.
Not Testing the Polish First
One of the biggest mistakes people make when applying floor polish is not testing the product first. It may seem like an unnecessary step, but it can save you a lot of time and money in the long run. Testing the polish on a small, inconspicuous area of the floor first will help you determine if it is the right type of polish for your flooring material, and if it will produce the results you desire.
There are a few things to consider when performing a test. First, make sure to use the same flooring material and condition as the rest of the floor. Second, follow the manufacturer’s instructions exactly as written. Finally, wait the recommended time for the polish to dry completely before evaluating the results.
By testing the polish first, you can avoid potential disasters such as discoloration or damage to the flooring. Additionally, you can save yourself the hassle of having to remove the polish and start the process over again. Remember, different types of flooring require different types of polish, so it is important to choose the right one for your floor to achieve the best results.
For more information on the benefits of floor polish and how to choose the right one for your needs, check out our article on the benefits of floor polish.
Preparing the Floor
Preparing the floor before applying polish is a crucial step to achieve a shiny and smooth surface. Proper preparation ensures that the polish adheres properly and lasts longer, preventing the need for frequent reapplication. However, many people make mistakes during the preparation stage, which can lead to a subpar finish. It’s important to pay attention to the details and take the time to prepare the floor correctly. In this section, we’ll explore some common mistakes to avoid when preparing the floor for polishing. If you want to learn more about cleaning floors after polish or eco-friendly alternatives to traditional floor polish, check out the cleaning floors after polish or enviro floor polish alternatives sections of our website.
Not Cleaning the Floor Thoroughly
When it comes to applying floor polish, one critical mistake to avoid is not cleaning the floor thoroughly. This is an essential step because dirt, dust, and debris on the floor can affect the polish’s adherence, causing it to flake or peel off sooner than expected.
Here are some tips for cleaning the floor thoroughly before applying polish:
- Start by sweeping the floor to remove any loose dirt or debris on the surface. Use a dustpan to collect the debris.
- Next, mop the floor using a cleaning solution that is suitable for the type of flooring you have. Make sure to remove any stubborn stains or spills on the floor.
- If necessary, use a scrub brush or a polishing machine to remove any stubborn stains or dirt that remained after mopping.
- After cleaning the floor, make sure there is no moisture left on it. Leave the floor to dry completely before applying any polish.
If you don’t clean the floor thoroughly before applying polish, the finish may appear cloudy, uneven, or even attract more dirt to it. So, to avoid such issues, take your time, and make sure the floor is spotless before proceeding with the application.
If you have more questions about applying floor polish or maintaining your floors, check out our FAQs page, where you can find answers to some common questions. You can also learn about the differences between wax and polish or the top floor polish brands and their features by checking out these articles or product review pages. Additionally, you can find valuable information on how floor polish can protect your floors by reading our article on Floor Polish: Protecting Your Floors.
Not Drying the Floor Completely Before Polishing
One of the most common mistakes that people make when applying floor polish is not drying the floor completely before polishing. This mistake can lead to an uneven application of the polish, and can even cause the polish to bubble or peel over time. To avoid this mistake, it’s important to take the time to properly dry the floor before you begin the polishing process.
Here are a few tips to help you ensure that your floor is completely dry before you start polishing:
| Step 1 | Clean the Floor Thoroughly: Make sure that you sweep, vacuum, or mop the floor thoroughly before you begin the drying process. This will help to remove any excess water or debris from the surface of the floor, which can help to speed up the drying process. |
| Step 2 | Allow Time for Drying: Depending on the humidity and temperature in your room, it may take several hours to a full day for the floor to completely dry. Be patient and allow enough time for the floor to air dry naturally. |
| Step 3 | Use a Fan or Dehumidifier: If you’re in a hurry or if you’re working in a particularly humid environment, you may want to use a fan or dehumidifier to help speed up the drying process. |
| Step 4 | Test the Floor: Before you begin polishing the entire floor, test a small, inconspicuous area to ensure that it’s completely dry. If you see any moisture, wait a bit longer before you start the polishing process. |
By taking the time to properly dry your floor, you can help to ensure that your floor polish looks smooth, even, and long-lasting. Don’t rush this step, as it can make a big difference in the quality of your finished product.
Application Techniques
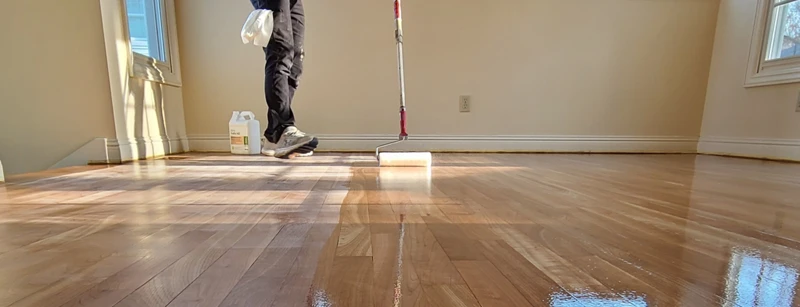
One of the most crucial steps in floor polishing is the application of the polish itself. This step requires a certain level of skill and attention to detail to achieve a smooth and even finish. From applying too much or too little polish to not spreading it evenly, there are several common mistakes that can ruin the outcome of even the most careful preparation. So, let’s dive into the essential aspects of applying floor polish with precision and skill.
Applying Too Much Polish
One of the most common mistakes when applying floor polish is applying too much polish. While it may seem like using more polish will yield better results, it can actually have the opposite effect. Not only can it leave the floor looking streaky and uneven, but it can also cause the polish to dry more slowly or not fully dry at all. This can create a slippery surface and may even damage the integrity of the flooring over time.
To avoid this mistake, it’s important to carefully measure out the amount of polish needed based on the size of the area being worked on. It’s also important to use a clean, dry applicator or mop to prevent excess polish from being spread. The following table summarizes some tips for avoiding the mistake of applying too much polish:
| Tip | Description |
|---|---|
| Measure the polish | Carefully measure the amount of polish needed for the area being worked on to avoid excess. |
| Use a clean mop or applicator | Avoid using a damp or dirty mop that can pick up excess polish and distribute it unevenly. |
| Work in small sections | Apply the polish in small sections to prevent it from drying too quickly and to ensure even coverage. |
| Allow ample drying time | Allow the polish to fully dry before walking on the floor or applying additional layers. |
By following these tips, you can achieve a perfect shine without encountering the problem of applying too much floor polish.
Not Applying Enough Polish
One common mistake that people make when applying floor polish is not using enough of it. When you don’t apply enough polish, the floor may end up dull and streaky, with an uneven appearance. It’s essential to ensure that you have the proper amount of polish to cover the entire surface area of the floor.
To avoid this mistake, make sure to read the manufacturer’s instructions carefully and follow them precisely. They will often recommend a specific amount to use per square foot, so a measuring cup or a jug can come in handy. When you apply the polish, use a clean mop or applicator, and spread the product evenly across the floor as if painting in straight lines. Be methodical, working in smaller sections if needed, to ensure that you don’t miss any spots.
Remember that applying too much polish isn’t good either. Excessive polish can damage the floor or create a sticky, greasy film that attracts dirt and grime. So always make sure to find the right balance, using only enough to produce a smooth, shiny surface but not too much that it becomes difficult to remove or causes slipperiness.
To ensure that you have applied enough polish, move back and forth in the room with your dry mop and look for any dull areas. If you find any spots that need more polish, apply a small amount extra and spread it evenly over that area until it blends with the rest of the floor.
Applying floor polish requires striking the right balance between using enough product to create a shiny, even result but not so much that it becomes detrimental. By following the manufacturer’s instructions and using the appropriate amount and technique, you’ll end up with a beautiful, professional-looking floor that will last for a long time.
Not Applying the Polish Evenly
When applying floor polish, it is important to make sure that it is applied evenly to create a smooth and uniform finish. Uneven application can lead to streaks, blotches, and an overall unappealing appearance. To avoid this mistake, follow these tips:
| Tip 1: | Divide the floor into sections and apply the polish in manageable areas. |
| Tip 2: | Use a clean, dry mop or applicator pad to apply the polish in a thin, even layer. |
| Tip 3: | Apply the polish in long, overlapping strokes, moving with the grain of the wood or in straight lines for tiled or synthetic surfaces. |
| Tip 4: | Avoid saturating certain areas more than others; instead, focus on maintaining a consistent layer across the entire surface. |
| Tip 5: | Allow the polish to dry completely before applying a second coat. If necessary, use a damp mop to redistribute any excess polish and create a more even finish. |
By taking the time to apply the floor polish evenly and consistently, you can achieve a professional-looking finish that enhances the look and durability of your flooring.
Drying and Buffing
One of the final and essential steps in applying floor polish is drying and buffing the surface. It is crucial to remove excess polish, smooth out any imperfections, and give the floor a long-lasting shine. Proper drying and buffing can take a considerable amount of time and effort, but it is worth it in the end. A sloppy job in this stage can result in an uneven and dull floor, which defeats the purpose of polishing in the first place. Let’s take a closer look at some common mistakes to avoid during the drying and buffing process.
Not Allowing Enough Drying Time
After applying the floor polish, it is important to allow enough time for it to dry completely. Not giving the polish enough time to dry is a common mistake that can lead to a subpar finish. Rushing the drying process can result in the polish being unevenly distributed on the floor and can also cause streaks and smudges.
To avoid this mistake, it is important to check the manufacturer’s instructions for the recommended drying time. Keep in mind that drying time can vary depending on factors such as humidity and temperature. As a general rule, it is best to wait at least 24 hours before allowing foot traffic on the floor.
To ensure that the floor is fully dry, you can use the touch test. Lightly touch the surface with the back of your hand. If it feels cool to the touch or your hand leaves a mark, it is not yet ready to be walked on. Avoid using fans or heaters to speed up the drying process, as this can cause the polish to dry too quickly and can also create air bubbles in the finish.
Remember to be patient and allow enough drying time for the best results. Rushing the process can lead to a subpar finish and may even require you to redo the entire job.
Using the Wrong Buffing Pad
Using the wrong buffing pad can result in an uneven finish or even damage to the floor. It’s important to choose the right pad for the type of floor and the type of polish used. Here are some common mistakes to avoid when it comes to buffing pads:
- Using a pad with the wrong abrasiveness: Different floors require different levels of abrasiveness in the buffing pad. For example, a pad with coarse abrasiveness would be suitable for a stone floor, but not for a wood floor. Make sure to choose the right pad for the type of floor.
- Using a pad that’s too worn: A buffing pad that’s worn out is not only ineffective but it can also cause damage to the floor. Check the condition of the pad before using it, and replace it if needed.
- Using a pad that’s too aggressive: A pad that’s too aggressive can strip off too much polish from the floor, leaving an uneven finish. Be sure to choose a pad that’s appropriate for the amount of polish being applied.
- Using a pad that’s not compatible with the machine: Different machines require different types of pads. Make sure the pad is compatible with the machine being used.
Take the time to choose the right buffing pad for the job, and avoid these common mistakes to ensure a smooth and even finish on your polished floors.
Not Buffing the Floor Enough
Proper buffing is essential to achieving a glossy, even finish on a newly polished floor. However, one mistake many people make when applying floor polish is failing to buff the floor enough after applying the polish. This can result in a dull and uneven finish that detracts from the overall appearance of the floor.
To avoid this mistake, it is important to invest in a high-quality buffing machine and to use the appropriate buffing pad for the type of floor and polish being used. Additionally, it is crucial to take the time to buff the floor thoroughly and evenly, paying special attention to any areas that may require extra attention such as high-traffic areas or spots with visible streaks or smudges.
It is also important to avoid rushing the buffing process as this can result in an uneven finish. Instead, take the time to carefully inspect the floor and buff any areas that require additional attention. Remember, a little extra effort during the buffing phase can make all the difference in achieving a beautifully polished finished product.
To ensure that your floor is adequately buffed, consider using a checklist or floor polishing guide to keep track of which areas have been buffed and which may require additional attention. By taking the time to properly buff the floor after applying polish, you can ensure that your hard work pays off with a beautifully polished and gleaming surface that enhances the appearance of any room.
Conclusion
In conclusion, applying floor polish may seem like a straightforward task, but it requires attention to detail and proper technique. Using the wrong type of polish or failing to test it first can lead to disastrous results, so it’s important to choose the right product and make sure it’s suitable for your floor type.
Before applying the polish, it’s crucial to thoroughly clean and dry the floor, ensuring that there are no dirt or debris that can affect the performance of the polish. Carefully applying the polish is equally important, as applying too much or too little can result in an uneven coating that is difficult to remove.
Drying and buffing the floor is the final step in the process, and it’s essential to allow for enough drying time before using the floor to avoid smudging or ruining the finish. Choosing the right buffing pad is also crucial, as using the wrong one can damage the floor or leave behind streaks.
By avoiding these common mistakes and following the proper techniques, you can achieve a beautiful, long-lasting shine on your floors. Remember to always read and follow the instructions on the polish label, and if you’re unsure about anything, don’t hesitate to consult with a professional to ensure the best results.
Frequently Asked Questions
What is the difference between waxing and polishing a floor?
Waxing adds a protective layer on top of the floor, while polishing enhances the shine and appearance of the existing floor finish.
Can I use any polish on any type of flooring?
No, you need to choose a polish specific to the type of flooring to avoid damage or discoloration.
Do I need to strip the old polish before applying a new one?
It depends. If the old polish is damaged or dirty, it is best to strip it before applying a new polish. If the old polish is in good condition, you can apply a new layer over it.
Can I use a regular mop to apply floor polish?
No, it is recommended to use a microfiber mop to prevent streaks and ensure an even application.
How soon can I walk on the floor after applying polish?
It is best to wait at least 30 minutes for the floor to dry before walking on it. However, it is recommended to wait 24 hours before placing furniture or heavy objects on the floor.
What should I do if the floor polish is too thick?
Add a small amount of water to the polish to thin it out before applying to the floor.
How often should I polish my floors?
It depends on the level of foot traffic on the floor. High-traffic areas may need to be polished every 2 to 3 months, while low-traffic areas can be polished every 6 months to a year.
Can I use vinegar or other homemade cleaners as a substitute for floor polish?
No, it is not recommended as it can damage the floor and void any warranties. It is best to use a recommended floor polish for the specific type of flooring.
Why should I test the polish first?
To ensure that the polish is compatible with your flooring and to avoid any damage or discoloration.
What is the purpose of buffing the floor after applying polish?
To remove any excess polish and create a smooth, shiny surface.