Have you ever looked at your floors and wondered how to make them look shiny and new again? With so many floor polish brands on the market, it can be overwhelming to choose the right one for your needs. Fear not! In this article, we will alleviate the confusion by highlighting the top floor polish brands available and their unique features. From Bona to Evershine, we will explore each brand’s benefits and drawbacks. Additionally, we’ll provide tips for selecting a polish that suits your specific flooring type and preferences. Plus, we’ll walk you through easy-to-follow steps on how to polish your floors and achieve a professional-grade finish. Let’s get to it!
Why Polish Your Floors?
Polishing your floors is an important part of maintaining their appearance and prolonging their lifespan. It provides a protective layer against wear and tear, scratches, and stains. It gives your floors a glossy and professional look that will impress your guests.
Regular maintenance is essential for all types of floors, whether they be hardwood, vinyl, or laminate. Over time, these floors can become dull and lose their shine, making them look old and worn out. Polishing is an effective solution to restore their original shine and keep them looking new for longer.
Polishing your floors can also prevent damage caused by furniture, foot traffic, and other regular use by adding an extra layer of protection to the surface. This can save you time and money on repairs and replacements, as well as ensure your floors look great for many years to come.
However, polishing your floors is not a one-size-fits-all solution, and it is essential to choose a floor polish that suits your specific type of flooring. Using the wrong type of floor polish can lead to damage or discoloration of the surface, so it is important to follow the manufacturer’s recommendations.
To learn more about floor polish and its types, benefits, and common mistakes, check out our Floor Polish Guide.
Top Floor Polish Brands and Features
When it comes to maintaining the shine and protection of your floors, using a floor polish is essential. With several brands available in the market, choosing the right one for your needs can be confusing. To help you with your decision, we’ve narrowed down the top floor polish brands and their features. Whether you have hardwood, tile, or laminate flooring, read on to find the perfect product for your floors. And if you have any questions regarding floor polish, check out our FAQs page for more information.
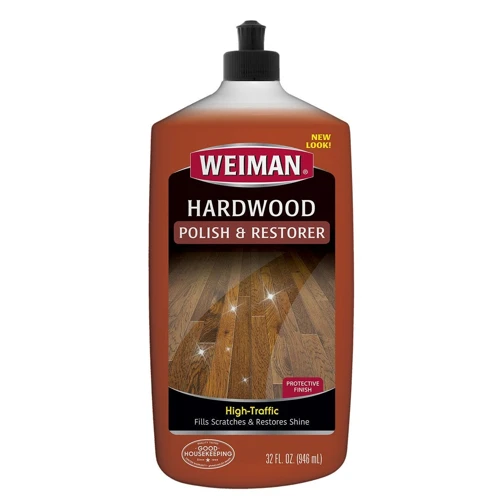
1. Bona Hardwood Floor Polish
Bona Hardwood Floor Polish is a popular brand among homeowners with hardwood floors. This water-based solution is specifically designed to enhance the natural beauty of hardwood floors without leaving any residue or build-up.
Features:
- Bona Hardwood Floor Polish is easy to apply and dries quickly.
- It is non-toxic and safe for children and pets.
- The polish provides a durable layer of protection to prevent scratches and scuffs.
- It fills in micro-scratches and evens out the floor’s finish.
- The formula is compatible with all types of hardwood flooring, including unsealed, unwaxed, and laminate floors.
It’s important to note that Bona Hardwood Floor Polish is not a cleaner but rather a protective layer that adds shine to the floor’s surface. It is recommended to clean the floors thoroughly before applying the polish to ensure optimal results. Additionally, it’s essential to avoid common mistakes such as applying too much polish or not allowing the first coat to dry properly.
If you’re unsure about which type of floor polish to use, you can check out our comprehensive guide on different types of floor polish. Additionally, if you’re interested in the benefits of floor polishing, you can read our article on the benefits of floor polish.
2. Rejuvenate All Floors Restorer
Rejuvenate All Floors Restorer can be used on hardwood, laminate, vinyl, tile, and linoleum floors. This floor polish brand stands out for its versatility and ability to restore the shine to dull and worn-out floors.
One of the key features of Rejuvenate All Floors Restorer is that it has a durable and scratch-resistant formula. This means that it can provide long-lasting protection to the floors against scratches, scuffs, and other damage.
Another advantage of Rejuvenate All Floors Restorer is that it is easy to apply. The floor polish comes in a pour bottle that allows for easy dispensing and application. The product can be applied with a microfiber mop or a sponge mop, and there is no need to mix it with water or any other solutions.
Rejuvenate All Floors Restorer can help eliminate minor scratches and other imperfections on the floors. This feature is particularly useful for high-traffic areas that are prone to wear and tear.
One thing to keep in mind when using Rejuvenate All Floors Restorer is that it requires proper preparation of the floor surface. The floor needs to be clean and free of any dirt, dust, or debris before applying the product. It is also important to allow the polish to dry completely before allowing foot traffic on the floor.
Rejuvenate All Floors Restorer is a great choice if you want a versatile and durable floor polish that can restore the shine to a variety of floor types. While it is important to follow the instructions carefully, this floor polish can help transform your floors and protect them from wear and tear in the long run.
3. Quick Shine Multi-Surface Floor Finish
Quick Shine Multi-Surface Floor Finish is a popular choice for those looking for a high-gloss and durable finish on their floors. This **floor polish** is suitable for use on a variety of surfaces, including hardwood, laminate, tile, and vinyl.
One of the standout features of Quick Shine is its ability to quickly dry to a glossy finish without leaving streaks. Additionally, this polish is resistant to scuffs and scratches, making it an ideal choice for high traffic areas.
Quick Shine Multi-Surface Floor Finish is water-based and contains no harmful chemicals, making it a safe choice for homes with kids and pets. It is also easy to apply and can be done with a mop or a floor buffer for a more professional look.
However, it is important to note that Quick Shine may not be compatible with all floor types. It is recommended to test the product on a small, inconspicuous area before applying to the entire floor surface.
Quick Shine Multi-Surface Floor Finish is a great option for those looking for a high-quality floor polish that provides a durable and glossy finish. Don’t forget to read our tips for choosing the right floor polish and our guide on how to polish your floors for best results.
To learn more about common mistakes to avoid when using floor polish, check out our related article: Avoid These Common Mistakes When Using Floor Polishes.
4. Pledge Floor Finish
Pledge Floor Finish is another popular brand that has been providing efficient floor polishes to households for many years. It provides long-lasting shine and protection to various types of floors like wood, ceramic, vinyl, and laminate.
One of the notable features of Pledge Floor Finish is that it dries quickly without leaving any residue, making it very convenient to use. It is also quite durable and can withstand heavy traffic and scuffs, making it a great option for high traffic areas like entryways and living rooms.
Another advantage of Pledge Floor Finish is its compatibility with different cleaning methods. You can use a damp mop or a dry cloth to clean the floor without damaging the polish. It also resists water, stains, and spills, making it easy to maintain the floor’s shine and luster.
However, when applying Pledge Floor Finish, it is essential to ensure that the floor is clean and dry. Any dirt, dust, or debris can affect the finish of the polish. It is recommended to apply thin coats of the polish and let each coat dry completely before applying another. This helps to ensure an even and smooth finish.
When shopping for Pledge Floor Finish, consider the gloss level that matches your preference. It is available in both high gloss and matte finish options. Additionally, it is recommended to look for a non-toxic formula, especially if you have children or pets in the house.
Pledge Floor Finish is an excellent choice for those looking for an easy-to-use, durable, and low-maintenance floor polish that delivers long-lasting results.
Using floor polishes is essential for protecting your floors from scratches or any potential wear and tear. However, you should also keep in mind that floor polishes need proper maintenance, and cleaning floors after polishing will ensure that the polish lasts longer. You can also consider environmentally friendly alternatives to traditional floor polishes or learn about the difference between floor polish and wax.
5. Evershine Floor Polish
Evershine Floor Polish is another popular option for those seeking to add shine and protection to their floors. This floor polish offers a high gloss finish that is sure to impress.
The features of Evershine Floor Polish include:
| Feature | Description |
|---|---|
| Compatibility | Works on a variety of surfaces including hardwood, laminate, and tile. |
| Gloss Level | Offers a high gloss finish for a dramatic effect. |
| Non-Toxic Formula | This floor polish is non-toxic and safe for use around people and pets. |
| Easy Application | Application is easy with a mop and dries quickly. |
| Durable | Provides long-lasting protection and shine. |
If you’re looking for a floor polish that is both durable and easy to apply, Evershine Floor Polish may be the right choice for you. Just make sure to follow the manufacturer’s instructions for the best results.
Note: After polishing your floors, it’s important to clean them properly to maintain the shine and protect the finish. Check out our article on cleaning floors after polish for tips and tricks.
Tips for Choosing the Right Floor Polish

When it comes to choosing the right floor polish, the options can be overwhelming. With so many brands and formulas available, it can be difficult to know where to start. However, by considering a few key factors, you can narrow down your choices and find a floor polish that will give you the best results. Below are some tips to keep in mind when choosing the right floor polish for your home or business.
1. Check Compatibility with Your Floor Type
When choosing a floor polish, it’s important to check its compatibility with your specific floor type. Using the wrong polish can lead to damage and discoloration, so it’s crucial to do your research. Here are some common floor types and the compatible polishes for each:
| Floor Type | Compatible Polishes |
|---|---|
| Hardwood | Bona Hardwood Floor Polish |
| Laminate | Rejuvenate All Floors Restorer, Quick Shine Multi-Surface Floor Finish |
| Vinyl | Pledge Floor Finish, Evershine Floor Polish |
| Tile | Quick Shine Multi-Surface Floor Finish, Evershine Floor Polish |
| Concrete | Evershine Floor Polish |
It’s important to note that not all floor polishes are suitable for all floor types. Some polishes may contain harsh chemicals that can erode the finish of certain floors. Always check the label or manufacturer’s website to ensure that the polish is compatible with your floor type. Taking this simple step can save you time, money, and frustration in the long run.
2. Consider the Gloss Level
When choosing the right floor polish for your space, you also need to consider the gloss level you want to achieve. This refers to the shine or luster that the floor will have after the polish is applied.
Gloss levels can range from low to high, and this is an important factor to consider because it can affect the overall appearance of your floor. A high-gloss finish can make your space look brighter and more modern, while a low-gloss finish can give a more natural and rustic feel.
To help you make a decision, most floor polish brands will indicate the gloss level on their packaging. Here is a table outlining the different gloss levels and their corresponding descriptions:
| Gloss Level | Description |
|---|---|
| Matte | A low-gloss finish that does not reflect light. |
| Satin | A medium-gloss finish that reflects a small amount of light, but less than a semi-gloss. |
| Semi-gloss | A high-gloss finish that reflects more light and has more shine than a satin finish. |
| High-gloss | An ultra-shiny finish that reflects a lot of light and gives the surface a polished look. |
It is important to note that the gloss level you choose can also affect the level of maintenance required to keep the floor looking its best. Higher gloss levels may show more dirt, scuffs and scratches, whereas lower gloss levels are more forgiving. It’s important to choose a gloss level that suits your preferences and lifestyle.
3. Look for Non-Toxic Formulas
When choosing a floor polish brand, it is essential to consider the ingredients of the formula. Non-toxic floor polishes are the best choice for many households, especially those with children or pets. Non-toxic formulas are also a great pick for those who care about the environment. Here are some reasons why you should look for non-toxic formulas:
- Health benefits: Non-toxic formulas pose fewer health risks since they are free of harmful chemicals such as formaldehyde and volatile organic compounds (VOCs), which can cause respiratory problems, headaches, and allergic reactions.
- Safety for pets: Non-toxic formulas are also a safer choice for pets who often come into close contact with the floors. Pets can easily ingest toxic chemicals when they lick or chew on the floor, leading to potential health concerns.
- Environmentally friendly: Non-toxic formulas are sustainable and less damaging to the environment. They are free of harmful substances that could potentially contaminate water and soil.
When shopping for floor polish brands, look for products that are labeled as ‘non-toxic’, ‘low VOC’, or ‘green’. These labels indicate that the product is safe for your household and the environment. Be cautious of products that do not disclose their ingredients or contain harmful chemicals. It is always better to choose a product that you know is safe and has low environmental impact.
4. Ease of Application
When considering ease of application in choosing the right floor polish, there are several factors to keep in mind.
1. Consistency – The consistency of the polish can greatly affect how easy it is to apply. Look for a polish that is not too thick or too thin. A thicker polish may be harder to spread evenly, while a thinner polish may require multiple coats.
2. Applicator – Consider the type of applicator that comes with the polish. Some polishes come with a spray nozzle and can be directly sprayed onto the floor, while others require a mop or sponge applicator. Choose an applicator that you feel comfortable using and that will make the application process more efficient.
3. Drying time – Check the drying time of the polish. A polish that dries quickly will save you time and effort, but be careful not to rush the application process as this may result in an uneven finish.
4. Coverage – Look for a polish that provides good coverage. This means that a smaller amount of polish can cover a larger area, making the application process quicker and easier.
5. Odor – Some floor polishes may have a strong odor which can make the application process uncomfortable. Look for products that are low in odor or have no odor at all.
By considering these factors, you can choose a floor polish that is easy to apply, saving you time and effort in the polishing process.
5. Durability and Resistance
When choosing a floor polish, it is important to consider its durability and resistance to wear and tear. Here are some factors that can affect the durability and resistance of floor polishes:
- Type of Formula: There are different types of formulas available in the market, including water-based, oil-based, and wax-based. Water-based formulas are usually the most durable and resistant to wear and tear, as they form a tough protective layer on the floor without leaving any residue. Oil-based formulas are also durable but may leave a slightly greasy film on the floor. Wax-based formulas are the least durable and may need more frequent reapplication.
- Type of Floor: The type of floor you have can also affect the durability and resistance of the floor polish. For example, hardwood floors may require a polish that is specifically designed for wood, while vinyl floors may benefit from a more flexible formula that can withstand heavy foot traffic without cracking or peeling.
- Traffic: The amount of foot traffic on your floor can also affect its durability and resistance. For high-traffic areas, such as commercial spaces, it may be necessary to choose a floor polish that is specifically designed for heavy use.
- Moisture: Floors that are exposed to moisture or humidity may require a floor polish that is water-resistant and can withstand spills and excess moisture. Look for a formula that is specifically designed for moisture-prone areas, such as bathrooms and kitchens.
- Environmental Factors: Environmental factors can also impact the durability and resistance of a floor polish. For example, exposure to UV rays can cause some formulas to fade or discolor over time. In such cases, it is important to choose a floor polish that is designed to resist UV rays.
Taking these factors into consideration can help you choose a floor polish that is durable and resistant to wear and tear, ensuring that your floors look clean and shiny for a longer period of time.
How to Polish Your Floors
One of the best ways to maintain the beauty and cleanliness of your floors is through proper polishing. However, if you’re not sure where to start or how to go about it, the process can be overwhelming. But don’t worry, we’ve got you covered! In the following section, we’ll outline some simple steps you can follow to make your floors shine like new. So grab your supplies and let’s get started!
1. Prepare the Floor
Before you start polishing your floors, it is essential to prepare the surface adequately. Preparing your floor ensures that the polish adheres correctly to the surface, resulting in a smooth and even finish. Here are the steps to follow when preparing your floors:
| Steps | Description |
|---|---|
| Step 1 | Clean the floor |
| Step 2 | Remove any old wax or finish |
| Step 3 | Repair any damages |
| Step 4 | Sand the floor (if necessary) |
Step 1: Clean the floor
Before you start applying floor polish, ensure that the surface is clean and free of dirt, debris, and dust. You can use a broom, vacuum cleaner, or a mop to clean the floor. Ensure that you get rid of any stubborn stains, sticky residues or marks that might affect how the polish adheres to the surface.
Step 2: Remove any old wax or finish
If the floor already had an old wax or floor finish, you must remove it before you apply the new one. You can use floor wax remover, a floor stripping solution, or sandpaper to remove old finishes or wax buildup. You must ensure that you remove any remnants of the old wax or finish.
Step 3: Repair any damages
If your floor has any damages such as cracks, holes, or scratches, it is essential to repair them before you apply polish. You can use a wood filler, putty, or any other repair product suitable for your floor. Ensure that you follow the product instructions and allow the repair compound to dry completely before you start polishing the floor.
Step 4: Sand the floor (if necessary)
If your floor has any unevenness or deep scratches, you may need to sand the surface lightly. Sanding can help to even out the surface, making it smoother and easier for the polish to adhere. However, it is essential to be careful not to sand the floor excessively, as this can damage the surface.
2. Apply the Floor Polish
When it comes to applying the floor polish, there are a few key steps to follow to ensure your floors are properly polished and protected. Here are the steps to take:
- Clean the floor: Before applying any polish, clean the floors thoroughly to remove any dirt, dust, and debris. Use a broom or vacuum to remove larger debris, and then mop the floors with a mild cleaning solution. Allow the floors to dry completely before proceeding.
- Apply the polish: Use a clean mop or polish applicator to apply the floor polish evenly to the surface. Be sure to follow the manufacturer’s instructions for the specific product you are using. Start in the farthest corner of the room and work your way backwards toward the door to avoid getting trapped in a corner.
- Work in small sections: When applying the polish, work in small sections of the floor, about 2-3 feet at a time. This will help you apply the polish evenly and prevent it from drying out too quickly.
- Use a consistent application method: Whether you are using a mop, applicator pad, or brush, be sure to use a consistent application method throughout the process. This will help you achieve an even finish and prevent any streaks or uneven areas.
- Allow the polish to dry: Once you have finished applying the polish, allow it to dry completely before walking on the floors or applying additional coats. The drying time will vary depending on the product you are using, so be sure to check the manufacturer’s instructions.
By following these steps, you can ensure that your floors are properly polished and protected, and will maintain their shine and beauty for years to come.
3. Buff the Surface
After applying the floor polish, it is important to buff the surface to bring out its shine and remove any excess polish. Buffing smooths out the surface and creates a uniform finish.
Here are the steps to buff your polished floor:
| Step | Action | Details |
|---|---|---|
| Step 1 | Attach a buffing pad to a buffer machine | Choose a buffing pad that is appropriate for your type of flooring. Buffing pads come in different materials and densities such as wool, microfiber, and synthetic. Also, make sure to read the instructions of your buffer machine carefully to avoid any accidents. |
| Step 2 | Turn on the buffer machine | Make sure that the buffer machine is turned on and that the buffing pad is rotating at a moderate speed. Move the machine slowly across the floor, working in small sections. |
| Step 3 | Buff the floor | Overlap each pass slightly to ensure that the entire section is buffed. Apply light pressure and work in a side-to-side or back-and-forth motion. Avoid staying in one spot too long, as this may cause damage to your flooring. |
| Step 4 | Tilt the buffer machine and buff along the edges | Tilt the buffer machine slightly and buff along the edges of the room. This will ensure that the edges are properly buffed and that there are no visible ridges or lines along the edges. |
| Step 5 | Replace the buffing pad and repeat the process | As the buffing pad becomes saturated with polish, replace it with a new one. Continue buffing the floor until the entire surface is shiny and uniform. If desired, you can apply additional coats of polish and buff in the same manner as before. |
Remember to take breaks as needed and to avoid overworking the floor. With these simple steps, you can achieve a beautiful, polished floor that will be the centerpiece of your home or business!
4. Let the Polish Dry
After applying the floor polish, you need to give it some time to dry. This can take anywhere from 30 minutes to an hour, depending on the brand of polish and the environmental conditions in the room. During this time, it’s important to avoid walking on the freshly polished surface, as it may leave marks or smudges. Here are some tips to keep in mind during the drying process:
| Tip 1: | Avoid using fans or opening windows during the drying process, as this can cause dust or debris to settle on the surface and mar the finish. |
| Tip 2: | Keep pets and children away from the area until the polish is completely dry, as they may inadvertently scratch the surface or leave marks. |
| Tip 3: | Do not place any objects or furniture on the surface until the polish has fully dried, as this can cause dents or indentations. |
| Tip 4: | Check the manufacturer’s instructions for specific drying times and follow them carefully, as premature use can damage the finish and require additional work. |
By following these tips, you can ensure that your floor polish dries properly and looks its best for years to come. Remember, proper preparation and application are key to achieving a smooth and durable finish that enhances the beauty of your floors, while proper drying is the final step that brings it all together.
5. Apply Additional Coats (Optional)
If you wish to achieve an even shinier look, you can apply additional coats of floor polish. However, it’s important to wait until each coat is completely dry before applying the next one.
Here are some tips for applying additional coats:
| Tips | Description |
|---|---|
| Inspect the Surface | Before applying an additional coat, inspect the surface for any imperfections or dust. Make sure to clean and remove any debris before applying the next coat. |
| Apply Thin Layers | When applying additional coats, remember to use a thin layer of floor polish. Thick layers can take longer to dry and can result in an uneven finish. |
| Wait for Each Layer to Dry | Wait for each layer to dry completely before applying the next one. This can take anywhere from 30 minutes to an hour, depending on the product and environmental conditions. |
| Buff in Between Coats | Buff the surface lightly with a microfiber cloth in between coats. This helps to remove any dust or debris and ensures a smoother finish. |
| Don’t Overdo It | Remember that too many coats can result in a cloudy or hazy finish, so don’t overdo it. Typically, two to three coats are sufficient for most floor polishes. |
By following these tips, you can achieve a beautiful, glossy finish on your floors that will last for a long time.
Conclusion
In conclusion, choosing the right floor polish can make a significant difference in the appearance and durability of your floors. With so many options available on the market, it can be overwhelming to decide which one to use. However, by considering factors such as the compatibility with your floor type, the gloss level, and the non-toxic formula, you can narrow down your choices and find the perfect polish for your floors.
Moreover, the top floor polish brands such as Bona, Rejuvenate, Quick Shine, Pledge, and Evershine provide various features that cater to different needs and preferences. Whether you want a glossy or matte finish, a long-lasting or quick-drying formula, or an eco-friendly option, there is a floor polish out there that can meet your requirements.
Knowing how to properly polish your floors is also crucial to achieve the best results. It is essential to prepare the floor, apply the polish evenly, and buff the surface to ensure a smooth and uniform finish. Additionally, allowing the polish to dry completely before applying additional coats can enhance its durability and resistance.
In summary, by selecting the right floor polish, following the proper application process, and considering the maintenance required, you can prolong the life of your floors and keep them looking their best for years to come.
Frequently Asked Questions
1. What is floor polish and what purpose does it serve?
Floor polish is a product used to create a protective layer over a floor’s surface, enhancing its appearance and extending its life by protecting it from scratches, scuff marks, and stains.
2. Can floor polish be used on all types of floors?
No, floor polish must be compatible with the type of flooring for which it is intended. Certain types of polish are specifically formulated for use on certain types of floors, such as hardwood, tile, or vinyl.
3. How often should you polish your floors?
Polishing frequency may vary depending on factors such as the type of flooring, foot traffic, and usage. As a rule of thumb, it is recommended to polish your floors at least twice a year for optimal protection and shine.
4. Is it safe to use floor polish around children and pets?
It is essential to look for non-toxic formulas when selecting floor polish products. Some polishes contain harsh chemicals that may cause harm to children and pets. Always read the label and follow the manufacturer’s instructions to ensure safety.
5. Can floor polish remove deep scratches and stains?
No, floor polish is not designed to repair deep scratches or stains. It can only mask minor flaws, enhance the shine, and provide a protective coating against further damage.
6. How long does it take for the polish to dry?
Drying time can vary depending on the type of polish and the room’s humidity and temperature. Generally, floor polish dries within an hour or two, but it is best to wait at least 24 hours before placing furniture or walking on the floor.
7. Do I need to clean the floor before applying polish?
Yes, it is essential to clean the floor before applying polish. Remove any dirt, dust, and debris, and mop the floor with a mild detergent solution. Allow the floor to dry thoroughly before applying the polish.
8. How many coats of polish do I need to apply?
The number of coats required may vary depending on the floor’s condition and the desired gloss level. Typically, two to three coats are recommended for optimal results.
9. Can I use a buffer to apply polish?
Yes, using a buffer can make the application process faster and more comfortable. However, it’s important to use the appropriate buffer pad and follow the manufacturer’s instructions.
10. How do I maintain the shine after polishing?
Regular cleaning with a gentle cleaner and avoiding the use of harsh chemicals, abrasive materials or heavy furniture can help preserve the floor’s shine. It is also recommended to avoid direct sunlight, as it can cause discoloration and fading.